RSS
 

Posts Tagged ‘Kayak’

Horizontal or/and Vertical Format in Kayak Photography

17 Oct

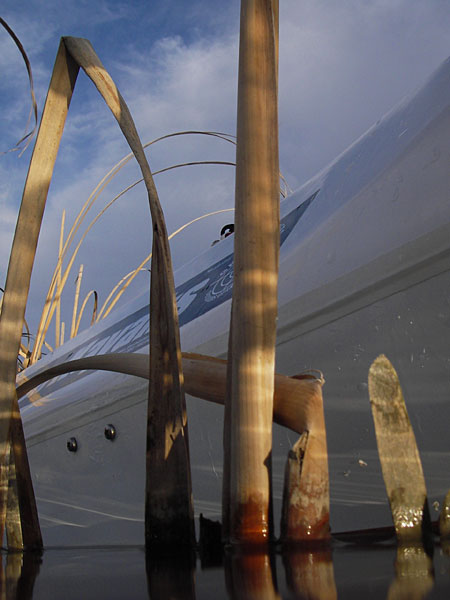
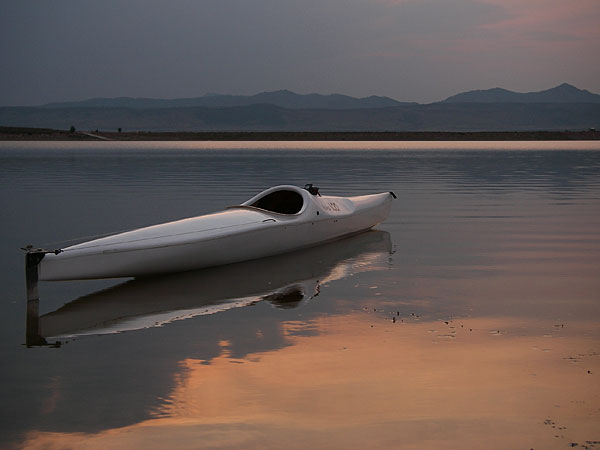
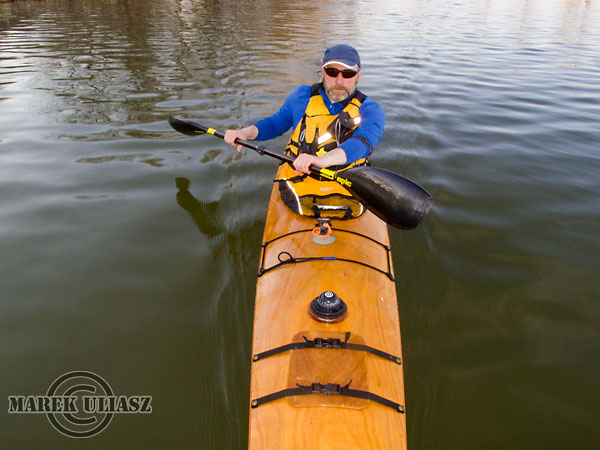
Like most paddlers I have a tendency to shoot pictures in a horizontal (landscape) format. It is more tricky to shoot in a vertical format from my tippy kayaks, especially, when I have to use a paddle to stabilize my camera.
paddling with a camera

 
Comments Off on Horizontal or/and Vertical Format in Kayak Photography

Posted in Photography


Oru Origami-Inspired Folding Kayak is Back with an Updated Design

15 Aug

[ By SA Rogers in Design & Products & Packaging. ]

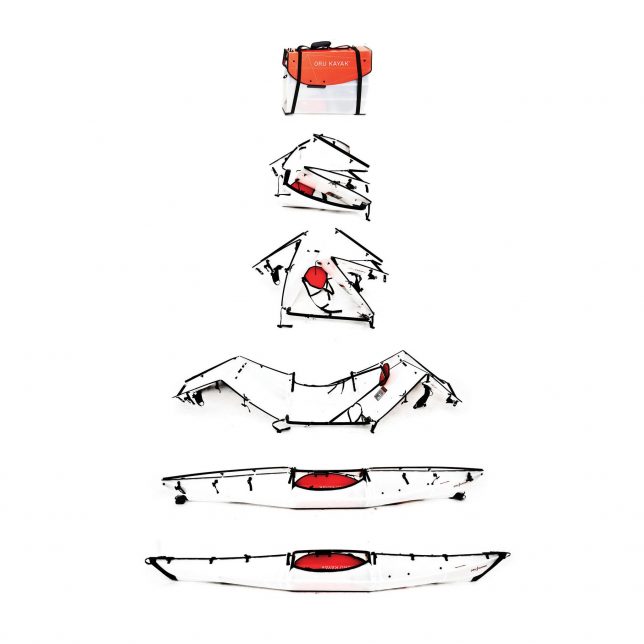
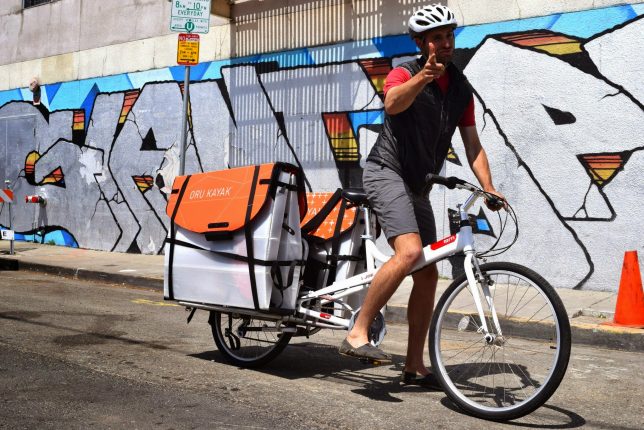
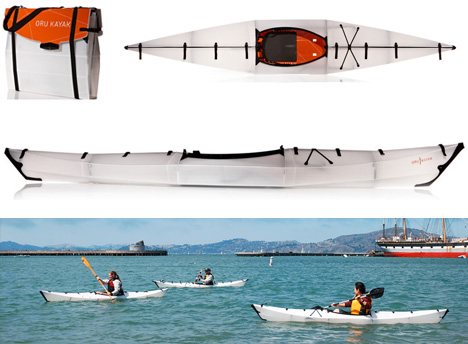
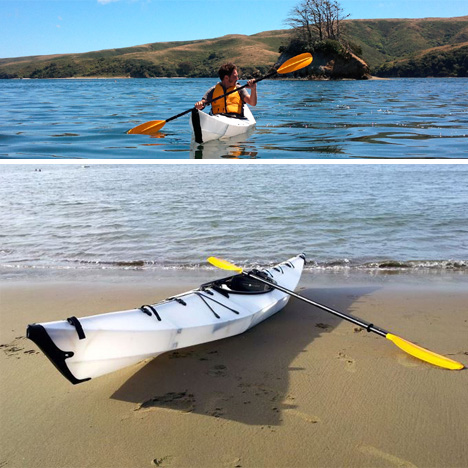
City dwellers with small apartments and limited storage can now own a kayak that folds up into a suitcase-sized package perfect for toting on your bike or public transit. The Oru Kayak originally debuted on Kickstarter in 2012, and every few years since then, they’ve released an updated model, with their lineup including the casual Beach LT for day trips, the Bay ST for longer days and the Coast XT for rugged conditions in surf and wind.

Earlier this year, they returned to Kickstarter to raise funds for a limited edition design in collaboration with 1% for the Planet with a custom green tree print, and now, they’re offering another limited edition: the United by Blue style.

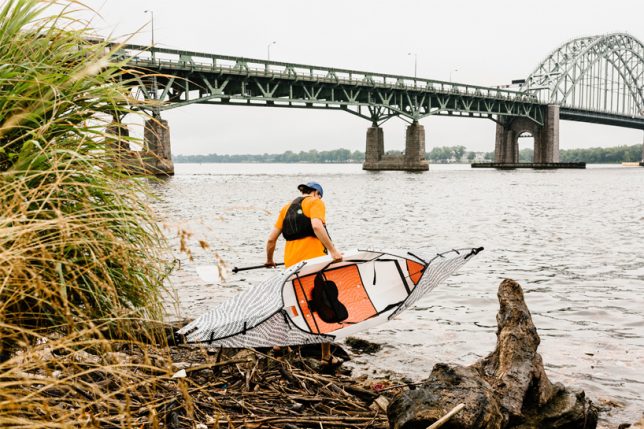
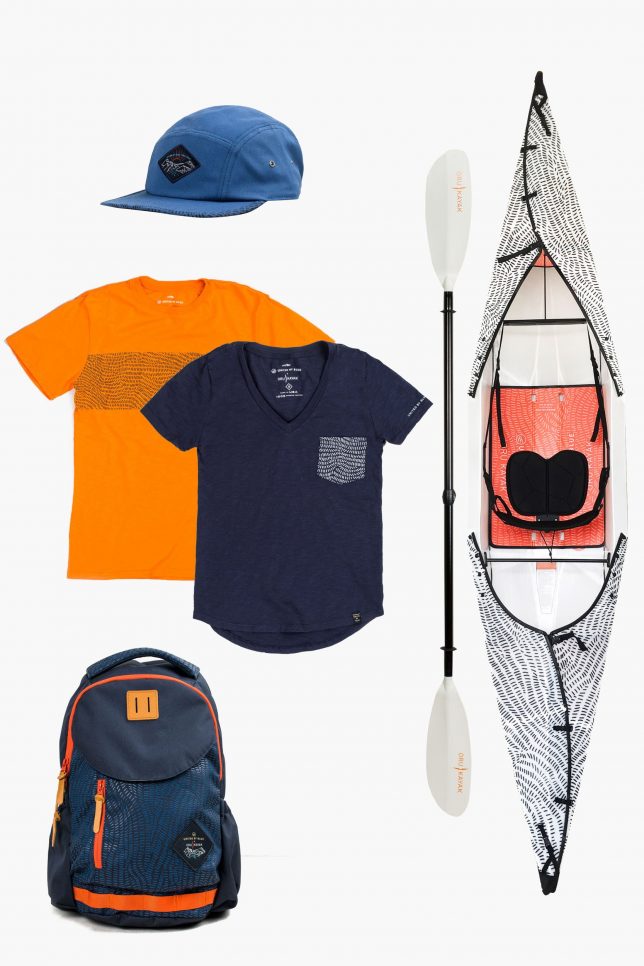
The Oru Beach LT Kayak: United by Blue edition has all the same features as the standard Beach LT, but with the addition of a seamless graphic print in either orange or navy blue. The collaboration is a natural fit considering that United by Blue has spent the last few years organizing volunteer ocean and river cleanups using Oru kayaks, and lots of urban kayakers donate their time on the water in a similar manner.

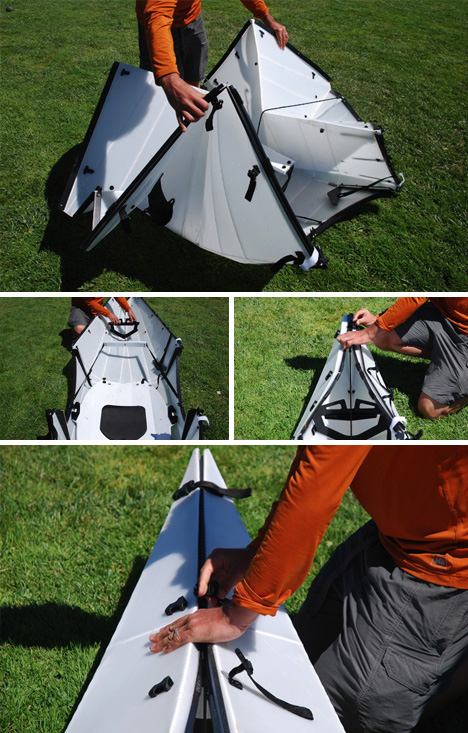
The origami-inspired folding design of Oru’s Beach LT folds from flat and compact into a standard-sized kayak in under five minutes, while the more complex models take 10 or 15 minutes to assemble. As anyone who’s ever owned and transported a kayak can imagine, the ability to fold such an unwieldy object is a welcome innovation, especially if you don’t have a garage or basement to store it in, or a vehicle of your own. But the design isn’t just for newbies – it was made for everyone from the weekender to the fisherman in mind, for short trips or multi-day excursions.

Get your exclusive UBB x Our Kayak Undercurrent Pack at the United By Blue website, or check out the other offerings at OruKayak.com.

Share on Facebook


[ By SA Rogers in Design & Products & Packaging. ]

[ WebUrbanist | Archives | Galleries | Privacy | TOS ]


WebUrbanist

 
Comments Off on Oru Origami-Inspired Folding Kayak is Back with an Updated Design

Posted in Creativity


7 Tips for Kayak Paddling Photography

19 Oct

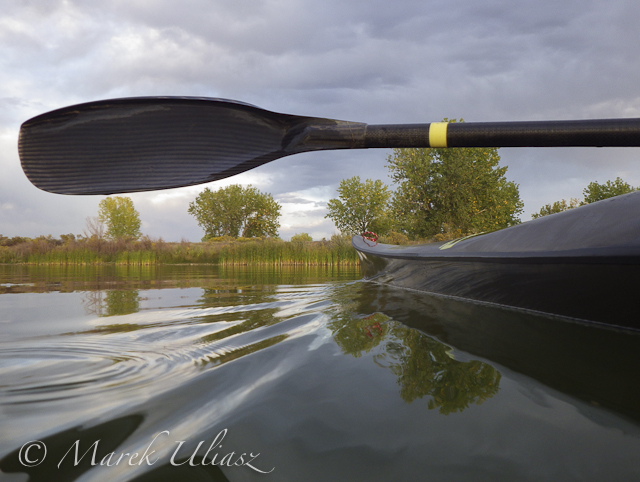
I would like to remind you this old post, How Did you Shoot It? with some updates and revisions. It was written two years ago as part of ProBlogger’s group writing project – “How to …” I hope that these tips are still useful. They represent quite well my own approach to paddling photography.


After posting the above picture, “Paddling in Clouds”, I’ve got several questions: How did you do it? And, I had troubles to provide a reasonable answer since the shot was technically really trivial.

Finally, I figured out that it is more about seeing pictures than about shooting and wrote these more general comments.

1. Look and See

Learn to see pictures. You do not need a camera to practice it. I am often “shooting” without camera, especially, when driving: that would be a good picture, this old barn would look great at sunrise, that dust devil at a horizon can be seen only through polarized glasses.

I believe that looking at photographs in magazines, books and calendars also help to develop your seeing capability. I am checking all new photography books arriving to my university library and browsing most of photography magazines in a local bookstore.

There are several good books on the art of seeing. Freeman Patterson comes to my mind first. Recently, I spent a lot of time with Photographer Eye by Michael Freeman.

2. Have a Camera

A photographer is shooting pictures, not a camera, but you should have your camera ready. “Ready” means not only accessible. You should be familiar with your camera settings and operations. Learn what camera settings are working for your paddling photography. It may be difficult to figure out camera features when sitting in a tippy kayak and waves are splashing.

Compact waterproof digital cameras like Pentax Optio “W” or Olympus Stylus “SW” revolutionized my kayak photography. I can shoot pictures I was not able to execute before, e.g., with a partially submerged camera. I am ready to sacrifice some camera features or to some extend a picture quality for convenience and accessibility of these tiny camera for paddling environment.

3. Be Aware of Light

The best light for outdoor photography is when the sun is low, i.e., around sunrise and sunset. I know that I can expect interesting light at the end of my afternoon paddling workout. If the sunset is not very exciting I can shoot water reflections or a tree silhouette.

Ironically, on paddling trips, we are often passing the best scenery in the middle of day, when the light is harsh and unpleasant. I am still shooting some snapshots for documentary purposes. My primary motivation to start paddling fast kayaks was to get in time to my shooting spots. All that racing craziness came later …

4. Point (compose) and Shoot

Do not be afraid to shoot without viewfinder. Well, you don’t have one in Pentax Optio. And, the LCD display is often difficult to read in a bright sun. It shouldn’t stop you from shooting. Use some creative angles as far as you can extend your arm. Remember, you can put this camera under water next to you kayak. The lack of a viewfinder is perhaps the main reason preventing some photographers from buying this camera, but I think that this a reasonable compromise in the camera of this size.

I didn’t have a clear view of the camera display when shooting my “Paddling in Clouds” picture. I was just trying to keep a paddle diagonally in my frame.

foggy sunrise over Suwannee River, Florida

5. Shoot Multiple Frames

Shooting pictures with a digital camera is cheap. You do not need to worry about film cost. You can always erase the picture and shoot again unless you are after some action shots. So, do not be afraid to experiment and shoot even if you do not see the image in your LCD monitor. Shoot some extra frames. It is helpful to have an adequate memory card.

I shot about 30 frames trying to catch a sky reflection in water and in my paddle. However, I would show not more than 3 or 4 from those 30 frames.

6. Practice

The more you shoot the better you should get. I have shot similar pictures before including reflections and a paddle.

Review your pictures on the camera LCD if possible. Check the histogram. Analyze your shots after paddling on a computer screen. You have all information about camera setting included in each digital image file. Try to figure out what worked and what not. Learn from mistakes.

7. Have Fun

I don’t consider myself a professional photographer. When paddling I am shooting what I like just for fun. Documenting my paddling trips and races is still fun. I feel free to experiment.

The great Alfred Stieglitz was an amateur photographer too. Anyway, the photography is not a profession…

Sometimes I sell a picture to a magazine or donate to a book cover. A year ago, I started to sell my pictures through microstock agencies. I am just taking more often my DSLR camera and a tripod for paddling.

Related posts:kayaking Colorado - Douglas Lake

  • Use Your Paddle to Stabilize Camera
  • No Viewfinder? 10 Tips on Shooting Pictures without Viewfinder
  • Pentax Optio WP/WPi – 10 Tips on Paddling and Shooting
  • Can Pentax Optio waterproof cameras be used in the water?
  • Pentax Optio W10 as a Helmet Cam – Inline Skating along the Poudre
  • Shooting movies with Pentax Optio WP and W10 and Sisson Nucleus 100 kayak


paddling with a camera

 
Comments Off on 7 Tips for Kayak Paddling Photography

Posted in Photography


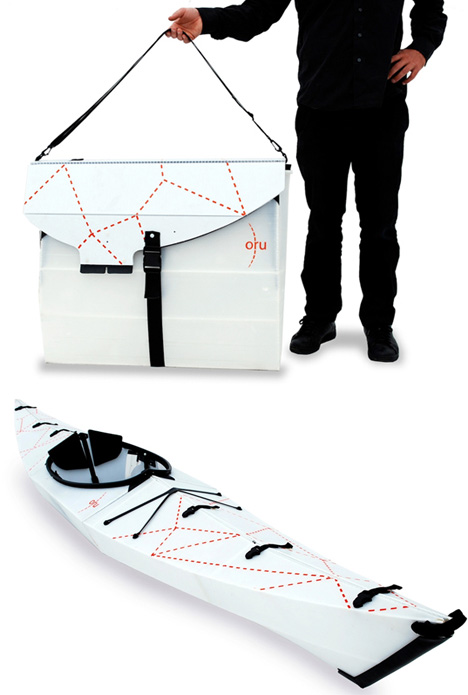
Origami Kayak: Packs Flat, Folds Up to Form its Own Case

25 Apr

[ By WebUrbanist in Technology & Vehicles & Mods. ]

kayak flat pack

Portaging in the wild is one thing, but try walking your canoe or kayak down the street (let alone through an airport) and you may smack someone right in the head – hence this city-friendly creation (25 pounds, 25 inches wide, and 12 feet long when deployed!).

kayak portable folding design

Compact, portable and light-weight, the Oru kayak folds in on itself to form a shoulder-ready carrying case containing, well, itself. It then unfolds and assembles in just five minutes – perfect for those living in crowded urban environments with little storage space.

kayak mobile folding form

From its creators: “Stash it in a trunk. Check it on a plane. Stow it on a sailboat. Hike it in to remote waters. No garage, SUV or roof racks necessary. The Oru Kayak makes boating simple, easy, and accessible— so you can spend more time on the water.”

kayak beach water deployed

But it is not just about mobility and transit – how the Oru works as a water vehicle matters as well: “The Oru Kayak is fast, stable, and handles incredibly well. Its light weight makes it fast and easy to paddle. The hard chines offer excellent tracking. And the 25″ width makes balancing easy, even for beginners. Check our blog for upcoming demos near you!” The catch? You may need to find the perfect flat-pack paddle to match!

Share on Facebook


[ By WebUrbanist in Technology & Vehicles & Mods. ]

[ WebUrbanist | Archives | Galleries | Privacy | TOS ]


WebUrbanist

 
Comments Off on Origami Kayak: Packs Flat, Folds Up to Form its Own Case

Posted in Creativity


Thunderbolt Racing Kayak and Ice in Early Spring Paddling

31 Mar

I am reviewing my old forgotten paddling video clips and posting them to my YouTube channel. Here is one from March of 2007. First paddling that season with Thunderbolt-X kayak on Beaver Pond in Arapaho Bend Natural Area. I was just playing in a small area of free water and pushing the kayak through a soft ice.

I bought Thunderbolt designed and built by Doug Bushnell from West Side Boat Shop in December of 2006. You can find a lot of pictures of Tbolt, trip and race reports in this blog and in Fitness Paddling.

Camera: Pentax Optio W10 mounted on a front or stern deck with the single suction cup
paddling with a camera

 
Comments Off on Thunderbolt Racing Kayak and Ice in Early Spring Paddling

Posted in Photography


10 Tips How to Avoid Blurry Pictures when Shooting from a Kayak

28 Mar

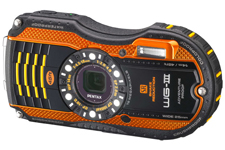
Pentax Optio WG3 waterproof camera Compact waterproof digital cameras like Pentax Optio W-series or Olympus Tough series are popular among paddlers. They may not offer the highest image quality among point-and-shoot cameras, but they still produce decent pictures. Most importantly, you can photograph in conditions where other cameras are better kept in a dry case or box.

However, new camera owners are often getting pretty bad, blurry pictures and are really disappointed with a purchase. Shooting on water from a kayak or canoe requires some extra efforts and practice from a paddling photographer. Here are a few tips which may help. This is an update of my old post written 5 years ago. Cameras are getting better, but, I believe, the tips below are still valid. I have been using Pentax Optio waterproof cameras starting from the original model WP, then W10, W30, and, currently, WG2 is attached to my life jacket.

1. Use the automatic mode
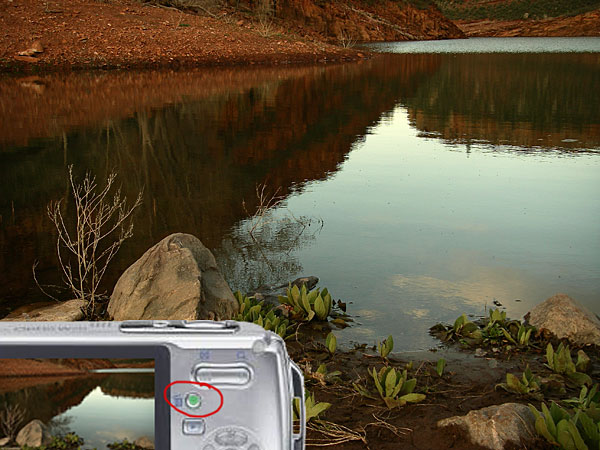
I do not have any special settings for my camera. On water I use exclusively the P (program) mode. Of course, in addition to the P mode I use the movie mode and interval drive mode quite often.

You can program the green button to do useful adjustments without a need to go through a setup menu. I am using two functions assigned to the green button: exposure correction and, much less often, white balance setups. Typically, I underexpose my shots to avoid overexposed areas with wash out details. Coincidentally, it shortens the exposure time which helps to avoid blurry pictures, but this is not a main purpose of this adjustment.

2. Keep the camera steady

This is the most important tip. However, it is not so easy when paddling, especially, when water is not calm. Ideally, you should hold the camera in both hands. In addition, it is quite easy to shake the light and small camera just by pressing a shutter button.

3. Use a paddle shaft to stabilize the camera
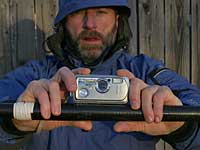
Here is a short video clip demonstrating how I am doing it.

This technique really helped me when I was starting to paddle a tippy Sisson Nucleus kayak. You can achieve two goals: to stabilize the camera and to stabilize your kayak. You have your paddle ready for bracing. This technique does not work with strong, gusty winds.

You can go further with this idea and attach or mount your the camera more permanently to your paddle – see a camera cradle by Mark Sanders.

4. Use a self timer

The 2 second selftimer available in Pentax Optio is very useful to avoid shaking the camera when pressing the shutter button. I recommend it, especially, when you are holding the camera with one hand (shooting on an extended arm or from some unusual angles).

5. Keep your lens clean of condensation, water drops, water residue

I keep my camera in a small neoprene pouch attached to my life jacket and usually do not have problems with water or dirt on my lens. The camera is always on a tether. Shooting with a camera mounted on a deck and exposed to splashes is another story.

6. Pay attention to light and sun position

Try to shade you camera lens from a direct sunlight to avoid a lens flare. Do not shoot against the sun.
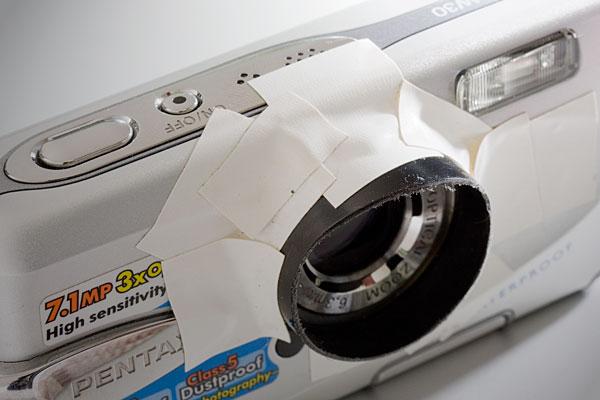
It is possible, at least for Pentax, to glue (epoxy) some step-up rings and to attach lens hood to your camera. I am using much simpler solution: an improvised lens hood attached with an electric tape to the camera.

You can expect the best “sweet” light for shooting when the sun is low, so after the sunrise and before sunset. Do not expect too much from this camera in low light conditions, but do not give up with shooting as soon as the sun is down. Consider shooting some silhouettes or water reflections then.

7. Use flash

Sometimes, I use flash to add light to objects in my fore plan. Usually, a soft flash option works better for a kayak deck. Be aware of any reflective tape on your kayak or gear.

8. Shoot multiple frames

Don’t limit yourself to a single shot for a given scene. Repeat the shot. Try different angles, horizontal and vertical format. You will increase your chances to get that great shot. Digital memory is cheap. You can always erase unsuccessful pictures later.

9. Photoshop …
Downloading pictures from the camera to your computer is not the end of your work as a photographer.
Use Photoshop or other image editing software to post process your pictures. Most often, I rotate my pictures to make horizon horizontal, adjust the exposure with levels, crop and resize them, and, finally, apply some sharpening. You cannot save completely blurred pictures in Photoshop, but you can improve most of them.

10. Practise

There are no reasons not to take and use the camera wherever you go. It is small and waterproof. Experiment and have fun.

Time to to time it is useful to browse through the camera manual. You may find something new and exciting in a jungle of all these options and settings.

More tips?

Could you share tips from your experience with a kayak or canoe photography? Are your on water pictures worse than these shot on land?

Some related articles where I am sharing my experience from paddling and shooting with Pentax Optio WP, W10 and W30 cameras:

  • Pentax Optio W20 Waterproof Camera Review, Tips, and Sample Photos
  • Kayak Photography: Using Your Paddle to Stabilize the Camera – Video Clip
  • 7 Tips on Kayak Photography: How Did You Shoot It?
  • No Viewfinder? 10 Tips on Shooting Pictures without Viewfinder
  • Is Pentax Optio W10/W20 the Paddler’s Camera? Many Boats, Many Cameras …
  • Kayak Photography Links – Tips and Hints for Paddling Photographers


paddling with a camera

 
Comments Off on 10 Tips How to Avoid Blurry Pictures when Shooting from a Kayak

Posted in Photography


Paddling CLC Patuxent Kayak with a Telescoping Camera Mast

16 Oct


April 2010. Paddling CLC Patuxent 19.5 kayak with Canon Powershot G11 camera mounted on a telescoping mast assembled from a monopod and sticky pod platform.

Related post:
Paddling with Canon PowerShot G11 Camera on a Monopod Mast
Kayak Video Camera Mast – Sticky Pod Combined with Monopod
A Bird’s-Eye View of Kayaking with GoPro Hero Camera


paddling with a camera

 
Comments Off on Paddling CLC Patuxent Kayak with a Telescoping Camera Mast

Posted in Photography


CLC Patuxent 19.5 Stitch-and-Glue Kayak

16 Oct


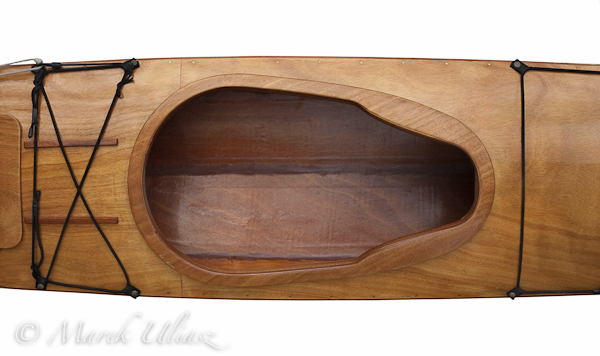
cockpit and deck of wooden sea kayak

July 11, 2009. A keyhole cockpit of the Patuxent 19.5 kayak – a plywood stitch-and-glue boat from Cheasapeke Light Craft. Camera: Canon EOS 40D with Canon EF-S 17-55mm f/2.8 IS USM lens.

I built Patuxent in my garage from a kit in 2009. The choice of a fast kayak was not dictated by my racing interest, but rather by a photography. I just needed a fast way to reach my shooting destinations. Racing came later. I paddled Patuxent on San Marcos and Guadelupe rivers in 2001 in my first training for the Texas Water Safari, but run the race in Spencer Xtreme canoe. The only race done in the Patuxent was the Colorado River Race in the upper Glenwood Canyon. I still paddle the Patuxent kayak mostly in a recreation and photography mode.

This picture is available for licensing as a royalty free image from my stock photography portfolio.

Related post:
Paddling with Canon PowerShot G11 Camera on a Monopod Mast
My First Paddling on the South Platte River near Greeley


paddling with a camera

 
Comments Off on CLC Patuxent 19.5 Stitch-and-Glue Kayak

Posted in Photography


Evening with WSBS Thunderbolt Kayak on Beaver Pond

16 Oct


WSBS Thunderbolt kayak

September 16, 2012. 1 hour evening paddling with WSBS Thunderbolt-X kayak on the Beaver Pond in Arapaho Bend Natural Area near Fort Collins. Camera: Pentax Optio WG2

Related posts:
3 Pictures from My Paddling Pond in Fall Colors
7 Pictures from Fall Paddling in Colorado Featuring Thunderbolt Kayak


paddling with a camera

 
Comments Off on Evening with WSBS Thunderbolt Kayak on Beaver Pond

Posted in Photography


GoPro Hero Camera and Thunderbolt Kayak

16 Oct


WSBS Thunderbolt kayak

September 18, 2012. Another evening with WSBS Thunderbolt-X kayak on the Beaver Pond in Arapaho Bend Natural Area near Fort Collins.

Thunderbolt provides for me the fastest way to go for a paddling workout – just a few seconds to load a kayak into V-racks on my car. And, in a small pond, I don’t even need to mess up with a sprayskirt.

I was playing with the GoPro Hero camera mounted on a kayak bow and set up in the interval shooting mode. This time I was using my two suction cup mount based on Sticky Pod.

Related posts:
10 Minute Double Suction Cup Camera Mount for a Kayak Deck
3 Pictures from My Paddling Pond in Fall Colors
7 Pictures from Fall Paddling in Colorado Featuring Thunderbolt Kayak


paddling with a camera

 
Comments Off on GoPro Hero Camera and Thunderbolt Kayak

Posted in Photography