RSS
 

Posts Tagged ‘hand’

hand coloring in lightroom

06 Jun

I’ve always loved hand-colored photos.   They have such a great look, very unique, very interesting.  For those who don’t know, “hand coloring” refers to any process where a photographer uses pigment, dye or paint of some sort to manually add color to a black and white photo.   Historically this was done in the 1800s by photographers using pigment and gum arabic on daguerreotypes!  The technique persisted in one  form or another throughout the years until it was supplanted by actual color photography.  Of course, just because it is no longer necessary to get color in such a way doesn’t mean it can’t be used for asthetic effect.

I shoot a lot of black and white film, which I generally scan and process in lightroom rather than wet printing.  Now if you’ve used lightroom, you are probably familiar with the brush tools for things like exposure, clarity or even skin smoothing.  However, the oft overlooked “tint” option can be used to easily paint in color to a black and white image for a “hand colored” effect.

let’s take this image.

This was shot on film (with a holga!) during a vintage pin-up shoot.  In other words, there is no actual color information in the file etc…

Now I’m going to hand color it to approximate the actual colors of the scene.  First we start by going into the lightroom brush tools.  Make sure all the adjustment sliders are set to zero (we are just painting on color here, not adjusting the photo itself)   Click on the tint box at the bottom right to bring up the color picker.

A little trick with the color picker is that if you hold the mouse button down you can drag the eyedropper out of the little selection window and  sample color from *anything* on screen.  One useful trick with this is to have a “reference photo” open separately and sample your colors for hand coloring from that.

Since the couch in this shot was a green color, I grab a nice rich green and begin painting my mask.  I find it more accurate to paint with the red overlay on (click “O” to toggle the overlay on or off).  You’ll want to use a separate mask for each area of color.  Here’s the green mask for the couch all done.

yeah, it’s not perfect, but close enough ?

I then do separate masks for her shirt (pink) and her skin.   With hand coloring, I like to leave a portion of the image uncolored which gives it it’s signature b/w+color look, different from “selective coloring”

and the final result:

Now this may be kind of a “niche” technique, and certainly not suited for all photos but it’s quick and easy and yields a very unique effect.  Overall it’s a nice trick to have in one’s toolbox.

Tweet This Post Stumble This Post


F/1.0

 
Comments Off on hand coloring in lightroom

Posted in Photography


Spider Holster launches updated Hand Strap and Lens Collar Plate, as well as two new products

24 Jan

Spider Holster, the company best known for its camera-carrying accessories, has launched four new products, including updated versions of its SpiderPro Hand Strap and its Lens Collar Plate. All four products are available from the company’s website now, making it easier to carry around a camera, attach it to tripods and tote around all of your photography accessories.

Most notable among the new products is the company’s new SpiderPro Hand Strap v2, a new version of the camera-carrying strap already offered by Spider Holster. This strap can be used with mirrorless and DSLR cameras, this time featuring Nylon cores for slowly conforming to the shape of the user’s hand.

As well, the updated version can be installed more quickly using a three-snap attachment feature, plus there’s a new Graphite version of the strap made from synthetic Hypalon fiber with a carbon fiber finish. This, Spider Holster explains, is an alternative for customers who don’t want to purchase the leather version. The model is available now for $ 70.

Joining the updated Hand Strap is the new Lens Collar Plate v2, an updated model that can be used to holster a telephoto lens with a tripod collar to the company’s SpiderPro Single and Dual camera-carrying products. The updated version of this product is Arca-Swiss compatible for use with tripods, features a built-in 1/4″-20 thread, built-in hex wrench, as well as a pair of Spider pins and a Spider Tether Bail. The model is available now for $ 55.

Spider Holster has also launched the new Spider Light Z Plate specifically for the Nikon Z6 and Z7 cameras, a model that can be used or without the FTZ Mount Adapter. The Z Plate can be used with any Arca-Swiss tripod in addition to the holster, plus it allows access to the camera’s battery door. The Spider Light Z Plate is currently available to preorder for $ 32.

Finally, Spider Holster has also launched its new SpiderMonkey Ultimate Kit, a bundle that features the entire SpiderMonkey product line, including the SMv2 Tab, Studio Assistant, Rain Cover, rotating and non-rotating Action Grip, Utility Pouch, Backpack Adapter, Bag Strap Clamp and more. With these accessories, users can easily clip a variety of camera gear to belts, backpack straps and bags.

The SpiderMonkey Ultimate Kit is available now in Essentials and Ultimate bundle options for $ 55 and $ 75, respectively.

Articles: Digital Photography Review (dpreview.com)

 
Comments Off on Spider Holster launches updated Hand Strap and Lens Collar Plate, as well as two new products

Posted in Uncategorized


No, Flickr didn’t hand your photos over to corporations for machine learning

16 Mar
A screenshot of illustrated portraits shared on IBM’s Diversity in Faces dataset website.

Earlier this week, Flickr started taking heat across the web after it was specifically mentioned in a report from NBC News that took a deep dive into the ‘dirty little secret’ of using Creative Commons images to help train facial recognition algorithms.

The report mentioned multiple datasets used to help companies train machine learning algorithms to better comprehend diversity in facial recognition programs, but one dataset in particular was emphasized and elaborated on: IBM’s ‘Diversity in Faces’ set that was derived and iterated upon from more than 100 million Creative Common images gathered by Yahoo and released for research purposes back in 2014.

Almost immediately, users around the web started raining down critical comments. Others, such as Flickr’s own Don MacAskill, chimed in as well to help clarify the situation.

The issue isn’t that Flickr is handing over your photos for free to corporations looking to train their artificial intelligence algorithms. It’s that users are sharing their photos under various Creative Commons licenses without fully comprehending what those licenses entail

After the dust settled from the initial publishing of the report and the subsequent commentary across social media, one thing became clear: the issue isn’t that Flickr is handing over your photos for free to corporations looking to train their artificial intelligence algorithms. It’s that users are sharing their photos under various Creative Commons licenses without fully comprehending what all those licenses entail, a concern Flickr specifically referenced just recently in their announcement to save all Creative Commons photos on its servers.

After all, IBM didn’t sneakily pull private photos off of Flickr to use and Flickr didn’t just hand over millions of protected photos, despite the overtone NBC News’ article might give off. The photos IBM used to build up its database were the same photos any one of us can find when searching for public, Creative Commons photos on Flickr.

Don MacAskill, SmugMug Chief Executive and head of Flickr, shared his take on the situation in a conversation with Olivia Solon, the author of the NBC News article, explaining that no ‘scraping’ of Flickr images was done, as the photos were opt-in Creative Commons licensed photos. Below was MacAskill’s first response, but the entire thread is worth the read.

Ryan Merkley, CEO of Creative Commons, even chimed in on the conversation with an official response on Creative Common’s blog. In it, Merkley addresses the concerns of Flickr users and went so far as to contact IBM ‘to understand their use of the images, and to share the concerns of our community.’

In it, Merkley writes (emphasis ours):

While we do not have all the facts regarding the IBM dataset, we are aware that fair use allows all types of content to be used freely, and that all types of content are collected and used every day to train and develop AI. CC licenses were designed to address a specific constraint, which they do very well: unlocking restrictive copyright. But copyright is not a good tool to protect individual privacy, to address research ethics in AI development, or to regulate the use of surveillance tools employed online. Those issues rightly belong in the public policy space, and good solutions will consider both the law and the community norms of CC licenses and content shared online in general.

The overarching theme that stands out amongst this ongoing debate is that it’s not always clear to users, especially those who aren’t as engrained in the online world of photography, what Creative Commons licenses cover and fair use actually is. Flickr doesn’t shy away from explanations and links out at various stages throughout the upload process and in its FAQ, but even the Creative Commons website lacks clear definition — something it’s already addressing with new FAQ pages that it will continue to update.

“Copyright is not a good tool to protect individual privacy, to address research ethics in AI development, or to regulate the use of surveillance tools employed online.”

Ultimately, the current copyright system that’s intended to prevent other people profiting from creative works, wasn’t necessarily designed to protect your images from this type of use. Those images don’t end up in devices, nor is anyone directly profiting from your creations, so existing rules don’t necessarily offer any protection, whatever rights you assert. The cost of your camera or smartphone getting that bit smarter might just be that your photos are the ones being used to train it.

Articles: Digital Photography Review (dpreview.com)

 
Comments Off on No, Flickr didn’t hand your photos over to corporations for machine learning

Posted in Uncategorized


ARRI starts certified pre-owned program for second hand cinema cameras

27 Apr

Filmmakers on a budget who prefer using second hand kit will soon have a great certified option at their disposal, as cinema camera manufacturer Arri has started a certified sales program for used Alexa bodies. The company says these pre-owned Alexa Plus and Classic models have gone through extensive servicing and testing before being put on sale, and for additional peace of mind, all of them will come with a one year warranty.

Before you get too excited, you are still going to need at least €9,900 (~$ 12,000 USD) plus tax to get yourself started… and that’s without a lens. So far the company has just eight cameras for sale, including Alexa Plus 4:3 and 16:9 models and a Classic EV, none of which are in the current production line-up.

Still, as the program grows, it will offer more affordable (if not exactly affordable) options for filmmakers with medium-deep pockets and extremely high standards.

To get ARRI’s Approved Certificate, the second hand bodies are checked, serviced, fixed and tested by the company’s service engineers. According to the website, this includes “a thorough check of parameters, including image sensor quality, recording functions, connectors, flange focal distance, audio system, and ARRI Lens Control System.” Furthermore:

The overhaul also includes an update to the latest Software Update Packet (SUP) of the respective model. Repairs are performed as required if any malfunctions are detected. Before the ARRI Certificate of Approval is issued, the equipment goes through the same Final Function Test as new cameras, ensuring it meets the high standards expected of it.

For more information, visit the pre-owned pages on the Arri website.

Press Release

Announcing the ARRI Approved Certified Pre-Owned Program

  • Selected ARRI ALEXA cameras available
  • Comprehensive check and overhaul of all components
  • All cameras subjected to final function test
  • Certified cameras come with one-year warranty

April 24, 2018; Munich, Germany – ARRI announces the introduction of the Certified Pre-Owned Program. The motion picture equipment manufacturer is now offering selected pre-owned and refurbished camera systems of the ALEXA series for sale. “We are excited to offer the ARRI Approved Certified Pre-Owned Program,” says Stephan Schenk, Managing Director of ARRI Cine Technik and General Manager of the Business Unit Camera Systems. “It’s a global initiative which adds a new tier to our products, allowing more filmmakers access to our technology. It also gives educational institutions a cost-effective way of providing high-quality equipment for their students.”

ARRI’s attention to detail and intimate knowledge of conditions on set for over one hundred years have resulted in generations of cameras that are robust, reliable, and simple to operate. Under the ARRI Approved Certified Pre-Owned Program selected ALEXA Plus and ALEXA Classic EVs undergo thorough assessments, are given thorough overhauls, and are recalibrated.

All components—starting with the sensor—are checked to confirm they are fully functioning, and that all systems work as they should. Any parts that require replacement are exchanged.

Christian Richter, Manager Certified Pre-Owned Camera Systems at ARRI, says the program delivers reliability, affordability, and dependability. “It will give more filmmakers access to tools that will enable them to capture stunning images,” he says. “They can be sure that they are not sacrificing performance for price, because the selected ALEXA cameras come directly from the manufacturer and are backed by ARRI’s warranty.”

Before the ARRI Certificate of Approval is issued, the equipment goes through the same final function test as new cameras, ensuring it meets the high standards expected of it. The ARRI approved and certified cameras are also covered by a one-year warranty.

Articles: Digital Photography Review (dpreview.com)

 
Comments Off on ARRI starts certified pre-owned program for second hand cinema cameras

Posted in Uncategorized


Juggling with one hand: Leica M10 shooting experience

14 Mar
A slightly blurry jet-lagged elevator selfie, which – yes – I could have taken on an iPhone. At least I didn’t add a fake film rebate…

Rangefinders are weird. The idea that superimposing a small ghostly image in the middle of a tunnel-type optical viewfinder is in any way superior to focusing with an SLR, (let alone using autofocus) is frankly bizarre, in this day and age.

In the digital world, a lot of people use the word ‘rangefinder’ rather lazily, to mean anything with a viewfinder positioned on the upper left of its back, but real rangefinders are uncommon. So uncommon, in fact, that Leica (the company which arguably perfected the technology) has made only ten substantially new cameras of this type since the mid 1950s.1

Grabbed quickly on my way back to my hotel on the new 35mm Summilux, this F2 snapshot isn’t pin sharp but by the time I’d nailed focus, the dog had moved.

I’ve always had a soft spot for the M-series, but if I’m being honest, their appeal has always been at least as much romantic as practical. They’re finely constructed, some of my favorite photographers used them, and they look beautiful. More so the film models, admittedly, but the M10 still retains a lot of the same aesthetic appeal as my all-time camera crush, the M6. Maybe I’m just shallow.

I also collect vinyl. Not because I believe it sounds better than CD or MP3 (it doesn’t), but because I’ve always been a pops and crackles kind of guy, and when it comes down to it, I don’t trust music that doesn’t weigh something. If that makes me a hipster, I’ll save you the bother of leaving a snarky comment and just admit it now.2

Speaking of music, I’ve heard it said that if you write a song on a banjo, and the song works, then it’s probably a good song. The point of course being that because the banjo is so simple, and so limited an instrument compared to (say) the electric guitar, it forces the composer to focus on the essentials of structure and melody.

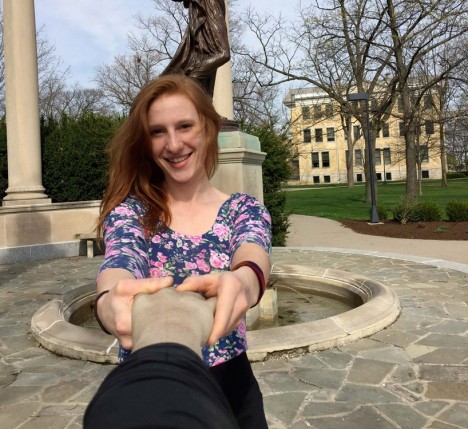
One of relatively few examples of successful zone focusing from my trip. I estimated subject distance at a little over 6 feet (one an a bit me’s) and shot waist-level on the 35mm Summilux at F5.6 to give a small margin for focus error. 

I can’t play the banjo, but I feel much the same way about shooting with a rangefinder, compared to (say) a modern DSLR. It’s a substantially less versatile tool, which forces me to slow down and think more about the photographs I take (and what kind of photographs I take). A day of shooting with the M10 can be very rewarding for this reason, but it can also be hugely frustrating. I’ve been spoiled by zoom lenses, autofocus and multi-zone metering for the better part of 20 years. At this point, shooting with a rangefinder, even a relatively sophisticated digital rangefinder like the M10, can feel a bit like trying to juggle with only one hand, and frequently did, on this trip.

“Who needs autofocus when you’ve got zone focusing?”

‘Who needs autofocus when you’ve got zone focusing?’ That’s a comment I just read on the Internet. Who needs autofocus, you ask? I do, apparently, judging by the miserable hit-rate I achieved during my first experiments with zone focusing. To my credit, I did get better, but accurately estimating distance by eye is tricky, and takes practice.

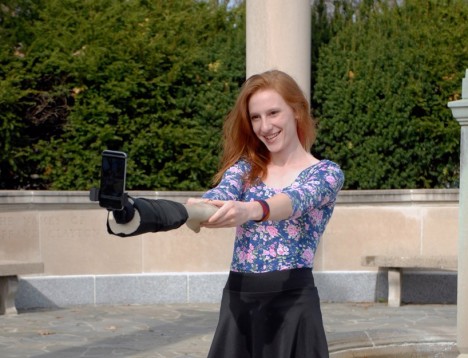
A less successful example of zone focus, also taken with the 35mm Summilux. I like this shot, and on film I’d probably call it acceptably sharp, but it’s not sharp enough for a DPReview sample gallery. My distance estimate was a bit off (the wall behind my subject is where the plane of focus has ended up) and it looks like a touch of camera-shake has crept in, too. 

Here’s a tip though – using their own height as a reference, most people can estimate distance roughly by imagining themselves lying down, and asking ‘How many me’s away is that person/thing?’

Try it now – it’s OK, I’ll wait.

See what I mean? Fortunately, I’m a simple, easy-to-visualize, boringly average, already-engraved-on-the-focus-ring 6ft in height, and that’s about the right distance away for a lot of candid street portraits. Shooting in this way, I’d position the focus ring at 6ft, set a conservative aperture of around F5.6-8 to account for some slop, and bingo – things would usually end up more or less in focus.

Note my use of the word ‘usually’ and the term ‘more or less’…

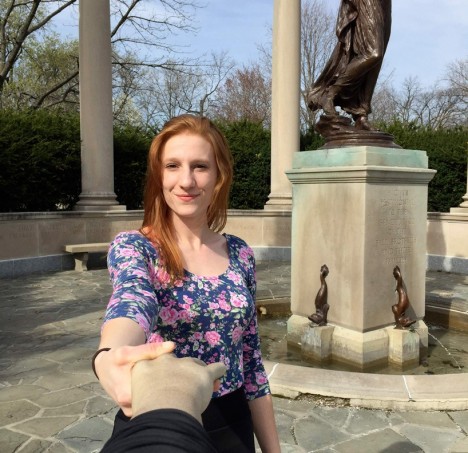
Nailed it. A successfully zone-focused F4 shot, taken in the same indoor market as the previous image. The small size and unobtrusive appearance of the M10 (once the ostentatious red dot has been taped over) tends not to draw much attention. 

The last time I shot with a rangefinder for any length of time I was using an M3, usually loaded with black and white film. Truly accurate focus didn’t bother me much, back then. Aside from anything else, being a 3-dimensional medium, film is very forgiving of minor focus errors. Not so the perfectly flat sensors inside digital cameras. And let me tell you, 10 years’ subsequent training as a professional pixel-peeper (try saying that when you’ve been moderating comments all day) is hard to shake. 

Working with the M10, one of the first things I had to get over was the learned fallacy that a shot is only worth keeping if the subject is exactly in focus. Maybe one day I’ll be able to judge distance and framing with 100% accuracy when shooting from the waist, but I’m certainly not there yet. Until then, and for the sake of my own sanity, I’m trying to to concentrate a little more on caring a bit less. 

Small and discreet

The M10 is small and discreet enough that often, you can snap quick moments without getting in anyone’s way or attracting too much attention. But in order to do this, you’ve got to be quick. You can’t standing there dumbly for ages like a second-rate living statue, fiddling with focus or exposure with the camera to your eye, or fretting over exact framing.

Often during my shooting, if the light was reasonably consistent I’d check accurate exposure using the built-in meter from time to time, but keep aperture, shutter speed and ISO locked. At this point, with the lens set to the hyperfocal distance for whatever aperture, taking a picture became a simple matter of raising the camera to my eye, and pressing the button. 

One thing I’ve greatly enjoyed doing with the M10 is shooting with some classic lenses. This F4 portrait of my friend and frequent tour-guide Emi was shot on my 1950s Nikon 5cm F1.4 S.C., (still my all-time best junk shop find). While it’s not in the same league as more modern optical designs, it’s lovely for portraits. Just be aware of curvature of field…

The transition to pre-setting exposure and focus wasn’t natural, (I’m a control freak, I suppose), but I found shooting like this with a 28mm Elmarit at F8, and either focusing hyperfocally or guestimating focus using the ‘how many me’s?’ method to be quite freeing. It certainly made me much more agile.

In fact, sacrilegious as this might sound to some readers, I think that the M10 is at its best when used essentially as a point and shoot camera – for street photography at any rate.  

Taken at F8 (possibly F11…) on the 28mm F2.8 Elmarit, this shot is one of a sequence of images taken at the lens’s hyperfocal distance. Used in this way, the M10 basically becomes a point-and-shoot camera. 

Speaking of 28mm, while I’m normally more of a 35mm fan, I found myself reaching into my bag for the wideangle frequently when shooting with the M10. Partly for the luxury of a bit more depth of field when shooting street scenes, and partly because I enjoyed being able to live inside the entire area of the M10’s viewfinder. Although slightly improved compared to the Typ 240, it’s still hard to see all four of the the 28mm framelines in a single glance, but given that the finder itself covers roughly a 28mm field of view, for the most part you can just ignore the framelines completely.

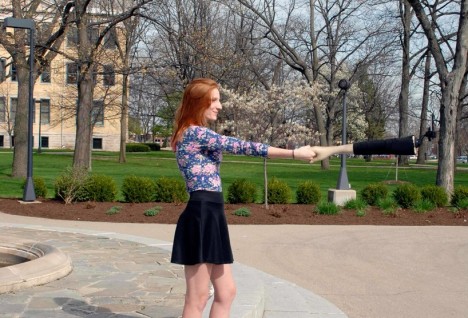
Another hyperfocal shot taken with the Elmarit 28mm, I waited as this group of people descended the staircase, and took a series of images. This one is my favorite. 

When the M10 is used like this, photography becomes a very immersive experience. The finder is brighter and more natural than an SLR’s ground-glass projection, and much more immediate than even the best electronic viewfinder. The 28mm F2.8 Elmarit is tiny, too, and without a hood attached, it does not occlude the finder. Even the premium 35mm F1.4 Summilux is a small lens by DSLR standards. Having that kind of quality in a compact, unobtrusive full-frame package happens to be one of the few unequivocal arguments in favor of rangefinder cameras in the 21st Century, and one that is made loudly (and justifiably) by Leica fans today.

One of the reasons I enjoyed shooting with the M10 so much when traveling is that I’m getting old, and I really don’t like having a lot of weight hanging around my neck when I’m out and about. I walked almost 70 miles in 3 days in Tokyo and Kyoto, and that would have been miserable with a full-frame DSLR and equivalent lens outfit. My back hurts enough already.


Some observations:

  1. When I was in Kyoto, the M10 got pretty soaked, repeatedly, and continued to work perfectly. Your experience may vary.
  2. Battery life is fine. It’s not something you need to worry about. You can easily get 500 shots on a single charge if you’re not using live view all the time.
  3. Connecting a Leica rangefinder to my phone to view and upload images felt very odd, somehow, but worked well enough.
  4. If nothing else, I sincerely wish the M10 had some kind of horizon level guide. I swear I have one leg longer than the other.
  5. The M10’s long startup time had less practical effect on my photography than I expected, but I did miss a few shots.
  6. Aspherics aren’t everything. The Minolta M-Rokkor 40mm F2 is a superb little lens, if you can live with the inaccurate frame-lines in the M10’s viewfinder.

Someone commented on my gallery of samples recently to the effect that ‘in Japan you can’t miss’, but I assure you, you can miss. And I know that because I did miss – a lot.

Several times I raised the M10 to my eye and tried to take a shot, forgetting the camera was turned off, and in the ~1.5 seconds it takes to power up, the scene had changed and the moment had passed. One day, it seemed as if I had the wrong lens mounted the entire day. Every time I switched lenses I’d see a shot that would have worked perfectly with the previous lens, and by the time I’d changed back, once again the moment had gone.

On a murky day in Kyoto3 I apparently forgot everything I’d ever learned about metering, and had to push each of my Raw files by at least +1EV in Lightroom to even see what it was I had tried to capture. A humbling experience, to say the least. 

Rangefinder focusing is tricky, but newer Leica lenses (like the 35mm F1.4 Summilux) have impressively little curvature of field. What this means in practical terms is that provided your subject doesn’t move, it is possible – with practise – to focus and recompose, even at wide apertures. This portrait (which I’ve cropped a little) was shot in a moving train at F2.8.

Despite offering automatic exposure, live view and all the rest, the M10 doesn’t make life easy for a photographer who’s not used to rangefinder shooting. It definitely provides the smoothest operational experience of any digital M-series I’ve used to date (although our sample does have a habit of crashing from time to time during image review) but the simple fact of the matter is that as I said in the first sentence of this article, rangefinders are weird.

“I would have come back from Japan with more in-focus, correctly-framed shots had I traveled with a DSLR”

Off-center focusing is tricky (there’s a reason why a lot of well-known shallow dof images captured on Leicas have their main subject positioned in the center of the frame) and when shooting using the optical finder, framing might charitably be described as ‘approximate’ 4. Off-the-curtain center-weighted metering takes some mastering, too.

Without question, I would have come back from Japan with more in-focus, correctly-framed shots had I traveled with a DSLR. I’m not afraid to admit it. But at the end of the day, would I have had as much fun? I doubt it – and I certainly wouldn’t have thought as much about my process. 

$ (document).ready(function() { SampleGalleryV2({“containerId”:”embeddedSampleGallery_6037658348″,”galleryId”:”6037658348″,”isEmbeddedWidget”:true,”standalone”:false,”selectedImageIndex”:0,”startInCommentsView”:false,”isMobile”:false}) });


1 I’m being pretty strict about omitting sub-variants in that total. The M6 spawned a bazillion special editions for example, most of which I can only assume still languish unused in dentists’ safes, and given that it’s essentially just a (slightly) modernised M3, I’m hesitant to call the fully-mechanical M-A a ‘substantially new camera’. An argument could be made that the Monochroms deserve their own appellation but I’ll leave that to the pedants to decide.

2 Although I would like to lobby for a general Internet policy whereby terms can only be used as insults when the thrower of the insult understands what the term means, and – ideally – when the term itself actually means something to start with. Who’s with me?

3 This article was actually called ‘The Kyoto Photo-call’ for about five minutes, before Allison made me change it.

4 Personally, I find shooting with anything longer than 50mm on a rangefinder to be very frustrating, for this reason.

Articles: Digital Photography Review (dpreview.com)

 
Comments Off on Juggling with one hand: Leica M10 shooting experience

Posted in Uncategorized


mini Plaster Hand is a camera mount on a belt

10 Jun

Hong Kong-based company miniorenji has introduced a new camera mounting product called ‘mini Plaster Hand.’ Unlike tripods, mini Plaster Hand is a camera mount on a belt designed to strap around rails and poles for steady shots in areas where tripods are inconvenient or banned. The mount can be used with or without a ball head.

Mini Plaster Hand is designed for use with all camera types, according to miniorenji, including point-and-shoot, mirrorless and DSLR cameras. The model is equipped with a flat plate and 1/4-inch screw; the plate can be placed on flat surfaces or strapped onto rails using the belt. When strapped onto a rail, a camera bag or other weighty item can be attached to the belt strap as a counterbalance weight. Mini Plaster Hand weighs 103g / 3.6oz and measures 60mm wide x 82mm high x 12mm deep (2.4 x 3.2 x 0.5-inches).

Minioreji is seeking funding for production on Indiegogo, where you can pledge $ 40 for a mini Plaster Hand unit and 1.2kg ball head.

Via: Indiegogo

Articles: Digital Photography Review (dpreview.com)

 
Comments Off on mini Plaster Hand is a camera mount on a belt

Posted in Uncategorized


A Little Sleight of Hand for Surreal Shots

21 Jul

The Great Outdoors definitely lives up to its name, but sometimes the summer heat is just too much. Staying in doesn’t have to be a total wash though, there’s loads of creative photos you can take in the Cool Indoors!

We’re totally digging these 10 tricks for setting up surreal snaps at home. Create mini worlds with a little papercraft, fool gravity with glue or create some intruige with smoke. Most of these fun setups require supplies you likely have already. So you’ll feel resourceful and productive on your day in.

Also check out some of our own ideas for indoor fun. Now you have all the excuses you need to keep out of the heat!

Stay cool, yo.

Photo by Dina Belenko


© Erin for Photojojo, 2015. |
Permalink |
No comment |
Add to
del.icio.us

Post tags:


Photojojo

 
Comments Off on A Little Sleight of Hand for Surreal Shots

Posted in Equipment


The Hand of Man: Bonsai Hangs Inside Abandoned Power Plant

20 Jun

[ By Steph in Art & Installation & Sound. ]

bonsai power plant 1

Inside the cooling tower of an abandoned power plant, a tiny bonsai tree hangs from a geometric metal frame, its roots exposed. The only other sign of life inside the cavernous space is an occasional slick of moss. The project meets at the junction between urban exploration, installation art and photography, with no one but the artist witnessing it in person before it was quietly whisked away, the bonsai re-planted to continue its life.

bonsai power plant 2

bonsai power plant 3

Located in the city of Charleroi, Belgium and originally built in 1921, the coal-burning power plant was decommissioned in 2007 after criticism of its inefficiency. While much of it was demolished, the tower – which once cooled 480,000 gallons of water per minute – still stands as a dystopian monument, drawing in determined explorers despite the security guards posted outside. Before protests shut it down, it was responsible for 10 percent of the total carbon dioxide emissions in the nation.

bonsai power plant 4

bonsai power plant 5

bonsai power plant 6

Japanese botanical artist Azuma Makoto doesn’t typically provide any explanation for the meaning behind his installations, but it’s hard not to see some potent symbolism in this image. Bonsai plants are painstakingly constrained by human intervention, and here one floats without the soil it needs to thrive, within a cavernous representation of waste and short-sighted thinking.

bonsai space

bonsai space 2

Makoto previously sent a bonsai into space for the Exobiotanica project, suspending a Japanese white pine and a bouquet of lilies and other flowers from carbon-fiber frames and launching them into the sky with a specially-equipped balloon. Six GoPro cameras captured their journey. Said the artist, “Roots, soil and gravity – by giving up the links to life, what kind of ‘beauty’ shall be born? Within the harsh ‘nature,’ at an altitude of 30,000 meters and minus 50 degrees celsius, the plants evolve into exbiota (extraterrestrial life.)”

Share on Facebook


[ By Steph in Art & Installation & Sound. ]

[ WebUrbanist | Archives | Galleries | Privacy | TOS ]


WebUrbanist

 
Comments Off on The Hand of Man: Bonsai Hangs Inside Abandoned Power Plant

Posted in Creativity


Lending a Hand: Selfie Arm Lets You Fake Your Friends

02 May

[ By Steph in Design & Products & Packaging. ]

selfie arm 5

Never mind that given its skin tone, this arm-shaped selfie stick kind of makes it look like you’re dragging a corpse around. Mounting your cell phone onto the end of it to shamelessly selfie away in public places might make you look ridiculous to bystanders while you’re doing it, but at least in the finished photos, you appear to be having a great time with a living companion.

selfie arm 4

selfie arm 3

Artists Aric Snee and Justin Crowe collaborated on the ‘Selfie Arm,’ which is exactly what it sounds like. Poking fun at the self-photography phenomenon and examining the relationships between humans and technology, the device is thoroughly tongue-in-cheek. Ten limited edition, signed copies of the prototype will be made.

selfie arm 2

selfie arm 1

Lightweight and portable thanks to its fiberglass construction, the Selfie Arm also makes for a conversation-starting accessory if you walk around with it poking out of your bag, so maybe it can actually help you meet a human companion who will take photos for you – no fake severed limbs required.

Share on Facebook


[ By Steph in Design & Products & Packaging. ]

[ WebUrbanist | Archives | Galleries | Privacy | TOS ]


WebUrbanist

 
Comments Off on Lending a Hand: Selfie Arm Lets You Fake Your Friends

Posted in Creativity


A Compact Solar Charger that Fits in the Palm of Your Hand

15 Jul

Extra photos for bloggers: 1, 2, 3

Your morning yoga routine brings you energy to make it through the day.

The Solio Sun Powered Charger has its own yoga-like abilities, turning sun salutations into battery power to recharge your phone.

Position the Solio outside on a sunny day, or plug it directly into an outlet and it will gather power.

This li’l guy can soak up enough sun to give your phone an 80% boost. It’ll even hold on to that power for up to a year, so it’s there when you need it.

The Solio is compact and travel friendly. Tuck it along side your yoga mat for a boost anywhere and anytime you need photo taking power.

Find Power in the Sun, Namaste
$ 70 at the Photojojo Shop


© Britta for Photojojo, 2014. |
Permalink |
No comment |
Add to
del.icio.us

Post tags:


Photojojo

 
Comments Off on A Compact Solar Charger that Fits in the Palm of Your Hand

Posted in Equipment