RSS
 

Posts Tagged ‘Flowers’

Weekly Photo Challenge – Flowers

06 Feb

The post Weekly Photo Challenge – Flowers appeared first on Digital Photography School. It was authored by Sime.

BEFORE you all rush to your archives to share that photo you’re thinking of, the ‘challenge’ part of our weekly challenges is that you get out and make a new photo for each challenge, and while we know that can be difficult, we would love to see you challenge yourselves and make a new, better than you’ve EVER done, image for the weekly challenges, rather than just grabbing one from the archives – if you can!

Need Inspo? Click Here or Here or Here

This week our theme is ‘Flowers‘ and while it has been done before, we want to see it done again, better than ever! From your garden, someone else’s garden, in the street, in the hills… What can you do with a simple flower? Work on your depth-of-field, eliminating distraction, or maybe make it part of a bigger scene, hidden beauty kind-of-thing.

Make sure you use the hashtag #dPSFlowers if you post your challenge entry on social media!

Weekly Photo Challenge – Flowers
Not Always Alive – #dPSFlowers

Don’t forget, you can go back and try ALL of our CHALLENGES over HERE!

Weekly Photo Challenge – Flowers
Fields of Gold #dPSFlowers

Great! Where do I upload my photos?

Simply upload your shot into the comments field (look for the little camera icon in the Disqus comments section) and they’ll get embedded for us all to see. Or, if you’d prefer, upload them to your favourite photo-sharing site and leave the link to them.

Weekly Photography Challenge – Looking Up

Share in the dPS Facebook Group

You can also share your images in the dPS Facebook group as the challenge is posted there each week as well.

The post Weekly Photo Challenge – Flowers appeared first on Digital Photography School. It was authored by Sime.


Digital Photography School

 
Comments Off on Weekly Photo Challenge – Flowers

Posted in Photography


How To Take Good Pictures of Flowers- An Easy Step by Step Guide

03 Jun

Do you want to learn how to use light in photography? Photograph a flower. A flower in and of itself is an interesting subject. Flowers have different textures, bright colors, and won’t get bored of sitting still while you adjust your settings. But a quick snap of a flower, while beautiful, can be boring. If you really want to bring Continue Reading

The post How To Take Good Pictures of Flowers- An Easy Step by Step Guide appeared first on Photodoto.


Photodoto

 
Comments Off on How To Take Good Pictures of Flowers- An Easy Step by Step Guide

Posted in Photography


How to Take Vibrant, Razor-Sharp Macro Photos of Flowers

29 Feb

The post How to Take Vibrant, Razor-Sharp Macro Photos of Flowers appeared first on Digital Photography School. It was authored by Ramakant Sharda.

razor-sharp-macro-photos-of-flowers

Macro photography is a very interesting subject for photographers. People love to shoot small objects like insects, flowers, waterdrops, etc. With macro photography, a photographer can show the tiniest details about the subject – details that are not possible to see with the naked eye. Today, let’s find out how to amaze viewers by taking colorful and razor-sharp macro photos of flowers.

razor-sharp-macro-photos-of-flowers

What you’ll need to capture razor-sharp macro photos of flowers

Camera body

You’ll be taking photographs, which means you will obviously need a camera body. But which camera body is good for macro photography – a full-frame or a crop-sensor camera?

Different photographers have different answers to this question. Each body has advantages over the other. With a crop-sensor camera, you can get a larger focal length with the same lens so that you don’t have to get very close to the subject. A crop sensor also gives you a deeper depth of field as compared to a full-frame body, which means you can keep more of the subject in focus.

On the other hand, a full-frame body reveals more details because of the larger sensor size. It also performs better in low-light conditions. So, ultimately, all bodies are good for macro photography, whether you have a crop-sensor camera or a full-frame camera, or whether it’s a DSLR or mirrorless.

razor-sharp-macro-photos-of-flowers

Lens

Lens choice is important in macro photography.

A true macro lens gives you 1:1 magnification, which means the size of your subject can be the same as your sensor size. In other words, if you have a full-frame body that has a 36mm x 24mm sensor size, you can fill the entire frame with a subject that is 36mm x 24mm in size. This gives you the opportunity to get really close to the subject and capture all the details.

However, don’t worry if you don’t have a dedicated macro lens. You can use extension tubes or a reverse ring with two lenses. Alternatively, you can use a cheaper option called macro close-up filters.

Flash and diffuser

A flash is a very important piece of equipment in macro photography. It helps you take razor-sharp pictures and capture bright colors. It also helps you avoid blurry images resulting from the shake of the camera.

A flash diffuser is equally as important as the flash. It softens the light and brings out the details and colors. You can use a mini softbox or domes or MagSphere, or you can simply put a diffuser cloth in front of the flash or bounce it with a white card.

You can use the flash on the camera hot-shoe or, if you have wireless flash triggers, you can use the off-camera flash. This will give you better results, but you will need someone to hold it.

How to Take Vibrant, Razor-Sharp Macro Photos of Flowers

Things to remember:

1. Depth of field

The first thing to remember when it comes to getting razor-sharp macro photos of flowers is depth of field (DOF). DOF is very important in macro photography. If you are shooting with a true macro lens with 1:1 magnification and your aperture is f/4, you’ll get only 1-2mm of total DOF. So, chances are, you won’t get everything you want in focus.

The solution is a smaller aperture. With an f/16 aperture, you can easily get 5-6mm total DOF and have everything you want in focus.

However, with such a small aperture, you’ll need lots of light. That’s why a flash is necessary for macro photography.

How to Take Vibrant, Razor-Sharp Macro Photos of Flowers

2. Focusing

Many photographers suggest that manual focus is better for macro photography, but I disagree with them.

I always use autofocus when taking macro pictures.

Why?

Because it’s easy, it’s fast, and you have fewer chances of taking out-of-focus pictures because both hands are free to hold the camera.

Just make sure that your hands and camera don’t move between focus lock and taking the picture.

3. Background

To achieve razor-sharp macro photos of flowers, you should always consider the background. In most cases, the background will be blurred, but, still, it should be clean and have contrasting colors.

4. Look from different angles

When we take photos of flowers, we usually take them from the top or the side. However, sometimes a flower can be very beautiful from the back, too.

When you are searching for a subject to shoot, always look it from different angles so that you can see and click something extraordinary – something that others can’t.

razor-sharp-macro-photos-of-flowers

5. Dead flowers can be great subjects, too

We always try to take photos of fresh flowers, but sometimes dead flowers can be great subjects, as in the following image. When a flower is dead, and all the petals have fallen, it starts preparing seeds.

Sometimes those seeds look very beautiful and can be good subjects to shoot macro.

razor-sharp-macro-photos-of-flowers

6. Shoot in RAW

To achieve razor-sharp macro photos of flowers, always shoot in RAW format because RAW files contain more details. Therefore, when you sharpen the image and enhance the colors in post-processing, you’ll get better results.

When you open a RAW image in post-processing software, it’ll look dull and lack sharpness, colors, and contrast. Don’t lose heart after seeing this. After a little bit of post-processing, it can often be better than a JPG image from the camera.

How to Take Vibrant, Razor-Sharp Macro Photos of Flowers

7. Keep your hands steady

A tripod is not a useful tool in macro photography because you’ll need to click at unusual angles.

If you have a moving subject, like insects, chances are, they’ll go away before you set up your tripod. So, it’s better to take photos with a handheld camera. Keep your elbows inside, which will give you support and lower your chances of camera shake.

8. Practice and be patient

If, after doing everything you have read in this article, you take photos that aren’t coming out sharp, don’t be disheartened. Have patience, and keep practicing. Eventually, you’ll get razor-sharp macro photos of flowers.

razor-sharp-macro-photos-of-flowers

Keep clicking and share your pictures here. If you need help, just ask me. I am always here to assist.


You may also like:

  • 5 Quick Tips for Outdoor Macro Photography
  • 7 Different Ways to Approach Macro Photography
  • Just Dew It – Fun with Macro Dewdrop Photography
  • How to take Great Flower Photos without a Macro Lens
  • 5 DIY Macro Photography Hacks for Stunning Macro Photos (on a Budget)
  • Reverse Lens Macro – How to Make Macro Photos with “Backward Thinking”
  • How to do Extreme Close-Up Photography with a Macro Bellows
  • 5 Camera Settings That All Macro Photographers Should Know


The post How to Take Vibrant, Razor-Sharp Macro Photos of Flowers appeared first on Digital Photography School. It was authored by Ramakant Sharda.


Digital Photography School

 
Comments Off on How to Take Vibrant, Razor-Sharp Macro Photos of Flowers

Posted in Photography


How to Photograph Beautiful Winter Snowdrops (or Other Flowers)

18 Feb

The post How to Photograph Beautiful Winter Snowdrops (or Other Flowers) appeared first on Digital Photography School. It was authored by Charlie Moss.

how-to-photograph-winter-snowdrops-flowers

Every year the forests and parks gain a touch of magic as the winter snowdrops emerge. For just a fleeting few weeks, their delicate flowers form beautiful white carpets that seem to flow in the weak winter sun. But sometimes, when we go out to photograph them, the results can be a little lackluster.

It seems like it shouldn’t be hard to take a great snowdrop photo, and yet many photographers really struggle to capture their beauty. Here are some of my top tips when it comes to the art of photographing these tiny flowers. Don’t forget your macro lens or close-up filters to get the best shots.

Get down low

When the flower you’re photographing doesn’t stand taller than the top of your boots, you’re going to have to get yourself and your camera down close to the floor for a worm’s eye view. For this reason, I always keep a couple of carrier bags in my camera gear. The alternative is wet knees and elbows, so I recommend you do the same!

Image: ISO100, 35mm (50mm equiv.), f2.8, 1/550th sec

ISO100, 35mm (50mm equiv.), f2.8, 1/550th sec

You can either rest the camera on the floor or use a very small tripod. Alternatively, some full-size tripods can invert, allowing you to get the camera down close to the ground.

Once you’ve got your camera down low, you can either use the screen to compose or the camera’s phone app (if it has one). I’d also suggest using manual focus for these kinds of shots; otherwise, you might find that your camera’s auto-focus locks on to errant blades of grass rather than the winter snowdrops themselves.

Choose interesting light

It’s hard to guarantee interesting light if you’re going out on location, but there are a few things that you can do to help swing the odds in your favor.

Heading out to your preferred winter snowdrops patch either first thing in the morning or during sunset can give you a better chance of having more interesting light. In the morning, you will also get the beautiful dew that makes specular highlights in the out of focus areas, adding extra magic to your photos (but you could also add “dew” with a spray bottle – I won’t tell anyone).

winter snowdrops

Left: ISO100, 35mm (50mm equiv.), f2.8, 1/320th sec. Right: ISO200, 35mm (50mm equiv.), f2.8, 1/4000th sec

Look for an opportunity to backlight the flowers with the sun. The light coming from behind can really highlight the thin white petals. You might want to add a small reflector or a pop of fill-flash to the front of the flower if you try this approach.

Of course, if you plan ahead, you could also grow winter snowdrops in a pot at home. That way, you can take them indoors when they start to bloom and spend as long as you like experimenting with different kinds of lighting!

Think about the depth of field

Your aperture choice can really make or break your snowdrop photo. Because it sets how much of your image is in focus, it’s the camera setting that requires the most thought for flower photos.

Deciding if you want a wide depth of field, or to focus on just one small part of the scene, is the choice that is going to make the biggest visual statement. It’s also one that you can’t reverse after the shot.

Both approaches have merit, and if you’re in any doubt, try shooting at a variety of aperture settings and choosing later.

My favorite way to shoot small flowers is with a shallow depth of field. This helps the viewer focus on just the subject without the background becoming distracting.

winter snowdrops

The image on the left was shot at f2, while the image on the right was shot at f8. Both were shot at ISO200, on a 35mm (50mm equiv.), lens.

A shallow depth of field also allows a single snowdrop to stand in isolation in your photograph, showing off its beauty. This approach can be especially good if the snowdrop is an unusual variety – some types of snowdrops can cost a huge amount per plant!

But if you’re trying to capture the vastness of a white carpet of snowdrops, then a larger depth of field can be more effective. That way, you can show the beauty of the mass of flowers without them all blending into one.

Post-process creatively

Many photographers shoot winter snowdrops every year, and a lot of images make it online. It’s easy to get lost amongst the crowd when it comes to photographs of snowdrops. Post-processing your images creatively can be both a good way to learn more about your software, as well as a chance to produce something truly unique.

winter snowdrops

ISO100, 35mm (50mm equiv.), f1.4, 1/1250th sec

You could go for post-processing that is as simple as a basic color grading. Emulating one of the different kinds of old film stocks might be a good place to start. Don’t forget to consider photographing with a black and white conversion in mind too – the white flowers really pop off a green grass background when you go black and white!

If you’re feeling adventurous, you could try adding textures to the image, or even following my method for layering multiple photographs in Adobe Photoshop.

There are no rules in flower photography, so let your imagination run wild when it comes to creative post-processing.

Try something abstract

These perfect clumps of little white flowers give you a great opportunity to try out something a little more experimental and off-beat. If you’ve not tried shooting abstract images before, just remember to approach the process with an open mind and try not to get hung up on what other people might think.

You could start off by trying an unconventional angle or using a tine depth of field to focus on just one part of the flower. Use the colors of the petals and the lines of the stems to create strong compositions where the subject itself is of secondary importance.

Image: Both: ISO100, 35mm (50mm equiv.), f16, 1/4th sec

Both: ISO100, 35mm (50mm equiv.), f16, 1/4th sec

Alternatively, how about trying out some ICM – intentional camera movement?

Set a long shutter speed (I usually start around 1/4 sec) and give the camera a wiggle while the shutter is open. You may find that you need to use a very small aperture or add a neutral density filter to your lens to allow for the long shutter speed without overexposing the image.

The technique is gaining popularity amongst many abstract photographers, and everyone has their preferred wiggle method!

When it comes to this kind of image-making, the key is to approach it with no expectations and not to be disappointed if you don’t get amazing results the first time.

As always, practice does make perfect, and it takes more than one attempt to create a masterpiece!

Take your camera for a walk and shoot

As always, the most important thing is to get shooting and start somewhere. You’ve only got a limited window of opportunity to photograph the snowdrops, so make the most of it while they’re in full bloom.

winter snowdrops

ISO100, 35mm (50mm equiv.), f2.5, 1/480th sec

The easiest way to find displays of snowdrops will be to follow the social media pages of country houses or landscaped gardens near you. They often use their social media pages to notify subscribers of whatever seasonal flowers are at their best.

You could also ask on local photography groups if anyone has an idea for other hotspots to find snowdrops – they often crop up in woodlands and parks that have been around a long time.

Don’t forget that these ideas can apply to plenty of other kinds of flowers too. But you might find that none are quite such showstoppers as the delicate little winter snowdrops.

So, go out and shoot some winter snowdrops and share them with us in the comments below!

The post How to Photograph Beautiful Winter Snowdrops (or Other Flowers) appeared first on Digital Photography School. It was authored by Charlie Moss.


Digital Photography School

 
Comments Off on How to Photograph Beautiful Winter Snowdrops (or Other Flowers)

Posted in Photography


Why You Need to Know the History of Flowers in Art and Photography

03 Oct

The post Why You Need to Know the History of Flowers in Art and Photography appeared first on Digital Photography School. It was authored by Megan Kennedy.

Flowers have had a presence in art for millennia. In this article, we’ll have a look at the history of flowers and some photographic principals that can be drawn from the historical use of flowers in visual culture.

history-of-flowers-in-art-and-photography

Floral colors

history-of-flowers-in-art-and-photography

Over the course of visual arts, colors have become embedded with a rich symbolic history.

While red can denote love and passion, blue can imbue a sense of calm.

The pairing of colors and flowers in both nature and art has influenced the reading of floral imagery throughout history. For example, the Ancient Egyptians often painted artistic renderings of the blue and the white lotus. However, the blue lotus was used as symbol of rebirth whereas the while lotus represented innocence and modesty.

In Renaissance artworks, a red carnation was symbolic of love. A pink carnation, on the other hand, stood as a symbol of marriage or betrothal, while in Japan, yellow chrysanthemums have historically signified the Emperor and Imperial family whereas white chrysanthemums indicate purity, truth or grief.

Melding color psychology with floral symbolism touches on our perceptions of visual art history. This is especially relevant if you are presenting your images as a conceptual artwork or as a gift with a heartfelt message layered in meaning. If you are looking to convey peace or emotional depth, try photographing blue flowers.

Incorporating yellow flowers into a photograph stimulates an energetic reading and sympathy is conveyed with white floral blooms.

You can also alter the color of flowers completely in post production, or strip it of its colorful meaning by working in black and white. This draws greater attention to a flower’s form rather than its biological pigmentation.

history-of-flowers-in-art-and-photography

The language of flowers

Why You Need to Know the History of Flowers in Art and Photography

Over time, cultures have linked flowers with specific ideas as a means of communication. Flowers like the lily and rose are used as symbols in the Hebrew Bible. This is especially the case in the Song of Solomon.

An age-old art form in Japan, the practice of Hanakotoba involves the pairing of flowers with meaning in the hopes of conveying emotion without the use of words. And for the first half of the 19th century, floriography was hugely popular in France, Britain and in the United States. Although many floriography dictionaries differed in meaning, some consensus on particular floral associations has prevailed in Western popular culture today.

Red roses (and their thorns), for example, continue to symbolize the duality of pain and pleasure in romantic love. The red poppy has become a symbol of remembrance of the fallen in war and white lilies, often used at funerals, signify sympathy and purity.

By utilizing the popular associations of flowers in a given culture, you can communicate ideas to a viewer through the photography of floral blooms.

Physicality

history-of-flowers-in-art-and-photography

Physicality defines the physical features that make up a floral bloom. For example, the textural qualities of a bloom influence our ability to visually feel the make-up of a flower. Aspects like the heaviness of a flower head can add visual weight to an image and the direction of a bloom can convey movement.

Varying dimensions of the flowers in Still Life With Flowers by Ambrosius Bosschaert cultivate energy and directionality, while the whimsical dimensions of the iris petals in Vincent Van Gogh’s Irises burst with movement and spontaneity. The repetition of Renoir’s Bouquet of Roses reinforces the soft quality of the rose heads, each vying for a place within the artist’s rendering, while Imogen Cunningham’s Magnolia Blossom features a single magnolia, emphasizing the delicate membrane of a lone flower.

Research into flower usage in art history will help you to achieve the right balance of physical characteristics within a floral photograph.

Abstraction

Why You Need to Know the History of Flowers in Art and Photography

According to Tate.org “abstract art is art that does not attempt to represent an accurate depiction of a visual reality but instead use shapes, colors, forms and gestural marks to achieve its effect.”

Abstract flowers in art are exemplified by the paintings of Georgia O’Keeffe. A leading figure in American Modernism, O’Keeffe pushed the boundaries of art by combining abstraction and representation. O’Keeffe’s close-up paintings of flowers allowed viewers to appreciate intimate forms from a fresh perspective.

In the same way, photographing abstracted flowers cultivates a sense of intimacy. Abstraction provides the opportunity for viewers to experience the properties of flowers through the eyes of the photographer.

You can achieve floral abstraction through the use of various photographic techniques.  Camera movement, cropping or creative macro photography are some of the ways a photographer can create intriguing abstracted floral imagery.

Conclusion

With thousands of types of floral blooms spread around the globe, flowers have caught the eye of artists for millennia. Familiarizing yourself with the history of flowers in art can be beneficial in a number of ways. A knowledge of colors and their use in conjunction with flowers is a useful tool in conveying emotional depth.

Knowing the history of flowers in art and culture can open more channels of communication between the photographer and the viewer. Training the eye to assess the physicality of different flowers allows for well-considered image-making.

And abstraction can introduce a unique perspective to your floral photography.


history-of-flowers-in-art-and-photograph

The post Why You Need to Know the History of Flowers in Art and Photography appeared first on Digital Photography School. It was authored by Megan Kennedy.


Digital Photography School

 
Comments Off on Why You Need to Know the History of Flowers in Art and Photography

Posted in Photography


5 Tips for Photographing Flowers with Impact

14 Dec

The post 5 Tips for Photographing Flowers with Impact appeared first on Digital Photography School. It was authored by Megan Kennedy.

1 - 5 Tips for Photographing Flowers with Impact

If like me, you live in the southern hemisphere, you’ll be well amongst the season of spring. Although this can mean the onset of the dreaded hay fever season, it’s a great time of the year for photographers to capture an amazing diversity of flowers that bloom in the warmer months.

Flowers make beautiful subjects for photography. In fact, they’re probably one of the most photographed subjects in history. An abundance of colors, species, and sizes means that flowers provide an endless array of photographic opportunities.

2 - 5 Tips for Photographing Flowers with Impact

However, floral photography isn’t limited to spring either. If you aren’t currently living it up in the southern hemisphere, now is a great time to show some self-love and buy yourself a beautiful bouquet of flowers…because you deserve it! And for photography purposes, of course.

No matter if you are in the thralls of spring or living vicariously through this post, this quick list is a great way to load up on ideas for that next floral shoot.

3 - 5 Tips for Photographing Flowers with Impact

Macro photography

Macro photography is the photographic reproduction of small subjects at a size that is larger than real life. Through macro photography, a photographer can take extreme close-up photographs of small subjects, reproducing them at a much larger size. Macro photography is often used to photograph flowers because it reveals attributes that can’t be seen by the naked eye. It’s easy to observe a flower in passing. But it takes a photographer to reveal the hidden details of a flower’s complex shape and structure.

A variety of dedicated macro lenses, as well as extension tubes and filters, mean that macro photography gear is becoming more and more accessible. For my macro flower photography, I use a set of extension tubes. They’re simple, don’t break the budget and they produce lovely results.

4 - 5 Tips for Photographing Flowers with Impact

5 - 5 Tips for Photographing Flowers with Impact

Abstraction

Abstract photography itself is a little hard to describe. Wikipedia defines abstract photography as “…a means of depicting a visual image that does not have an immediate association with the object world”. Abstract photography relies on compositional aspects like form, shape, color, line, and texture without worrying too much about depicting identifiable subject matter.

It’s a complicated subject, but flower photography is a great excuse to explore abstract photography for yourself. Try focusing on the details that make up the network of organic shapes in a flower, or home in on the subtle lines that form the flower’s shape. Don’t worry too much about the bigger picture. Go for it – it’s a lot of fun!

6 - 5 Tips for Photographing Flowers with Impact

In this abstract image, the flowing lines and natural color lend the impression of an organic subject

Color

Focusing on a colorful subject matter is a great way to form a dialogue between a photograph and viewer. Flowers are known for their abundance of color and variety. Their beautiful and sometimes surprising hues make them wonderfully diverse photographic subjects.

For vibrant color in your floral photography, you want to photograph a well-lit subject. If you are photographing outside, aim to shoot on a day with a good amount of sunlight. If you are inside or shooting on a particularly cloudy day, try incorporating on-camera flash into your photography. Direct flash will usually blow out a subject, so try using a diffuser or bouncing your flash for a softer effect that will lift a flower’s color without washing it out.

7 - 5 Tips for Photographing Flowers with Impact

Taking advantage of the color in floral subjects will allow you to build up a body of diverse botanical photography by relying on the natural features of the flower

Black and White

Of course, not all flower photography has to be in color. Color photography can have the drawback of directing attention away from the subject itself. Black and white photography, on the other hand, enhances form and texture by minimizing distraction.  And because flowers are associated with color, black and white photography also lends a timeless, surreal angle to your floral imagery.

To photograph flowers in black and white, you can set your camera to shoot in monochrome mode. Or, you can convert your images to black and white in post-production with programs like Photoshop or Lightroom. Either way, black and white photography is a great way to add a unique perspective to your flower photography.

8 - 5 Tips for Photographing Flowers with Impact

This photograph of was taken using a process called Scanography. The black and white scheme accentuates the subtle details in the subject

Perspective

Perspective dictates the way a viewer places themselves in a photograph. As a basic example, a high perspective can remove the viewer from the scene, inviting them to asses a photographic environment clinically. It introduces a sense of unease, as height is considered innately dangerous. A low perspective amplifies the height of subjects, lending a sense of grandeur to an environment. At the same time, it can also instill a feeling of ‘smallness’ in the viewer, as if they were an ant inspecting an impossibly tall building.

Viewers get drawn to images that are out of the ordinary. Creatively utilizing your camera’s point of view challenges the way a viewer sees their surroundings. For a unique twist on perspective, try photographing floral subjects down at their level. It’s amazing how much a subject can be transformed with a quick change in perspective.

9 - 5 Tips for Photographing Flowers with Impact

Conclusion

Focusing on color, black and white, perspective, macro, and abstract photography are only some of the ways to approach flower photography. Even the smallest flower poking its head through the cracks in a path can bring a smile to someone’s face. So, combining photography and flowers is sure a sure-fire way to create beautiful imagery. I’d love to see your results below!

The post 5 Tips for Photographing Flowers with Impact appeared first on Digital Photography School. It was authored by Megan Kennedy.


Digital Photography School

 
Comments Off on 5 Tips for Photographing Flowers with Impact

Posted in Photography


A Beginner’s Guide to Photographing Flowers

21 Jun

Photographing flowers is one of the most enjoyable and rewarding types of photography around. Yet it can be surprisingly difficult, even for more seasoned photographers. Getting strong flower images often requires new settings, new lighting, and new gear, not to mention a new approach to your subjects.

flower photography macro abstract - A Beginner's Guide to Photographing Flowers

In this article, you will learn the ins-and-outs of flower photography. Starting off with a discussion of flower photography gear and camera settings. Then moving into flower photography lighting, focusing primarily on the best types of natural light. Finally, you’ll get few guidelines for strong flower photography compositions.

Gear

There are a few types of flower photography gear to think about: cameras, lenses, and accessories (such as flashes and tripods).

flower macro photography abstract red tulip - A Beginner's Guide to Photographing Flowers

1 – Cameras

My camera recommendation is straightforward: the best cameras for photographing flowers are DSLRs. They offer great flexibility in terms of settings and have a huge array of excellent lenses available.

Which DSLR camera should you use? Especially if you are a beginner, it matters little. Most DSLRs allow for outstanding quality images, whether marketed for professionals or consumers.

Mirrorless cameras are another option. However, the macro lens line-up is still fairly limited. So at least for the time being, I’d go with a DSLR.

clematis flower - A Beginner's Guide to Photographing Flowers

I took this clematis photograph using a DSLR and a dedicated macro lens.

2 – Lenses

First, take note: It is possible to get good images of flowers using any lens, macro or non-macro, wide-angle or telephoto. I have taken some of my best flower images using a Canon 50mm f/1.8 lens.

flower photography macro abstract poppy - A Beginner's Guide to Photographing Flowers

I took this poppy image with my Canon 50mm f/1.8 lens.

On the other hand, the higher your lens’s magnification capabilities, the more opportunities you’ll have. You can make intimate and detailed images of flowers. You can also experiment with more abstract photography techniques.

This is why I generally recommend a dedicated macro lens for flower photography. Such a lens usually offers life-size magnification, pin-sharp images, and excellent bokeh. Some of these are available for a decent price, and I have written previously about choosing the perfect macro lens.

flower photography macro yellow - A Beginner's Guide to Photographing Flowers

This image was taken using a dedicated macro lens.

Another option is to use a regular lens (often a telephoto lens) plus extension tubes. Extension tubes are a cheap way of reducing your lens’s minimum focusing distance, therefore allowing for you to shoot at higher magnifications. The primary downside to extension tubes is flexibility.

When mounted between your camera and lens, extension tubes greatly decrease your maximum focusing distance, preventing you from quickly changing your point of focus. That is, with extension tubes mounted, you cannot take images of distant objects; you are restricted to only subjects within a few feet.

A third way of doing inexpensive flower photography is to freelens. By detaching the lens and placing it in front of the camera body, you can increase magnification (while also generating some interesting effects). I often do this with my Canon 50mm lens and backup body, because there is a risk of getting dust in the sensor.

pink coneflower - A Beginner's Guide to Photographing Flowers

I used freelensing to photograph this coneflower.

3 – Artificial Lighting

Flower photographers often like to use artificial lighting (e.g., flashes or ringlights). These can be both bulky and costly. I prefer natural lighting, but a flash can be especially useful in situations when the natural light isn’t ideal; for instance, bright, midday sun.

4 – Tripods

Flower photographers rarely leave home without a tripod. This is where I’m going to break with the prevailing opinion and say – you don’t need a tripod.

Let me qualify that statement. You don’t necessarily need a tripod for photographing flowers. You can shoot all kinds of pleasing flower images while handholding your camera. But there are certain techniques that do require a tripod. I will discuss those below.

white flowers - A Beginner's Guide to Photographing Flowers

I photographed these aster flowers without a tripod.

Camera Settings

Flower photographers generally aim for one of two looks: sharp throughout the frame or shallow focus.

Sharp throughout the frame requires a very narrow aperture, especially at higher magnifications, often at f/16 or beyond. This is where a tripod is necessary, as this is difficult to do without one. It may also require special techniques (i.e., focus stacking) in order to prevent the diffraction that comes from higher apertures.

flower photography macro dahlia - A Beginner's Guide to Photographing Flowers

An example of a “sharp throughout the frame” look.

However, my personal preference is shallow-focus macro photography. This requires no extra equipment, no flashes, and no tripod. Instead, you use a wide aperture (in the f/2.8-f/7.1 range) to render a small portion of the flower in focus.

The rest of the image is blown out of focus which can produce unique and stunning effects.

flower photography macro daisy abstract shallow focus - A Beginner's Guide to Photographing Flowers

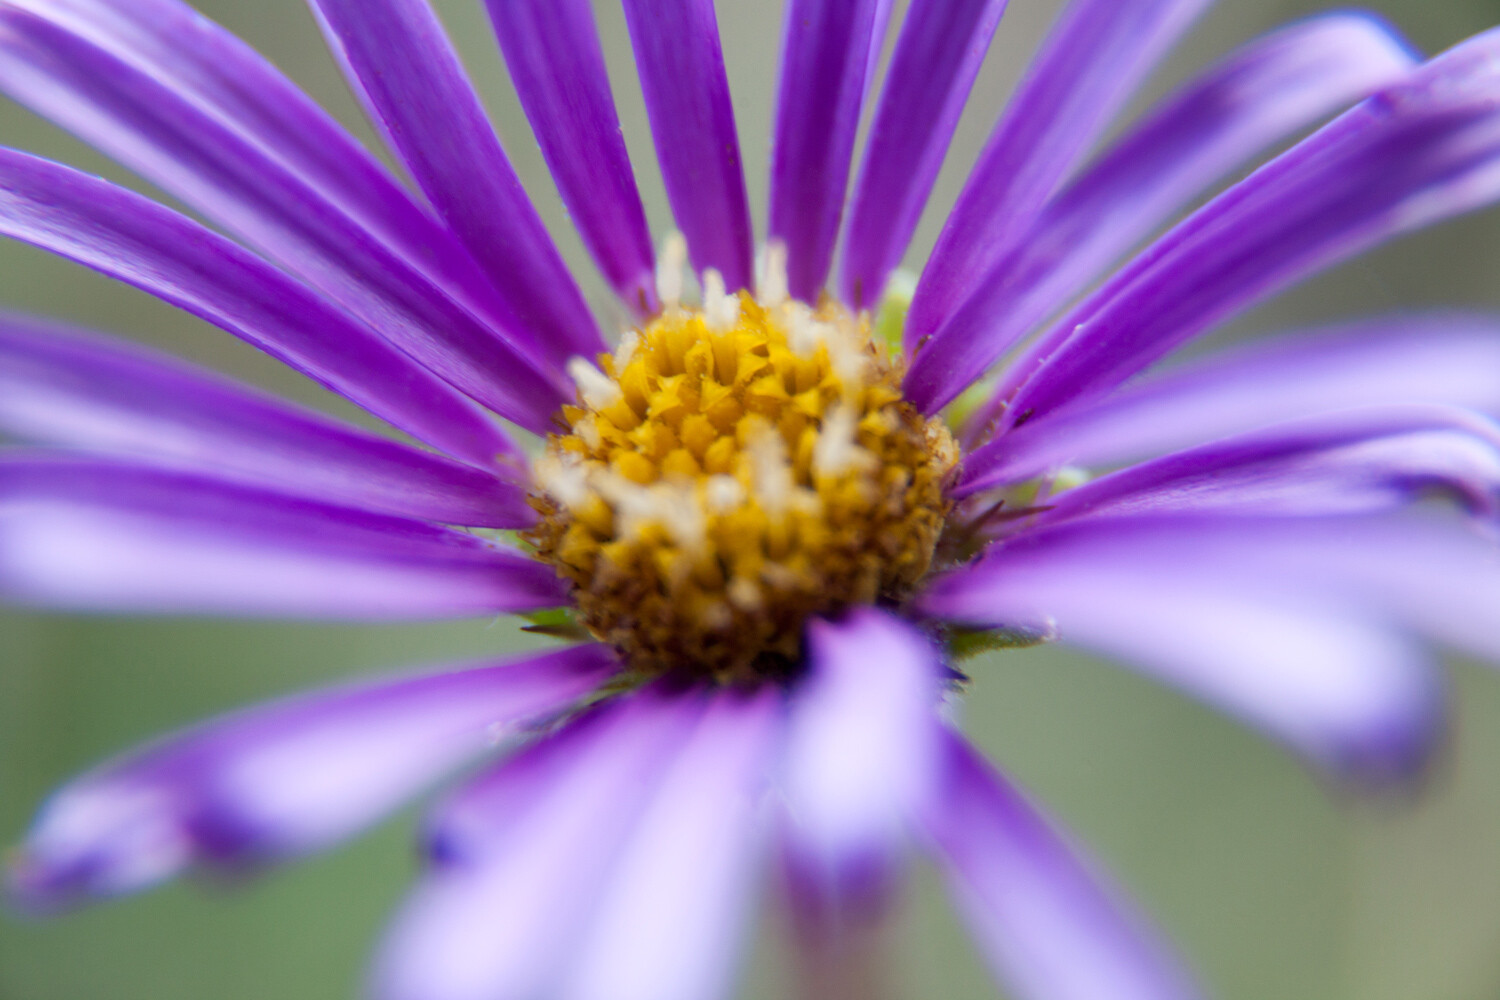
This daisy photograph is an example of my preferred type of flower photography with only a small part of the subject in focus.

In both cases, it is the aperture that is important. The shutter speed and ISO should be adjusted in response to the aperture (though I wouldn’t recommend dropping your shutter speed below 1/160th or so unless you have very steady hands or some form of image stabilization).

Lighting

I am going to primarily discuss natural light for photographing flowers. This is not because artificial light in flower photography is useless, but because I think it’s much more enjoyable to experiment with the light that’s available.

My first piece of lighting advice is to shoot on overcast days. When the sky is cloudy, the light becomes diffused. The flower will be evenly lit, and the soft light makes colorful petals pop.

tulip flower photography abstract macro - A Beginner’s Guide to Photographing Flowers

This tulip abstract was taken on an overcast day, which produced deeply saturated colors.

My second piece of lighting advice is to shoot in the morning or evening when the sunlight is golden. This prevents strong sunlight from falling on the flower and can generate some outstanding images.

flower photography macro evening light - A Beginner’s Guide to Photographing Flowers

This image was taken in the evening when the light was soft and golden.

I also like to shoot in the shade with the sun behind me, so that the bright sunlight is falling behind the flower (but not on it directly). One way to ensure this lighting is to find a flower that is in the shadow of a tree. Another is to cast the shadow yourself, by using your head, arm, or even your camera bag.

flower photography macro hyacinth - A Beginner’s Guide to Photographing Flowers

I cast a shadow over this grape hyacinth, in order to avoid the direct light of the sun.

Composition

A final aspect of flower photography to consider is the composition. This may seem daunting for the beginner, but there are a few simple compositional guidelines that will help you take better flower photographs instantly.

flower photography macro abstract - A Beginner’s Guide to Photographing Flowers

Fill the frame with your subject

In flower photography, you rarely want to have a lot of empty space in your frame. More empty space means more opportunities for distraction, for confusion, and for loss of impact. So instead of leaving space around the flower, move in closer to fill the frame as much as you can.

flower photography macro tulip - A Beginner’s Guide to Photographing Flowers

The more colorful, the better

When photographing flowers, you often have a whole palette of colors right in front of you. Use it to your advantage!

Put color in the background by placing another flower behind your main subject. Add color to the foreground by shooting through several other flowers.

macro photography flower colorful abstract - A Beginner’s Guide to Photographing Flowers

Keep things clean

In flower photography (or any type of photography, really), it’s important to have a point of emphasis (or a focal point). This can be the edge of a petal, the flower itself, the flower plus its environment, but regardless, you must ensure that the viewer’s eye is drawn to this spot.

One of the easiest ways to guarantee a strong point of focus is simply to have little else but that point of focus. I hope this sounds simple because it is. Hence, before taking a photograph, rid your potential composition of all distracting elements. This includes out-of-focus stems, as well as bright colors or dark spots in the background that don’t fit the image as a whole.

Think simplify.

macro photography flower abstract rose - A Beginner’s Guide to Photographing Flowers

The eye immediately focuses on this rose stamen.

Conclusion

By following this guide, you should be on your way to becoming an excellent flower photographer. While there are a number of elements to considergear, settings, lighting, and compositionI feel confident that you’ll be taking strong flower photographs in no time.

Any questions about photographing flowers? Let’s discuss them in the comments!

macro photography flower colorful abstract - A Beginner’s Guide to Photographing Flowers

The post A Beginner’s Guide to Photographing Flowers appeared first on Digital Photography School.


Digital Photography School

 
Comments Off on A Beginner’s Guide to Photographing Flowers

Posted in Photography


Weekly Photography Challenge: Flowers – with Prizes from ViewBug

05 May

If you didn’t already cover this topic from last week’s photography challenge (spring) now’s the time to get some flowers.

Photo by dPS writer Jaymes Dempsey

There are many ways to photograph flowers. Here are some ideas:

  • How to do Photography of Frozen Flowers
  • 3 Tips for Taking Photos of Flowers
  • How to Create Gorgeous Flower Images using a Flashlight and a Reflector
  • Five Ways to Take Your Macro Photography to the Next Level

Weekly Photography Challenge – Flowers

Simply upload your shot into the comment field (look for the little camera icon in the Disqus comments section) and they’ll get embedded for us all to see or if you’d prefer, upload them to your favorite photo-sharing site and leave the link to them. Show me your best images in this week’s challenge. Sometimes it takes a while for an image to appear so be patient and try not to post the same image twice.

Share in the dPS Facebook Group

You can also share your images in the dPS Facebook group as the challenge is posted there each week as well.

Win Prizes from ViewBug

We’re excited to introduce a sponsor and prizes for this week’s challenge. ViewBug is the World’s biggest photo contest community with over 70 contests always open for submissions. Win prizes, exposure, and the bragging rights. It’s FREE to join! This week, ViewBug will be awarding three winners prizes!

One Challenge winner will receive 1 year of ViewBug PRO ($ 139 value) plus a free photography logo bundle ($ 59 value). Two Runners Up will receive a 1 year of ViewBug Premium ($ 59 value) plus a free photography logo bundle ($ 59 value).

To Enter

Participate in the challenge as you normally would (as described above) by posting your photo. To be considered for a prize you just need to complete the entry form below (or via this link) and submit the link to your photo.

The Contest is open continuously from 05:00am Australian Eastern Standard Time (“AEST”) on May 5, 2018 (03:00pm United States Eastern Daylight Time (“EDT”) on May 4, 2018), through May 12, 2018, 04:59am AEST (May 11, 2018, 02:59pm EDT) (the “Contest Promotion Period”).

Full Terms and Conditions Digital Photography School Weekly Challenge – ViewBug T&C.

Winners are announced on the Weekly Challenge Winners page on 19th of May.

?Loading…

The post Weekly Photography Challenge: Flowers – with Prizes from ViewBug appeared first on Digital Photography School.


Digital Photography School

 
Comments Off on Weekly Photography Challenge: Flowers – with Prizes from ViewBug

Posted in Photography


How to do Photography of Frozen Flowers

07 Jul

Have you ever received a beautiful bunch of flowers and wondered how they might look frozen solid? No? Well, me neither! Actually, up until recently, I was more interested in keeping flowers in a good old conventional vase. But photographers are a mighty creative bunch. Provided with some of nature’s most basic ingredients, we put our heads together and discovered an amazing way to create such wonderfully abstract photographs of frozen flowers. And with such beautiful results, I wish I had started stowing my floral bouquets in the freezer sooner!

How to do Photography of Frozen Flowers

Supplies

You will need:

  • Flowers
  • Freezer
  • Water
  • Container
  • Camera

Method

Getting started

How to do Photography of Frozen Flowers

There are a few methods I’ve encountered for preparing photo-ready frozen flowers. One of those methods involves the use of liquid nitrogen, but I’m going with something a little less technical. To fully encase your beautiful flowers in a block of ice, you’ll need to gradually build up the surrounding layers of ice. Usually, you could go about filling any old tray with water, throwing it in the freezer and forgetting about it until summer. However, flowers contain oxygen, and oxygen is lighter than water. This means that chucking flowers into a full bowl of water and freezing it over is a no-go. The flowers will simply bob to the surface, stick out of the ice and wither away.

Anchoring your flowers

Instead, have a dig in your Tupperware drawer. I’ve found that a wide and relatively shallow plastic container works best, depending on freezer space. Fill your container with a few centimeters of water. Tap water has a foggier appearance when frozen, so use distilled water if you want a glossier effect. Place your flowers face-down in the water, arrange them how you like, and place the container in the freezer. The small amount of water will freeze over, trapping parts of the flowers and anchoring them so that they can’t float in subsequent layers of water.

Retrieve the container after a couple of hours, making sure the flowers are partially frozen to the ice in the container. Once the flowers are secured, pour a few extra centimeters of cool water over the flowers and existing ice. Be careful not to add too much though – the ice below can thaw and release the flowers, starting the whole process again. Return the container to the freezer.

Flowers fixed in place by a few centimeters of frozen water

Final stages

After another couple of hours (you guessed it) take the container out of the freezer again and add a few more centimeters of water. This time, you can add as much water as you like. But remember, the thicker the ice, the harder it will be for light to pass through the frozen block, cutting down the amount of light which will reach your camera’s sensor. However, ice will melt over time, so adding more water is better than adding too little. When you have added the last layer of water, take your container and pop it back in the freezer one last time.

Once the uppermost layer is frozen, remove the container from the freezer and let it sit for 10 minutes or so. After the ice has separated from the container, turn the container upside down over a cloth. Gently tap the container and the ice should slide out. Voila, behold the beautiful results of your hard work!

How to do Photography of Frozen Flowers

In this image, the base of the container has created an impression in the ice. You can even out the surface by rubbing a warm dampened cloth over the uneven imprint.

Photographing your creation

Now that you’ve created your icy flower sculpture, it’s time to photograph it before it melts. I recommend positioning your ice block near a light source or window with natural light coming through. This allows light to penetrate the ice and the membrane of the flowers to create a more detailed subject. For my photographs, I leaned my frozen flower block against the glass petitions of my apartment balcony. Be sure to put a towel underneath the ice to avoid a wet puddle.

How to do Photography of Frozen Flowers

How to do Photography of Frozen Flowers

Positioning the frozen block of flowers against natural light illuminates the details and varying tones in the image.

Experiment!

Now that you have the technique down, have a go with different combinations of flowers and containers. Depending on the shape and length of a container, you can manipulate the density and trajectory of bubble trails frozen in the ice. Try adjusting the orientation of the container, or breaking and refreezing the ice.

To make the rounded point encasing the rose head below, I lined the inside of a glass cup with a plastic bag. After anchoring the flower head to the first few frozen centimeters of ice, I gradually built up the layers of water to completely cover the rose. The air that escaped the rose was squeezed out and trapped inside the base of the glass, creating intricate patterns around the rose head. To make the ice more rounded, I simply wore the edges down with my hand for a minute or two.

How to do Photography of Frozen Flowers

The long bubbles suspended over the rose head are the paths of oxygen trying to escape

How to do Photography of Frozen Flowers

Line the inside of a glass cup so that the flower is easier to remove once it is completely encased in ice.

Once completely frozen, I let the glass sit at room temperature, gently tugging on the plastic bag every 10 minutes or so. Eventually the plastic bag became separated from the glass, and I carefully lifted the ice from the cup, revealing the beautifully encased flower inside.

How to do Photography of Frozen Flowers

A single rose, completely frozen after being positioned vertically in a glass cup.

How to do Photography of Frozen Flowers

As water freezes, oxygen is squeezed out of the flower, leaving beautiful trails in the ice.

Conclusion

Frozen flower photography is a super simple way to give your floral images a unique edge. With a few simple tools found in the kitchen and a pretty selection of flowers, you can create a countless variety of beautifully intricate photographs. Whether you are looking to update your portfolio or searching for something to do on a rainy day, these eye-catching floral sculptures are definitely worth braving the cold.

Share your frozen flower photos in the comments below! You could also give this a try: How to do Frozen Object Photography at Home.

How to do Photography of Frozen Flowers

How to do Photography of Frozen Flowers

How to do Photography of Frozen Flowers

How to do Photography of Frozen Flowers

How to do Photography of Frozen Flowers

How to do Photography of Frozen Flowers

How to do Photography of Frozen Flowers

How to do Photography of Frozen Flowers

The combination of ice and organic material is simple and striking, even as the ice begins to crack.

How to do Photography of Frozen Flowers

A small section of an autumn leaf protrudes from the ice.

The post How to do Photography of Frozen Flowers by Megan Kennedy appeared first on Digital Photography School.


Digital Photography School

 
Comments Off on How to do Photography of Frozen Flowers

Posted in Photography


AI-powered Google Lens can identify types of flowers, give info about restaurants

19 May

At Google I/O 2017 the company showed off its new Google Lens technology. This AI-powered capability uses visual recognition to provide information about whatever your smartphone’s camera is pointed at. Examples given by the company include identifying a type of flower or providing reviews and other information about a restaurant.

You will also be able to point the camera at a concert sign and have the opportunity to buy tickets, or get connected to a Wi-Fi network by aiming at the router’s ID ‘setting sticker.’

Google Lens will be incorporated into the company’s Photos and Assistant apps, but specific release dates aren’t given.

Articles: Digital Photography Review (dpreview.com)

 
Comments Off on AI-powered Google Lens can identify types of flowers, give info about restaurants

Posted in Uncategorized