RSS
 

Posts Tagged ‘Enhance’

Using Photoshop Filters During Post-Processing to Correct and Enhance Images

24 Nov

When you think of filters in photography, your first thought might be those specialized glass pieces you affix to the end of your lens. Most of these filters serve a specific purpose (e.g. a polarizing filter to reduce glare), although some are for artistic effects (e.g. colored filters).

But if you want to apply artistic/special effects in post-processing, Photoshop has a number of filters you can apply during this stage of your workflow. They can also be used to clean up or retouch images.

Recommendation

When working with an image, it’s good practice to work non-destructively (i.e. you don’t change the pixels). Using Photoshop filters directly on a pixel layer will change the pixels, so wherever possible you should use Smart Filters.

A Smart Filter is a filter that’s applied to a Smart Object – a layer that saves the image’s source information with its original characteristics and allows you to edit non-destructively. So before you start applying filters, convert the layer you’re working on to a Smart Object.

Note: Depending on your version of Photoshop, you may not be able to apply some filters as Smart Filters.

Filter Gallery

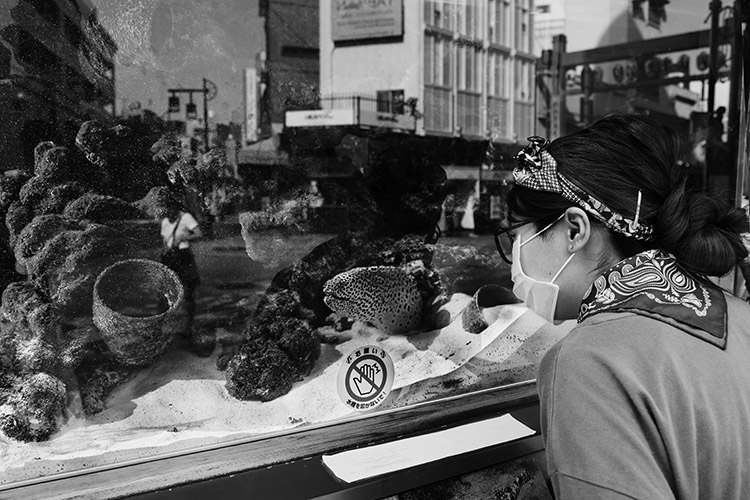
The filter gallery in Photoshop gives you quick access to a number of filters. From the menu choose Filter, and then Filter Gallery to view them on the screen. It’s an easy way to see the effect a filter would have without changing the original image. Here you can apply one or a combination of filters to your image.

The easiest way to understand what they all do is to select each one and look at the preview. It’s a simple artistic edit that can come in handy when used selectively.

The Filter Gallery showing the options that can be applied.

Adaptive Wide Angle Filter

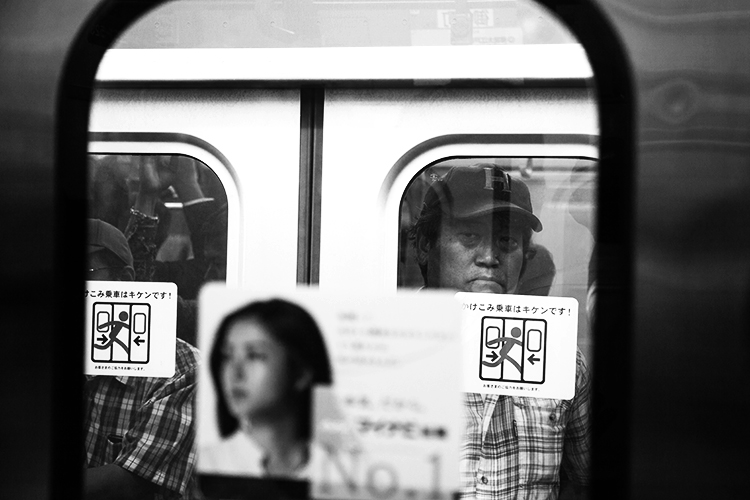
This is also available in the Filter menu and can be useful for correcting distortion issues resulting from wide-angle or fisheye lenses. These lenses sometimes introduce curves that weren’t actually there. You can also use the adaptive wide angle filter to straighten lines that appear curved in panoramic shots.

To straighten a curved horizon, click and drag from the left side of the horizon to the right. This adds a blue line (called a constraint) around the area of distortion. The constraint marks the area and straightens it.

An image taken with a fish-eye lens

This filter has a number of correction types:

  • Fisheye corrects those extreme curves made with a fisheye lens
  • Perspective corrects converging lines resulting from your angle of view or camera tilt
  • Full Spherical corrects 360-degree panoramas with a 1:2 aspect ratio
  • Auto applies what Photoshop deems an appropriate correction

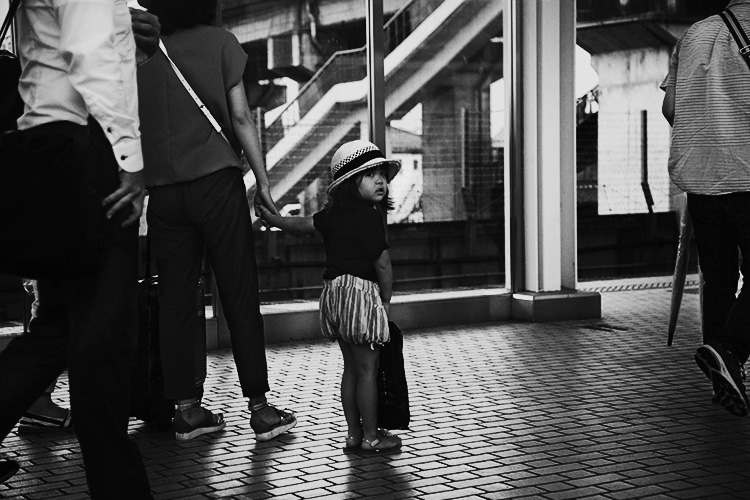
Image adjusted using Adaptive Wide Angle filter

Note: The Panorama correction type is also available if you apply this filter to a photomerged panorama.

Lens Correction

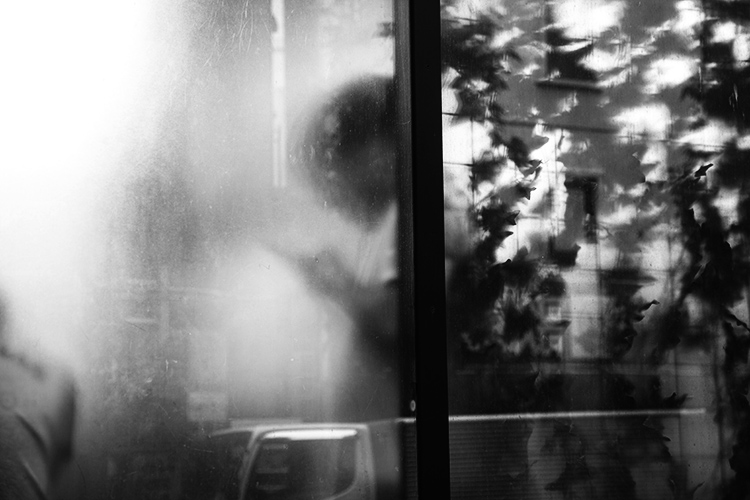
The Lens Correction filter fixes different kinds of distortions. Similar to the Adaptive Wide Angle filter, it remedies distortion created by wide-angle and fisheye lenses. It can also straighten images taken at an angle and make them appear as if shot straight on. One of the great things with this filter is you can choose to either manually correct the image or have Photoshop correct it automatically.

Angled image.

  • Geometric Distortion is another easy way to remove a fish-eye effect.
  • Chromatic Aberration can remove any colored fringes around your subjects on high contrast edges.
  • Vignette does a good job of adding a vignette.
  • Transform gives you sliders to help you correct perspectives, with options for vertical and horizontal perspectives, as well as rotating to compensate for camera tilt.

Edited with the Lens Correction filter.

Liquify

The Liquify filter can be used to push and pull pixels around and is one of the most powerful filters under the Filter menu. You may associate liquify with body transformations, but it can do much more than that.

Within the liquify filter menu, the forward warp tool (at the top left) is the most popular. The key to using this tool successfully is to use a brush size slightly larger than you think you need. You should also use a lower pressure brush (for more subtlety) and increase your density (to affect a bigger area within your brush circle).

The Liquify Tool used to reshape a piece of fruit.

Vanishing Point

The Vanishing Point filter brings an image in line with the perspective of another. For example, if you want to composite a picture frame into a room, this filter will help you match the perspective of the frame to any wall in the right perspective.

Third-Party Filters

Photoshop lets you easily add hundreds of third-party filters (available via plugins) to your arsenal.

These can help you make the most of your images or get super creative. Many simplify the steps Photoshop is capable of achieving so you can perform them in a shorter time. Some of these include the Nik Collection, Topaz and ON1.

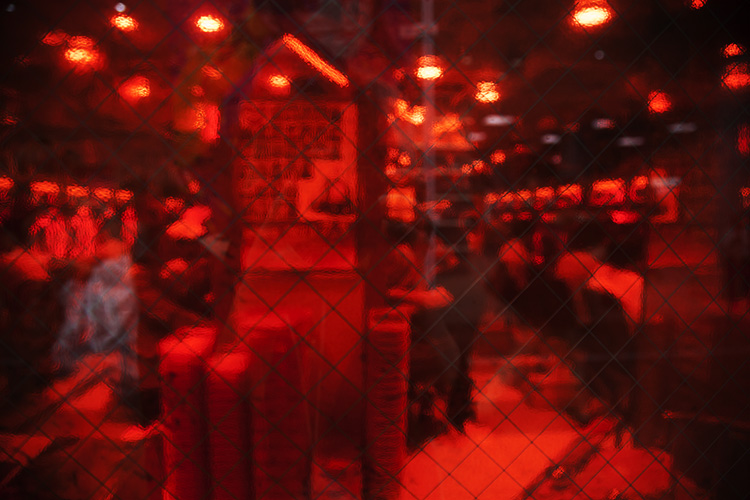
Above Image with two Nik filters applied: Paper Toner and Vignette

Conclusion

Using Photoshop Filters is an easy option if you want to get creative. Photoshop has a few standard ones you can experiment with, and stacking them can create a unique image.

Which filters do you use? Share some of your results with us.

The post Using Photoshop Filters During Post-Processing to Correct and Enhance Images appeared first on Digital Photography School.


Digital Photography School

 
Comments Off on Using Photoshop Filters During Post-Processing to Correct and Enhance Images

Posted in Photography


Magic Lantern starts work on way to ‘enhance’ Canon EOS R feature-set

20 Oct
An example of the Magic Lantern software running on an EOS DSLR

The group that provides Canon users with programs to expand the feature set of their cameras has begun cracking the new EOS R mirrorless firmware.

Beta firmware from Magic Lantern is said to be in the test stages, and if it follows already existing Magic Lantern software, it will add new display overlays, uncompressed raw video, focus stacking and even the chance to load games on to the camera. Magic Lantern doesn’t replace the firmware already loaded onto the camera by Canon, but is extra software that runs alongside it to add additional features.

Many users will perhaps hope that full-sensor 4K video will be added, though the consequences of the camera using the whole sensor area for extended recording is yet to be discovered.

Andrew Reid from EOSHD shows a video of an experimental firmware probe successfully taking control of the camera system – even if to just show a green screen. This, he says, is good news, as it means the Magic Lantern code ‘was able to execute on the EOS R as normal’ and ‘which demonstrates the possibility to change camera registers and execute code on the main processor.’

Obviously more work is needed, but the first steps of cracking the file format and encryption seems to be underway.

Articles: Digital Photography Review (dpreview.com)

 
Comments Off on Magic Lantern starts work on way to ‘enhance’ Canon EOS R feature-set

Posted in Uncategorized


5 Camera Filters That Can Enhance Your Photography

27 Jun

Photography can be an expensive hobby, with equipment improvement really making a hole in your wallet. What if I told you there was an inexpensive piece of equipment, which can greatly improve your work! You’d want to know what that is right? Well, step forward the humble camera filter.

Although in truth, there are some camera filter systems that are quite pricey, you can also get ones that are a great value. So let’s take a closer look at what camera filters are all about.

What is a camera filter?

In the age of smart phone filters, it’s worth explaining what the term “filter” used to mean in photography. A filter is something that attaches to the front of your camera lens and is used to alter or adjust the light coming into the camera in some way.

5 Camera Filters That Can Enhance Your Photography - orange warming filter

Camera filters allow you to add more creativity to your photography.

Filters come in two different shapes

  • Circular Filters – These filters screw directly onto the front of your lens. You’ll need to buy a filter of the same diameter of the front of your lens (look at the back of your lens cap for the correct size). It is also possible to buy step-up or step-down rings that will allow you to attach your filter to camera lenses of different diameters.
  • Square Filters – These sometimes come as a rectangular filter, and always as part of a system that allows you to attach them to the front of your lens. There is typically a bracket, which itself attaches to a round ring, that you will screw onto the front of your lens. Systems like this make stacking filters easier and are better for graduated filters.

There are in fact many different filters which you can use, and not all of them are going to be mentioned here. Many people like to use a UV filter to protect the glass on the front of their lens. This is a functional use, and this article seeks to look at the creative use of lens filters.

A few notable omissions to this list are the starburst filters, and the softeners/diffusers used in portrait photography. With all this covered, let’s take a look at the five best camera filters that you can use to enhance your photos.

5 Camera Filters That Can Enhance Your Photography - set of different filters

Circular filter are one of the main options out there.

#1 – Circular Polarizing Filter

The circular polarizer is a great filter, it’s a must-have in your bag. Its primary use is for landscape photography, though it can be useful for outdoor portrait scenes as well. This filter works by only allowing polarized light into the camera, that means light traveling from one direction. This has several effects on your photo.

  • Reflections – A circular polarizing filter can enhance or remove reflections from a scene, depending on what you desire. As you rotate the filter, you will see the reflection either increase or decrease.
  • Saturation – This filter can also add more saturation to your photo, giving it more impact with the viewer. You can adjust how much by rotating the filter.
  • Clouds – Related to the increase in saturation, is the enhancement of clouds. On days where there is a mixture of sky and cloud, this is especially effective.
5 Camera Filters That Can Enhance Your Photography - blue sky and a green field

Circular polarizing filters are great for enhancing skies like this one.

#2 – Neutral Density Filter

Neutral density filters are ones that block the light in varying amounts depending on the strength of the filter. The strength ranges from the ND2 to ND1000, weakest to strongest respectively. These filters are mainly used for either portrait work, or landscape work with the stronger filters used in landscape photography.

The darkness these filters add is referred to as a stop, and a stop means one exposure value (1EV). That means an ND2, which is a 1 stop filter, darkens the photo by -EV1. The ND1000 filter is referred to as a 10-stop camera filter.

  • Portrait filters – ND2, ND4, and ND8 filters can broadly be described as portrait filters. They are used with prime lenses when there is too much light for that lens to be used with a large aperture. Their other function, when using a strobe (flash), is to block enough light so you can use the flash at the camera’s regular sync speed (without the need for high-speed sync HSS).
  • Landscape filters – While there are times you might want to use some of the weaker ND filters for landscape photography, typically you’ll be using an ND110 or ND1000 for landscape photography. This allows you to make dramatic long exposure photos during the day, ideal for moving water or clouds.
  • Solar eclipse – Should you be lucky enough to witness a solar eclipse, you’ll want to use the 16-stop ND100000 filter (a special solar filter).
5 Camera Filters That Can Enhance Your Photography - long exposure scene

If you want to take a daytime long exposure you’ll need a strong ND filter.

#3 – Graduated Neutral Density Filter

These filters are the domain of landscape photographers. Graduated Neutral Density filters come in two types, hard and soft. They’re used to make the sky darker, so it balances out the exposure of the image in relation to the foreground.

Purist photographers who like to create their photos from a single image, and avoid techniques like HDR or digital blending like to use these filters. Even those who like to blend their images will use them, as it makes post-processing easier later on.

If you’re looking to buy one you should look at the square variety, as this gives you the ability to adjust where the horizon line is. Let’s look at the types you could use.

  • Hard – This means there is a sharp line between the dark and light areas of the filter. They are more difficult to use but create nice results when applied correctly.
  • Soft – Soft graduated filters have a more graduated transition from dark to light. Easier to use, and better when the horizon line isn’t sharp if it contains buildings or trees.
  • Strength – As with the regular ND filters these vary with strength. You can get ND2, ND4 and ND8 graduated filters.

Note – The quality of the ND filters will be better the more you spend. Cheaper varieties may introduce a color cast to your image and are therefore not entirely neutral. If you have the money to spend, the Lee filter system is highly recommended.

Read these dPS reviews for more on these filters:

  • Comparison – HDR Versus Graduated Neutral Density Filters for Landscape Photography
  • Review of the Vü Professional Filter System
  • Review of the Wine Country Camera Filter Holder System
  • How to Use Graduated Neutral Density Filters for Landscape Photography
5 Camera Filters That Can Enhance Your Photography

The square shape is best for graduated filters.

#4 – Graduated Filter

Progressing on we now look at the Graduated Filter. These are used to enhance the color in the sky. They work just like the graduated ND filters but instead add color. This type of filter will often be used to make a sunset sky even more dramatic, by making the sky orange, or perhaps rose red.

Other options for graduated filters are adding sepia to the top half of your photo. Even more experimental is adding one color to the bottom of the image, and another color to the top by using two of these filters together. This is a great camera filter to be creative with, but you need to apply it to the right place.

Those wishing to try their hand at this type of photography with a filter should look at this excellent guide.

5 Camera Filters That Can Enhance Your Photography - colored filters

You can use filters to add color to the sky, even when it’s not there yet.

#5 – Infrared filter

Do you want to create a dreamscape from your photos, with foliage that looks like it’s from a snowstorm? Then you’ll need to learn how to make infrared photos.

One of the most accessible ways to do this is by using a filter. When you buy a filter like this it will appear black, that’s because the human eye can’t see the infrared spectrum of light. A popular filter for infrared photography is Hoya’s R72. Even with a filter, you’ll need a camera that will perform with this filter attached, and some cameras are better at this than others.

Most manufacturers will block infrared light from reaching the sensor to some extent, the stronger that block is the less effective this filter will be. Should you choose to use this kind of filter on a non-converted camera expect your exposure times to range from 30 seconds up to 4 minutes, depending on your ISO and aperture settings.

Read more: My First Time Shooting Infrared Photography

5 Camera Filters That Can Enhance Your Photography  - b/w infrared style image

Infrared photography is a lot of fun to try. This photo was shot with the Hoya R72 filter.

What camera filters do you use?

There are lots of methods you can add creativity to your photography, a good camera filter is one of those ways. In this article, you’ve seen five of the best filters available to add that little extra to your image.

Have you used any of these filters? Is there another filter that you use in your photography, that can add more creativity? Those who take black and white photos will no doubt point to the effects that red, orange and yellow filters can add to this genre. As always we’d love to see examples of your photos in the comments section, together with hearing about your experience using filters.

5 Camera Filters That Can Enhance Your Photography  - landscape scene

Filters can be used to darken the sky in landscape photography. This can make it more dramatic.

The post 5 Camera Filters That Can Enhance Your Photography appeared first on Digital Photography School.


Digital Photography School

 
Comments Off on 5 Camera Filters That Can Enhance Your Photography

Posted in Photography


CP+ Olympus interview: “It’s time to enhance the imaging business”

30 Mar
Shigemi Sugimoto, Head of Olympus’s imaging business unit. Pictured at the CP+ show in Yokohama, Japan.

At last month’s CP+ show in Yokohama, we met up with Shigemi Sugimoto, Head of Olympus’s imaging business unit. During our interview, Mr. Sugimoto explained where he sees the most opportunity for Olympus, and how his company will continue to differentiate itself from the competition.

This interview (which was conducted through an interpreter) has been edited for clarity and flow.


You’re relatively new in your role as head of the imaging business unit. How will your leadership change the company?

We’ve gone through a painful period, in the past. We had to shrink the size of the business, and that was reflected in our product lineup – especially the compact cameras. But now it’s time to enhance [and grow] the imaging business and catch up in terms of market share. Part of this will be enhancing our lineup.

How long have you been with Olympus?

I joined Olympus 32 years ago, initially in the accounting department. I’ve been with the imaging division for ten years. In 1997-2002 I worked in Hong Kong, where I established our factory in China.

What was your first Olympus camera?

A compact, at first but I replaced it with a PEN E-P1.

Our first priority is what we call system mobility – not just the size of our camera bodies, but the entire system

What are your ambitions for Olympus’ range of photography products going forward?

We’re focused on the mirrorless ILC category, because we’re concentrating on portability and reliability. This is our value in the market. Our first priority is what we call system mobility – not just the size of our camera bodies, but the entire system, such as our telephoto lenses. Because of the benefit of the 2X crop factor we can provide a dramatically different solution [compared to other manufacturers].

We see the OM-D system truly as a system, including accessories and other equipment. We need to expand the capability of the entire system – not only bodies and lenses.

The 300mm F4 PRO behaves like a 600mm on full-frame, giving Olympus shooters a powerful and sharp telephoto option at a fraction of the size and weight of a ‘true’ 600mm lens.

Are you still aiming primarily at a still photography-oriented audience, when you develop new products?

Our position hasn’t changed. We’re focused on stills photography – this is our basic stance. But if we see that our customers want to take more video with our equipment, we’ll [include] video features. But our main focus is stills. Video technology is not our first priority. On the other hand, we can also provide the benefits of the OM-D system’s mobility to video users, for example our high-performance 5-axis image stabilization.

Considering the film-making audience, we’re not going to be going in the direction of large [dedicated] video cameras. Rather, [hybrid cameras], for handheld use, which can shoot high-quality video just with a single operator. That’s a benefit that [I think will be] appreciated by videographers.

We don’t have a strong line of communication with the video audience

Do you have a sense of how many of your OM-D E-M1 Mark II customers use the camera to shoot video as well as stills?

We don’t have a strong line of communication with the video audience, so we don’t have many people using that feature in our cameras. We know our cameras and lenses are capable of capturing high-quality video, and we’d like to get this message across. Olympus makes nice, multi-operation handheld cameras that can shoot good video.

Would you like to increase the number of people who use your cameras for video creation?

Yes, of course.

Advanced amateurs and professionals tend to want more robustness, and improved operability

A number of enthusiasts and some professionals have adopted the OM-D E-M1 Mark II. What are they asking for?

The demands are different depending on their level. Advanced amateurs and professionals tend to want more robustness, and improved operability. For entry-level users, they want new technology, which they can’t find in DSLRs. Olympus is a pioneer in digital photography in the camera field, and our users expect that.

The OM-D E-M1 Mark II is an uncommonly tough camera, which can take a lot of punishment. From the jungles of Thailand to the snowy mountains of British Columbia, we’ve soaked it, frozen it, and dropped it in the mud but it keeps on shooting.

Is there an engineering limit to the effectiveness of image stabilization systems?

When we introduced the OM-D E-M1 Mark II, the IBIS system in that camera represented the limit at the time. But of course the technology is still developing. After the OM-D E-M1 Mark II was announced, our engineers have tried to [push the barriers] of performance and recently they’ve come up with some solutions. So there is still room for improvement in terms of stabilization.

The next generation may be even more effective?

Yes, you can expect so.

Going forward, is there any value left for Olympus in the compact camera segment?

We are focused on the TG tough range of compact cameras, and mirrorless cameras. From a profitability point of view we’re focused on these high value products, even though the volume [of sales] is lower.

The Tough TG-5 is a class-leading waterproof camera, in a market segment that remains profitable for Olympus.

Can you tell us anything about how the Tough camera range might evolve over time?

At this point, we’re not looking to [develop] this range too aggressively. That’s based on the current situation. Of course, the market is always changing, and flexibility is really important to meet customer demands.


Editors’ note:

Mr. Sugimoto has been with Olympus for a long time, but he was only recently promoted to his current position as head of the imaging business. It’s a tough job, especially in such a competitive landscape, but during our conversation he seemed confident that Olympus can bring a unique value to the marketplace. By his own account, Olympus has gone though some difficult years, but now the time has come to invest and grow its market share.

That’s not to say that we’re expecting Olympus to suddenly start churning out cameras like they used to – it’s very clear that Mr. Sugimoto sees most value in the mirrorless ILC segment, and the high-profit Tough line of compacts. He is hoping that what he calls ‘system mobility’ will continue to attract enthusiast photographers to the OM-D and PEN lines, and all but confirmed his engineers are working on even more effective 5+ EV IBIS. DSLR and full-frame mirrorless photographers can only dream of this kind of stabilization, which is equally useful for video, as well as stills.

It’s extremely unlikely that we’ll see Olympus creating a Panasonic Lumix DC-GH5S competitor any time soon

Speaking of video, Mr. Sugimoto confirmed that it still isn’t the main priority for Olympus, but he did frame the issue partly in terms of communication. Unlike competitors like Panasonic, Olympus has never really dealt with video creators in the past. Clearly, Mr. Sugimoto believes that his company makes products that will have value to this constituency, but is concerned that up to now, Olympus hasn’t found a way of effectively communicating with them.

Products like the OM-D E-M1 Mark II with its spookily effective IBIS, and high-quality 4K video are impressively capable when it comes to video, but it’s extremely unlikely that we’ll see Olympus creating a Panasonic Lumix DC-GH5S competitor any time soon. Instead, after talking to Mr. Sugimoto we’re predicting a consolidation of Olympus’s mid-range and high-end ILC lineup and more high-end lenses. In a landscape increasingly dominated by chunky APS-C and full-frame cameras and lenses, Olympus will need to start selling the ‘system mobility’ message aggressively. New products will help, but communication is definitely part of the challenge.

Articles: Digital Photography Review (dpreview.com)

 
Comments Off on CP+ Olympus interview: “It’s time to enhance the imaging business”

Posted in Uncategorized


Tips for How to Enhance the Mood in Your Foggy Photos

17 Mar

I love photographs of foggy scenes. It can be a view of a busy street, a sprawling city skyline or a secluded mountain valley. Mist and fog are transformative and can give a well-known location a completely different feeling, filled with mystery and depth.

How to Control Mood in Your Foggy Photos

There are so many things you can do with your foggy images to give them the kind of mood and feel you want.

In this article, I’m going to choose an image that features fog and edit it a few different ways. I’ll show you a few simple factors that you can put to use to help you learn to completely control the mood of your misty and foggy images.

The Photo

This is the photograph that was kind enough to lend itself to be a guinea pig for our little experiments.

foggy image of a tree - How to Control Mood in Your Foggy Photos

It’s an image I made early one morning in the mountains of Virginia and of course, it is a RAW file…for now. Below we’re going to look at how some easy changes can literally transform this photo.

Contrast

We all know about contrast to some extent. At its core, contrast is simply the difference between light and dark in an image. When there’s a big difference and the lights are bright and the shadows are dark the photo is said to be high contrast. The opposite is true with low contrast photos where there is a very little gradient between the lights and darks.

The reason I’m refreshing you with a little Photography 101 is that fog inherently makes most images low contrast. You can choose to further reduce the contrast or bump things up as I’ve done in our first example.

Here’s our test photo with a large amount of increased contrast (using the Contrast and Blacks sliders) applied.

How to Control Mood in Your Foggy Photos - higher contrast tree image

A relatively large amount of contrast in a misty scene instantly changes the tone of the photo by adding a sense of brooding. The light areas become brighter and the shadows deepen. High contrast images, in general, have more impact but that’s more of a preference than a rule.

Alternatively, you can choose to embrace the softness of foggy images and decrease the contrast even more. Now I’ve lessened the contrast using the Tone Curve to fade out the tree.

How to Control Mood in Your Foggy Photos - lower contrast tree image

Low contrast can make your image extremely delicate which imparts an artsy, nearly abstract vibe. Oddly enough, low contrast foggy photos can be surprisingly workable in black and white as well.

How to Control Mood in Your Foggy Photos - b/w tree

Color Temperature

Believe it or not, color temperature has one of the most perceivable impacts on photos of fog and mist. Perhaps even more so than anything the feel of the photograph and how it conveys mood is determined by the temperature of the color tones.

Now I’m going to take that high contrast version of the photo from the last example and change nothing but the color temperature. The version is nice and soothing cooled down. I adjusted the White Balance from 6150K to 4350K.

How to Control Mood in Your Foggy Photos - cool image of a tree

Next, let’s warm the color temperature back up considerably from the base 6150K to 7350K

How to Control Mood in Your Foggy Photos - warmer image of a tree

See what a difference that makes? Misty and foggy images with a cooler color temperature are more ethereal and give the viewer a more ominous, darker experience. On the flip side of the temperature coin, warmer toned images are generally viewed as more upbeat and comforting.

It’s funny how changing the color temperature can have such a drastic effect on identical scenes.

Brightness

The overall all brightness of a photo is very subjective but when it comes to foggy photos there’s a very particular change you can make to your photo to take it from mundane to wow. “Wowdane” maybe? You know what I mean.

You accomplish this by making use of your old friend in Lightroom, the Graduated Filter. I’m going to use the cool toned image from the last example but the only change I’ll make is to add some increased exposure in the top portion of the photo.

How to Control Mood in Your Foggy Photos - darker

By brightening up the fog in the tree top the entire photo becomes more impactful and punchy. The fog seems to “glow” and becomes more like something out of the pages of a storybook.

Experiment with your photo by moving the Graduated Filter around to add directional lighting or even opting for the Radial Filter to localize the effect even more. I use a Graduated or Radial Filters (or both) in virtually all of my landscape and nature photos and it becomes especially useful in those which feature fog or mist.

Embracing the Haze

Some final thoughts on working with images of mist and fog include using the suggestions above, but I also encourage you to revisit the same image more than once while editing. Look for ways to change the mood and tone of the photo by changing the color temperatures. Don’t be afraid to go to extremes with contrast.

The great thing about working with these types of scenes is that they offer incredible creative opportunities for both you and the viewer.

The post Tips for How to Enhance the Mood in Your Foggy Photos by Adam Welch appeared first on Digital Photography School.


Digital Photography School

 
Comments Off on Tips for How to Enhance the Mood in Your Foggy Photos

Posted in Photography


How to Enhance Colors Using Photoshop’s Color Range Tool

08 Dec

Luminosity Masks have become a go-to technique for many photographers wanting to make selective adjustments on their images. While it’s a great way to create precise masks, it’s a mask solely based on the luminosity of a pixel and it may not be ideal when you only want to make adjustments to a specific color. Perhaps you want to enhance that beautiful sunset you photographed last night or maybe you want to change the color of your subject’s eyes. Regardless of what color based adjustment you want to make, there’s a simple and quick method of creating a precise selection based on the color value using Photoshop’s Color Range Tool.

Why Use Selective Adjustments

Before we jump into how you can create a precise selection based on a color, I quickly want to talk about why you should be using selective adjustments in your post-processing.

My area of expertise is landscape photography but this topic is important no matter what type of images you capture or your ambitions. If you have a desire to make your images look better, you need to be making some selective (local) adjustments to them.

It doesn’t need to be anything super-advanced, but start by at least making some selective color adjustments. The main reason you’d want to do this is to get rid of the unwanted color cast. The color cast can come as a result of your previous post-processing or it can come straight from the camera and it’s something that sticks out as a negative when viewing the image (the exception is when it’s a deliberate color cast that serves a purpose).

How to Enhance Colors Using Photoshop's Color Range Tool

I used Selective Adjustments to keep the shadows cold in this image.

It’s also quite common that you’ll want to make an adjustment only to a specific area of an image (known as a local adjustment). A normal adjustment will affect the entire image (known as a global adjustment). Instead, create a mask that selects only the part of the image you want to affect (for example the highlights, a color, or maybe just a specific subject) and make your adjustment. Now, you’ve kept the majority of the image untouched but have made a visible adjustment to that particular area – no global color cast and no unwanted effects.

Create a Mask Based on Color

Okay, let’s jump into it and start making a few adjustments based on a color. In the example below, I want to increase the saturation and brightness of the yellow flowers in the foreground. A typical way of making a similar adjustment would be to use the Hue/Saturation adjustment and increase the saturation of the yellows. Yes, the flowers are saturated and brighter now but so are the cliffs, areas in the sky, and even some of the water.

How to Enhance Colors Using Photoshop's Color Range Tool

First of all, make sure that you’re on a Stamp layer – in other words, one which is all the layers below it merged into one (you can delete this layer later but you’ll need it for the next step). Now, go to Select > Color Range… A new box should now appear and it’s here that you’re going to create the mask.

How to Enhance Colors Using Photoshop's Color Range Tool

For the best results, make sure that Sampled Colors is selected in the top drop-down menu. It’s possible to work with the other options as well but I find the mask to be much more accurate by manually sampling the colors you want. Next, with the Eyedropper Tool selected, click on the color in your image that you want to select. For me, that’s one of the yellow flowers in the foreground. Notice that the image within the Color Range box now has changed and it’s mostly black. This represents the selection we’re making (only the white parts of the mask will be affected).

Refine the mask

The Fuzziness slider is a useful tool to make the selection more or less refined. By pulling the slider towards the left, you’re creating a more restricted mask and it affects less of the similar colors to what you’ve selected. Pulling it towards the right has the opposite effect and the mask starts including similar colors. I prefer to use a fuzziness of approximately 70-80 but I recommend you play around with it for each shot.

How to Enhance Colors Using Photoshop's Color Range Tool

That’s it! Click OK and you’ve created a precise mask based on that color. Now, you choose the adjustment you want to use – I’ll use the Hue/Saturation slider for now.

Adding Colors to the Selection

Before we continue and start enhancing the image, I want to show you how you can add more colors to the mask. Let’s say that I also wanted to make the same adjustment to the bright parts of the sky. Before clicking OK and creating the selection, I would simply hold shift (or select the second Eyedropper Tool named “Add to Sample) and click on the sun. You’ll see that the mask has changed and the area around the setting sun is also whited out.

How to Enhance Colors Using Photoshop's Color Range Tool

Unfortunately, this step also included some of the cliffs in the lower right corner which I don’t want to be affected. The best way to remove that from your mask is to paint directly on the mask with a black brush after creating an adjustment layer.

Making the Adjustment

The last thing I’m going to do is to increase the saturation and brightness of the flowers. With the mask we created active (you know it’s an active mask when you see the marching ants around your selection), create a new Hue/Saturation Adjustment Layer. Since we’ve already created a mask that targets only the yellow flowers, we don’t need to go into the yellow channel, instead, we continue using the Master channel.

Now just drag the Saturation slider towards the left until the colors are saturated to your taste. I also increased the Lightness slightly to make the flowers pop even more.

Before

How to Enhance Colors Using Photoshop's Color Range Tool

After

This technique of creating a precise mask can be used with any adjustment layer that you want. I often combine it with any color-based adjustments such as Hue/Saturation, the Photo Filter, and Color Balance. For adjustments that affect the brightness and contrast of the image, I prefer using Luminosity Masks.

The post How to Enhance Colors Using Photoshop’s Color Range Tool by Christian Hoiberg appeared first on Digital Photography School.


Digital Photography School

 
Comments Off on How to Enhance Colors Using Photoshop’s Color Range Tool

Posted in Photography


How to Enhance your Black and White images with Infrared Photography

09 Mar

This article will give you some tips on how you can enhance your black and white images by using infrared photography.

Enhancing your Black and White images with Infrared Photography

Infrared photography for something different

Are you a fan of black and white photography? Like many, I love a good black and white image. The mood you can exude from the shadows and light always fascinates me.

When I was new to photography, I mostly avoided black and white landscapes. I used it mainly a handy way to hide the sporadically bizarre white balance my old Olympus EPL1 used to occasionally surprise me with.

Infrared photography (IR) also took a while to attract my attention. I wasn’t a huge fan of the typical false colour images, but quite liked the black and white IR photos, particularly the work of Simon Marsden. If you haven’t explored his portfolio of dark and atmospheric infrared film photography, you are missing something unique.

Anyway, after a while, I started doing more black and white landscape images, and eventually followed the urge to get into IR images purely for their unique monochrome potential.

Enhancing your Black and White images with Infrared Photography

I went down the path of buying a modified camera off Ebay. You can buy anything from a point and shoot to a full frame DSLR, and everything in between. If you have an old body you can always get it converted, but it’s worth checking the cost against buying one that’s already been modified.

I picked up an Olympus EPM1 for around AUD $ 300 ($ 230 USD). The advantage for me was being able use the same lenses and batteries I already had for the EPL1.

Why buy a modified camera rather than use IR filters?

Filters are a great and relatively inexpensive way to get into IR photography, but they have their limitations.

The main attraction of a modified camera is that you are not limited to the long exposures needed for an IR filter. You can capture sharp images in any conditions, and can be more creative with your exposures (e.g. pick the perfect shutter speed for moving water). You can shoot handheld from any point of view without being limited by a tripod.

Enhancing your Black and White images with Infrared Photography

It is also much quicker. When using filters, you need set your focus before attaching the filter which can become tiresome.

I used to take my IR camera with me for a run along the river. Without the need for a tripod, I could travel light and take quick photos whenever an interesting composition presented itself.

Enhancing your Black and White images with Infrared Photography

What can infrared photography bring do for a landscape photographer?

Perhaps the most striking characteristics of infrared photography are the typical white vegetation, black water, and dark skies. You can create punchy, high contrast images. The middle of the day works best for these type of shots. Perfect for those landscape photographers that hate early mornings!

If you like capturing the complex patterns in clouds, you’ll find that the black skies really allow the clouds to stand out.

Enhancing your Black and White images with Infrared Photography

IR also gives you clarity. Any haze visible to the eye tends to disappear in infrared photography. So you can achieve a very crisp and contrasty look.

Enhancing your Black and White images with Infrared Photography

The deciding factor for me was tone. I found the infrared monos gave me a wonderful palette of greys and blacks to work with, particularly for trees and vegetation. The balance between light and dark just seems easier to manage in infrared and really lets you produce some unique images.

Enhancing your Black and White images with Infrared Photography Enhancing your Black and White images with Infrared Photography

Processing

So what processing should you use for infrared photography? The short answer is not much really. Experiment to find out what works for you.

Myself, I don’t normally use Lightroom or Photoshop, so my workflow may be a little different than yours. But the principles will be the same.

I import my raw images into Corel’s AfterShot Pro, which is a handy little raw file editor. Here I’ll straighten the image, adjust the exposure, and maybe increase the contrast if required. My infrared raw files come into AfterShot Pro displaying blue-grey hues, which is a good starting point for me. From here I export them as TIFFs into PaintShop Pro.

PaintShop Pro has a “Black and White Film” effect that lets you apply a colour filter to your image. Changing your filter between blue, red, and green gives a different result.

From here it is a matter of personal taste adjusting the light and dark of your image, the white and black points to suite the image, and maybe applying curves as appropriate.

Enhancing your Black and White images with Infrared Photography Enhancing your Black and White images with Infrared Photography

What is the Secret Sauce?

Infrared photography is wonderfully clean and crisp. But what if you love that IR film look with a ghostly flare?
Don’t worry. PaintShop Pro has it in the bag. They have an “Infrared Film” effect that was probably created to make ordinary images look a bit infrared-ish.

But when you apply it to a proper infrared image as a starting point, you get a wonderful controlled flare effect. It doesn’t quite match the often spooky and surreal results Simon Marsden achieved with IR film, but it does get you a lot closer than anything else.

Enhancing your Black and White images with Infrared Photography

Enhancing your Black and White images with Infrared Photography

The flare can be applied to give a sense of mystery, mood, and surrealness that is hard to replicate any other way.
Enhancing your Black and White images with Infrared Photography

Are there any downsides to infrared photography?

Not really. The only big drawback you’ll find is that you cannot use your favourite filters. Standard neutral density and polarizers do not work in the IR spectrum. If you sky is very bright and your subject is dark, you’ll just have to blend a few different exposures. Shooting in RAW of course gives you more leeway, but my Olympus files are not as forgiving as my Nikon files when recovering blown highlights.

Enhancing your Black and White images with Infrared Photography

The only other thing I notice is that some people get so enamoured by the white leaves and black sky effect that they forget to put their attention on the composition. Yes, everything looks cool in IR, but don’t take pictures of everything. Aim for strong compositions and uncluttered images. IR really shines with a minimalist approach.

Enhancing your Black and White images with Infrared Photography

Many dismiss infrared photography as an oddity; a strange niche that is a bit too left of centre for them. Others just think it is too hard and expensive to get into.

But if you like creating black and white images that stand out from the crowd, I’d suggest you have a crack at it. You’ll find it a challenge but also quite rewarding.

Enhancing your Black and White images with Infrared Photography

The post How to Enhance your Black and White images with Infrared Photography by Matthew Larsen appeared first on Digital Photography School.


Digital Photography School

 
Comments Off on How to Enhance your Black and White images with Infrared Photography

Posted in Photography


5 Tips for Shooting Glass to Enhance Your Street Photographs

20 Dec

As any studio photographer will tell you, photographing translucent and reflective objects like glass for product work can be an ordeal. It’s not impossible, but it sure isn’t easy, with plenty of variables and tricky reflections to minimize and avoid.

Naturally, you can imagine my foray into street photography was both a welcome change and a culture shock. Stepping out of the studio and into the realm of street photography, I went from an incredibly controlled environment to anything but! That’s when I began to view glass in a different light. Yes, the very bane of many a studio photographer’s existence can actually be a street photographer’s blessing.

Shooting through glass

Photographing through glass lends unique perspectives, like this photo of a gecko hanging upside down on a glass enclosure.

There aren’t many fixed objects that pose opportunities as readily to a street photographer as glass. As photographers, we all (mostly) use glass in our lenses as its inherent properties focus light and correct optical aberrations, allowing us to record sharp images. Glass surfaces in the street, however, present a variable and volatile abundance of opportunity. It can soften, reflect, highlight, disguise, frame, and transpose. Glass constantly changes with the environment yet it behaves as a physical barrier between the photographer and subject, allowing for a degree of ease between the two.

For the sake of this article, I’ve narrowed the benefits of glass to only the most obvious and dramatic – color, pattern and texture, reflections and depth, glass as a physical barrier, framing and finally, distortion and perspective. Okay, so I combined a few points, but you’ll soon see that glass isn’t just for selfies and reflections. Shooting through glass can actually change up your practice and give you a whole new perspective on street photography.

1 – Color

photography-through-glass05

The saturated red of the glass between the subject and I adds a sense of voyeurism.

Color greatly influences how a viewer reads an image. Shooting through colored glass is a great way of adding atmosphere to your photographs without post-production. Red glass, like that found on decals or nightclubs, suggests a sense of intimacy or passion, whereas blue could suggest an aquatic or daylight setting. Color eludes to the time of day a photograph was taken and a highly saturated image can also take on a surreal appearance, distancing the viewer from the photograph and creating a feeling of voyeurism. Try photographing subjects through tinted feature walls at late-night shopping malls or through the aged glass of old windows.

photography-through-glass06

2 – Pattern and texture

Using pattern and texture in a photograph explores how an image feels as well as how it looks. Textural images appeal to our sense of touch and it allows photographers to form greater connections with an audience. Photographing textured, semi-opaque and reinforced glass divides an image into smaller sections. This prompts a viewer to dissect an image in pieces to gain a greater understanding of the whole.

Different textures are great for images with organic and inorganic subject matter too. Creating juxtapositions that draw attention to subjects that are usually discounted creates engaging subject matter. Texture also affects the way light interacts with glass, softening the subject matter behind it and emphasizing form and shape over content.

photography-through-glass04

The rough, reinforced glass in the foreground of this image highlights the soft, organic form of the plant in the background.

photography-through-glass07

3 – Reflections and depth

Want to add context to a portrait but running low on legroom? Reflective glass windows are a great way to add depth to a photograph. Reflections in glass create a greater sense of atmosphere and give the viewer more information about an image. The characteristics of reflected light add tonal variety to a photograph, drawing a viewer in for a closer look. The closer you are to a glass surface, the less it will reflect, try stepping back or shifting the camera angle. Stepping back also has the added bonus of minimizing your chances of disturbing a potential subject.

photography-through-glass02

This photograph features a woman inspecting an eel in a shop window, but also includes a reflection of the street, adding depth and a greater sense of context.

4 – The invisible wall

In my time as a street photographer, I’ve noticed an interesting psychological phenomenon. When I’m photographing subjects through transparent panes of glass – people are much more at ease. Photographing people through a glass window or panel seems to add a degree of separation. My theory is that when there is a physical barrier between you and the subject, people subconsciously feel more comfortable. Glass reduces noise and light, creating a physical partition that lures people into a sense of security.

I find that when separated by a pane glass people are more likely to look directly into the lens too, allowing their curiosity to run a little freer behind a physical partition. Some of the most natural street portraits I have taken have been through glass partitions and windows. Train rides offer an excellent opportunity for unencumbered street photography.

photography-through-glass12

Taken from a train window, the subject and I had a bit of a stare-off before I took this shot.

Also taken from a train window, this child was watching my train leave the station. I was quick enough to place my camera against the glass to capture her looking back at me.

5 – Framing and perspective

Emphasizing the photographer’s point of view can lend a voyeuristic atmosphere to an image. Framing is the use of shapes in the environment to guide the viewer’s eye to a point in a photograph. Photographing through glass partitions or windows emphasizes that you have captured a moment without prompting a subject, like looking through a keyhole.

Viewing a subject photographed from above feels different to viewing a photograph taken from below. One great way to take advantage of glass’s transparent nature is to focus on various animals’ attraction to transparent surfaces. Inhabitants of urban landscapes such as lizards, frogs, spiders, snails and insects all negotiate glass surfaces with ease.

A photographer with a keen eye can exploit these opportunities to capture unique perspectives of our fellow city-dwellers. Like humans, animals seem more at ease with a wall of glass to separate them from potential predators, allowing you the chance to capture a more natural photograph.

photography-through-glass13
photography-through-glass11

photography-through-glass03

Distortion

Light traveling through glass often behaves in surprising and interesting ways. If light touches even the most minute curved surface it refracts, distorting anything viewed through it. Planning a shot in front of a pane of glass can yield fascinating and surrealistic photographs.

Try experimenting with different thicknesses of glass at varying degrees of curvature. Aquariums and aquatic displays are good for honing this technique because the water inside the glass containers amplifies the distortion. Holding variously shaped prisms over the front of your lens can yield some surprisingly effective and interesting results too.

photography-through-glass08

Conclusion

Transparent, opaque, tinted, laminated, textured, reinforced… there are endless varieties of glass and each presents a unique opportunity for you as a photographer. Although I’ve tried to list a few of the more dramatic ways to use glass in street photography, the potential is limitless and exciting.

photography-through-glass14

They key to taking great street photographs is to be open to opportunity and quick on the shutter button. With limited time to capitalize on the moments that are presented to you, focusing on surfaces like glass that can yield fascinating results quickly and is a fool-proof way of enhancing your craft.

googletag.cmd.push(function() {
tablet_slots.push( googletag.defineSlot( “/1005424/_dPSv4_tab-all-article-bottom_(300×250)”, [300, 250], “pb-ad-78623” ).addService( googletag.pubads() ) ); } );

googletag.cmd.push(function() {
mobile_slots.push( googletag.defineSlot( “/1005424/_dPSv4_mob-all-article-bottom_(300×250)”, [300, 250], “pb-ad-78158” ).addService( googletag.pubads() ) ); } );

The post 5 Tips for Shooting Glass to Enhance Your Street Photographs by Megan Kennedy appeared first on Digital Photography School.


Digital Photography School

 
Comments Off on 5 Tips for Shooting Glass to Enhance Your Street Photographs

Posted in Photography


3 Photoshop Elements Tutorials to Help You Correct and Enhance Your Images

14 Dec

We’ve noticed on our current reader survey (if you haven’t filled it out already, please do so here) that many of you are using Photoshop Elements. So I rounded up some video tutorials to help you use Elements (15 or any older version) to help you make corrections and enhancements to your images.

#1 How to brighten and improve a dull photo

George Peirson from How To Gurus walks you through several steps you can apply to make a dull photo more exciting. He covers things like working with adjustment layers so you can work non-destructively, adding more color in certain areas, layer blending modes, and more.

#2 How to remove people using the clone stamp tool

Sometimes you can get unwanted people in your shots. In this video you can learn how to remove them using just the clone stamp tool in Photoshop Elements.

#3 How to create a motion blur effect using Elements

In this final video learn the steps to add motion to an image using different blur effects in Photoshop Elements. The example used is a race car that was frozen with a fast shutter speed.

If you use Photoshop Elements I hope these videos have helped you out, and you have learned a couple new things. Many things that you can do in Photoshop, can also be done in Elements. Some of the tools and menus are a bit different but many of the features are similar. Elements also offers a “guided” user experience to help you walk through doing some common things.

If you want to learn more try the Adobe website where they have more tutorials and articles on Elements.

For more Photoshop help try these dPS articles:

  • How to Add a Sun Flare to Your Images Using Photoshop
  • How to do Non-Destructive Editing in Photoshop
  • An Introduction to Photoshop Layers Possibilities and Properties
  • Tips for Using the Blur Filters in Photoshop
  • 2 Simple Methods for Adding Color to Your Images Using Photoshop
  • A Guide to Black and White Conversion in Photoshop

googletag.cmd.push(function() {
tablet_slots.push( googletag.defineSlot( “/1005424/_dPSv4_tab-all-article-bottom_(300×250)”, [300, 250], “pb-ad-78623” ).addService( googletag.pubads() ) ); } );

googletag.cmd.push(function() {
mobile_slots.push( googletag.defineSlot( “/1005424/_dPSv4_mob-all-article-bottom_(300×250)”, [300, 250], “pb-ad-78158” ).addService( googletag.pubads() ) ); } );

The post 3 Photoshop Elements Tutorials to Help You Correct and Enhance Your Images by Darlene Hildebrandt appeared first on Digital Photography School.


Digital Photography School

 
Comments Off on 3 Photoshop Elements Tutorials to Help You Correct and Enhance Your Images

Posted in Photography


How to Use Photoshop to Enhance Details in Your Photos

24 Jul

Do you think that your images lack details? Here is the way to extract the extra details that are already present in your photos, but are not visible, using Photoshop. Some methods like high pass sharpening will either give you a way too crunchy look or create halos around the edges of the different elements in your image. However, this Continue Reading

The post How to Use Photoshop to Enhance Details in Your Photos appeared first on Photodoto.


Photodoto

 
Comments Off on How to Use Photoshop to Enhance Details in Your Photos

Posted in Photography