RSS
 

Posts Tagged ‘Editor’

Photoshop Elements vs Photoshop: Which Editor Is Right for You? (2021)

07 Oct

The post Photoshop Elements vs Photoshop: Which Editor Is Right for You? (2021) appeared first on Digital Photography School. It was authored by Megan Kennedy.

Photoshop vs Photoshop Elements

Which editor should you pick, Photoshop Elements vs Photoshop?

It’s a tough question, and the answer will depend on your post-processing preferences. In this article, I’ll break it all down for you; I’ll compare and contrast Photoshop Elements and Photoshop and see where they both fit in the grand scheme of image editing.

By the time you’re finished, you’ll know which program is the better buy!

Let’s get started.

Photoshop Elements vs Photoshop: overview

Photoshop has become the industry standard for editing on Windows and MacOS systems – so much so, in fact, that the phrase Photoshop is now used as a verb. Photoshop gives users the ability to create and enhance photographs, illustrations, and other digital media. As a critical utility for graphic artists, photographers, designers, web developers, etc., Photoshop has become an integral part of many creators’ processes.

The Photoshop layout
Layout of Photoshop 2021

So where does Elements come in? Photoshop Elements is a simplified version of Photoshop, designed primarily for photographers who want a quick and easy way to edit and organize images. The program came out in 2001 (long after Photoshop first debuted), and is also great for consumers who are just getting started with photo editing.

The Photoshop Elements layout
Layout of Photoshop Elements 2021

While there are numerous incarnations in the Adobe Photoshop and Photoshop Elements lines, for this article, I’ll compare the most recent versions: Photoshop Elements 2021 vs Photoshop version 22.3.0.

Photoshop Elements vs Photoshop: key features

Now that you’re familiar with the purposes of both Photoshop Elements and Photoshop, let’s take a detailed look at what these two programs offer, starting with:

Price

While both Photoshop Elements and Photoshop are owned by Adobe, the sales models couldn’t be more different.

Adobe Photoshop Elements is sold as a one-off program, and the 2021 version will set you back about $ 100 USD. Photoshop Elements can be bundled with Premiere Elements 2021, a simplified video editing software (see the screenshot below). Upgrade pricing for existing Elements customers in the United States is also available.

Photoshop Elements pricing

Adobe Photoshop, on the other hand, is offered only as a (monthly or yearly) subscription. At present, the best value is the Creative Cloud Photography Plan, which includes Photoshop, Lightroom, Lightroom Classic, plus 20 GB of cloud storage, and costs $ 9.99 USD per month.

Creative Cloud pricing for Photoshop

Note that Adobe offers a 30-day trial of both Elements and Photoshop if you’d prefer to try before you buy.

Ease of use

Although Elements and Photoshop offer many overlapping features, Elements is geared toward an audience looking for a newcomer-friendly editing application.

Photoshop is the industry standard, but this can make it harder to approach for first-time users. Enter Photoshop Elements, which is designed to enable simple, streamlined editing processes while maintaining an accessible interface. This simplified application can help ease a budding creative into the world of digital editing without plunging them headfirst into a sea of pixels.

Bottom line: Photoshop is designed for in-depth, manual editing operations. Elements is a photo processor, better suited to quick and easy refinements that don’t require intensive editing.

Workspaces

Photoshop offers six pre-made workspaces for different creative requirements: 3D, Essentials, Graphic and Web, Motion, Painting, and Photography.

Photoshop Elements divides the editing process into three workspaces: Quick, Guided, and Expert:

Quick

In Photoshop Elements, Quick view is a simplified interface with basic adjustments. This layout lets you quickly perform common editing tasks and includes basic photo editing tools neatly distributed across the workspace.

Quick mode enables users to access the Healing brush, fix exposure, sharpness, color, and lighting, and even provides the option to apply effects, filters, enhancements, textures, and frames.

Elements Quick interface
The Quick interface of Adobe Photoshop Elements.

Guided

The Guided workspace offers step-by-step instructions for Photoshop Elements users. With over 50 tutorials and counting, this workspace will help you apply a range of effects to a photograph.

Elements Guided interface
The Guided interface with editing functions to select.

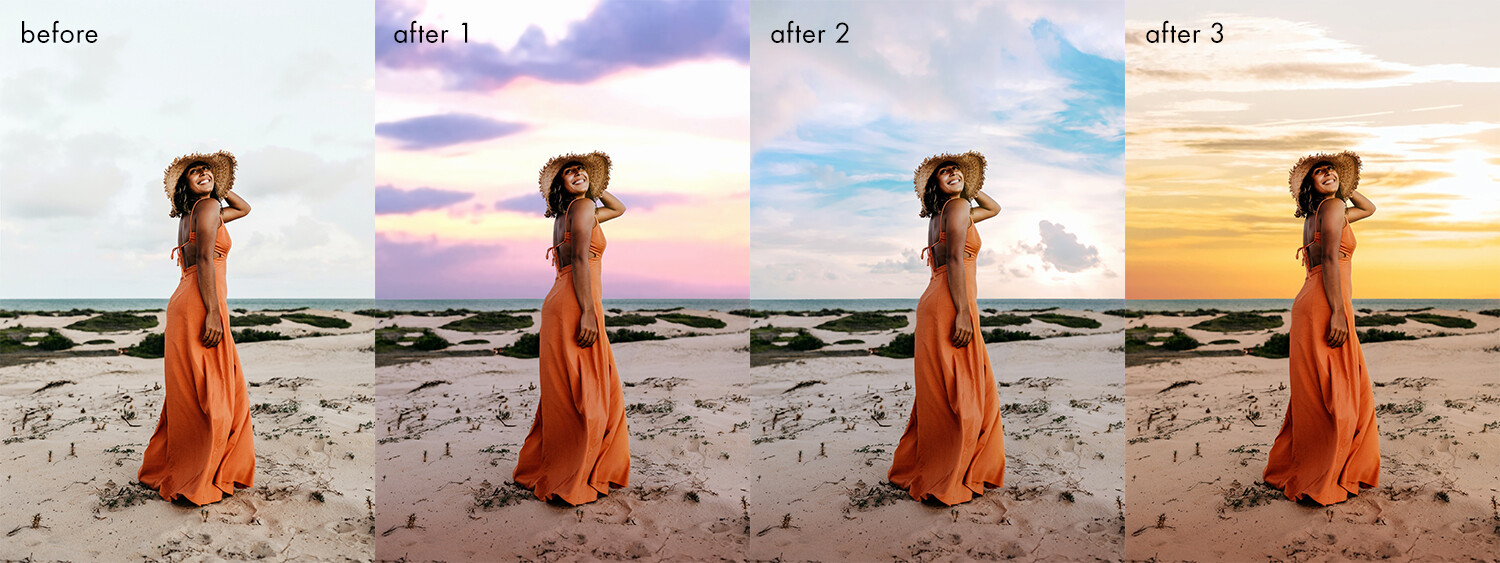
With the option to introduce Tilt-Shift, Black and White, Orton, and Lomo effects (and many more) to an image, Guided provides a user-friendly interface for applying relatively customizable effects.

To access these tutorials, switch over to the Guided interface in Photoshop Elements, pick an effect, and go from there.

Black and White effect Elements
The Guided interface with the Black and White effect in action.

Expert

Expert mode is designed for users who are more experienced with image editing. The Expert view unpacks all of the editing tools available in Photoshop Elements and neatly organizes them around the user interface:

The Expert view in Elements.
Photoshop Elements interface in Expert view.

Expert mode has an expanded range of tools compared to Quick mode, enabling you to apply complex editing effects. Draw and Enhance tools, Graphics, Layers and Styles, Histograms, additional Filters, History, and more are all available in the Expert workspace.

Other tools and functions

While Photoshop Elements packs a considerable amount of power, some tools are still reserved for Photoshop. For instance, chromatic aberration correction, which fixes unwanted fringing, is a Photoshop exclusive.

Elements doesn’t support vector formats, either – so the Pen tool, which creates advanced paths and shapes, is not an Elements feature. (Because Photoshop supports vector and raster files, users can add vector-based Smart Objects into a Photoshop file.)

In addition, Elements doesn’t offer the Content-Aware Patch tool (which sources nearby content to blend a region with the surrounding image area) or the Channel Mixer (which is often used for advanced black and white conversions).

Other significant differences include the lack of 16-bit and 32-bit image support in Elements. Lens geometry profiles aren’t included in Elements or in the accompanying (and also pared-back) Camera Raw utility.

Sample moving photo

A new feature in the 2021 version of Elements is the AI-powered Moving Photos function (used to turn static pictures into moving GIFs, as displayed above). While GIFs can be created in Photoshop, the process is a little less streamlined, though Photoshop does offer more flexibility in making these GIFs.

Printing

An additional point of difference in the Photoshop Elements vs Photoshop comparison is printing. Unfortunately, Elements is missing a few key features for professional print production. Unlike Photoshop, Photoshop Elements can’t export files in CMYK, and the program also excludes in-depth soft-proofing.

Plus, Elements supports a simplified color management system compared to Photoshop; while Elements has RGB, Grayscale, Bitmap, and Indexed Color, Photoshop features all of the aforementioned color options, but also Duotone, CMYK, Lab, and Multi-Channel, which allows for greater control when printing.

Elements vs Photoshop: the two programs compared
A game of image modes! Photoshop on the left, Photoshop Elements on the right.

Time management

Photoshop can be more labor-intensive than Photoshop Elements, though the number of guided edits available in Photoshop Elements do streamline the process.

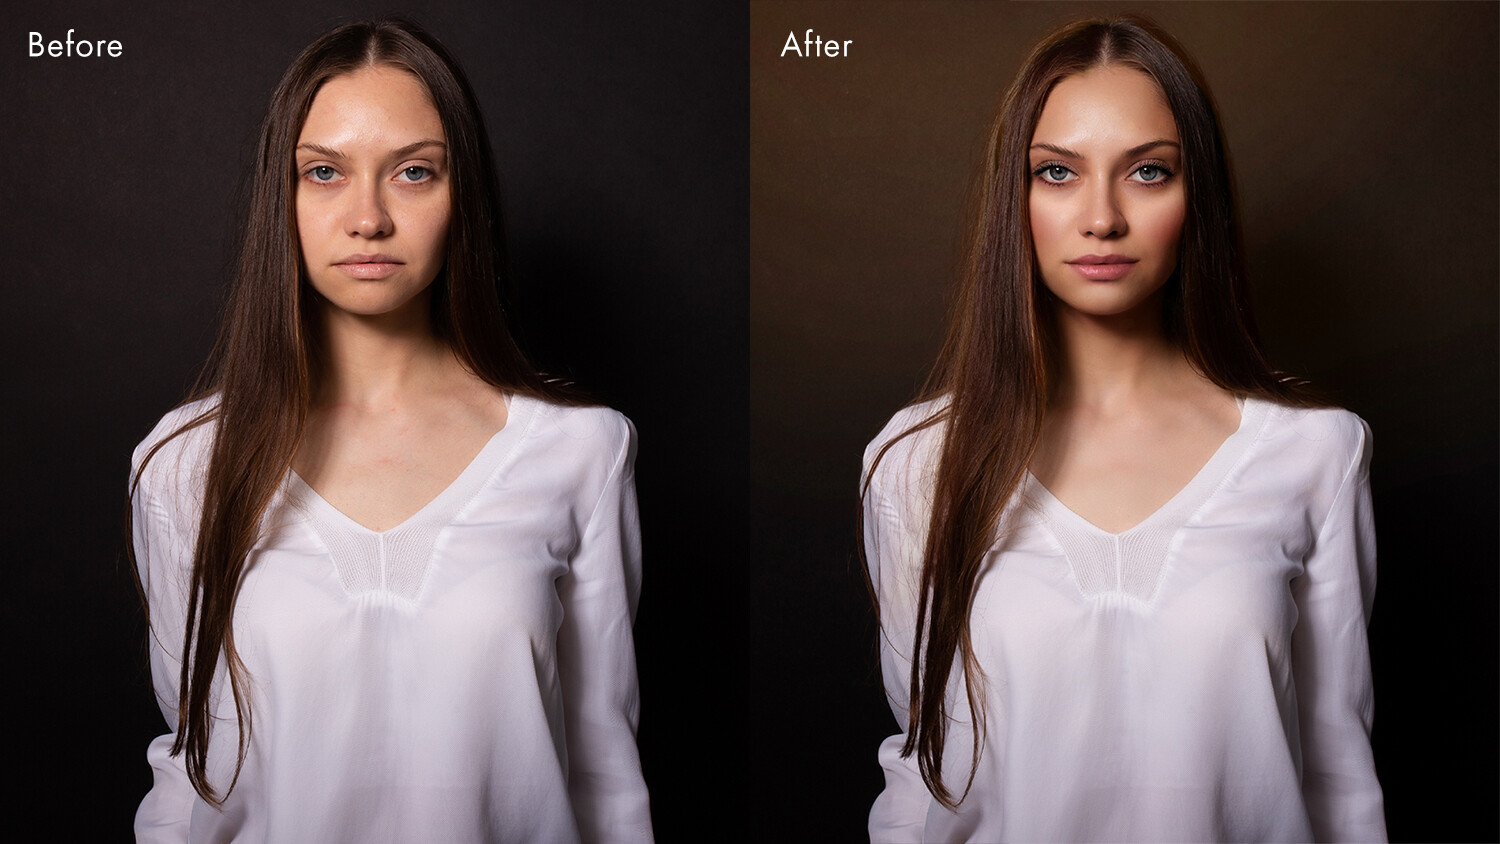
However, although Elements includes quick, automated processes and adjustments, it sometimes sacrifices the manual customizability and creative precision achieved through editing in Photoshop. Put simply, the hands-on approach of Photoshop can pay off, depending on the level of tweaking you require to create an effective image.

Photoshop Elements vs Photoshop: final words

Photoshop can create stunning photographic work, but that doesn’t rule out the capabilities of Photoshop Elements. While Photoshop Elements offers to do the heavy lifting with a few clicks of the mouse button, Photoshop proper offers a larger range of detailed editing features.

Ultimately, if you’re looking for a simple editing program, Elements works well. However, creative professionals in need of precision editing software should jump for Photoshop instead.

Photoshop Elements vs Photoshop FAQs

What is the difference between Photoshop Elements and Photoshop?

Put simply, Photoshop Elements is a simpler version of Photoshop. Elements is easier to use but lacks the full-fledged creative control that Photoshop delivers.

Who uses Photoshop Elements?

Photoshop Elements is primarily aimed at beginner or intermediate users looking to edit photographs. Professional photographers and designers generally invest in Photoshop for more in-depth editing capabilities.

What are some features in Photoshop that aren’t in Photoshop Elements?

There are a good amount of utilities available in Photoshop Elements, but some tools are still reserved for Photoshop. Chromatic aberration correction, the Content-Aware Patch tool, and the Channel Mixer don’t feature in Elements. Elements doesn’t provide vector format or 16-bit and 32-bit image support. Lens geometry profiles aren’t included in Elements or in the accompanying Camera Raw utility. Photoshop Elements can’t export files in CMYK, Lab, Duotone, or Multi-Channel color modes.

How much does Photoshop and Photoshop Elements cost?

Adobe Photoshop Elements 2021 costs around $ 100 USD for a full license. Photoshop is only available as a subscription, which costs $ 9.99 USD per month (at minimum).

The post Photoshop Elements vs Photoshop: Which Editor Is Right for You? (2021) appeared first on Digital Photography School. It was authored by Megan Kennedy.


Digital Photography School

 
Comments Off on Photoshop Elements vs Photoshop: Which Editor Is Right for You? (2021)

Posted in Photography


Lightroom vs RawTherapee: Which Editor Should You Pick?

23 Sep

The post Lightroom vs RawTherapee: Which Editor Should You Pick? appeared first on Digital Photography School. It was authored by Ana Mireles.

Lightroom vs RawTherapee: which editor is best?

Looking for a top-notch photo editor, one that offers a combination of power, user-friendliness, and organizational chops? Lightroom and RawTherapee both fit the bill, but it can be tough to determine which option is perfect for your needs.

And that’s where this article comes in handy. I’ll break down the main aspects of these two programs, from the ease of use to the costs and benefits.

So if you’re ready to determine which program is better, Lightroom vs RawTherapee, then let’s get started.

Lightroom vs RawTherapee: overview

Lightroom and RawTherapee are both photo editing programs with advanced RAW processing capabilities. In fact, Lightroom is one of the most popular choices in the photography world, though many people are put off by Adobe’s subscription model. RawTherapee is less well known, which makes finding learning resources difficult, though the program itself is (get this!) free.

As far as I’m concerned, you can’t go wrong with either option – they both work nicely, though they cater to different types of photographers. Let’s take a closer look.

Ease of use

Is Lightroom the easier program to use, especially as a beginner? Or is RawTherapee the better buy?

Download and installation

Getting started with Lightroom

To install, purchase, and download Lightroom, you’ll need to set up an Adobe account. You’ll also need to navigate through the different plans available and decide which one works best for you. This isn’t as straightforward as you might like; it can be tough to fully understand the difference between some of the options.

Once you’ve decided on a plan, you can subscribe by providing a Paypal account or a credit card. Alternatively, you can start a free trial. Then you’ll need to follow Adobe’s instructions to install the Creative Cloud – necessary for any Adobe app – and then, from the Creative Cloud window, install Lightroom.

RawTherapee home page

RawTherapee is a free open source program. To download it, simply go to the RawTherapee website, choose your operating system, and click Download. You’ll receive the software, which you can install like any other program. You’ll also get a “manual,” which is actually a link to a page with information and tutorials. And if you want an older version of RawTherapee, just click Downloads on the home page to see the entire set of available programs.

Interface

Lightroom Library

Lightroom has seven modules, though the most used ones are the Library module (to manage your files) and the Develop module (to edit your images). The remaining modules are for specific uses and are fairly self-explanatory – for example, Book lets you design photo books, Print lets you prepare prints, and so on. Lightroom’s standard tools are clearly marked, but it might take some time for you to fully explore the interface.

RawTherapee File Browser

RawTherapee is also user friendly, although experienced photo editors may find its lack of similarity to other programs off-putting. By default, it opens in the File Browser section, which is very straightforward and like Lightroom.

On the left side, you’ll find the tabs to change the screen. There’s an Editor screen – to edit your photos – and a Queue option – to export your edited images.

You should be able to apply your first edits without help, but it will take some time and effort to understand RawTherapee’s full potential.

Information and tutorials

Lightroom tutorials

Adobe provides a wide variety of Lightroom video tutorials that will guide you from beginner to pro. And since it’s the most popular photo editing software on the planet, you’ll find countless YouTubers explaining how to do practically anything you can think of. Written tutorials are also available from the official Adobe site, as well as third-party websites (such as dPS!).

RawPedia tutorials

RawTherapee has a RawPedia with all the information you need to get started and perfect your skills, and the material is available in multiple languages. Like most open-source programs, there’s also a big community behind RawTherapee that’s happy to share its knowledge and help you with any problems.

Cancellation

Lightroom is a subscription-based software, and in most cases, plans are annual. If you cancel before the end of your yearly subscription, you’ll be charged 50% of the remaining months of the membership. After that, you can keep up to 2 GB of storage in the cloud, and you’ll have 90 days to delete any files that exceed the limit. You’ll then have a year to export your edited images from Lightroom, but you can’t make any more changes.

Since RawTherapee doesn’t require a subscription, you can simply delete it from your computer (and re-download it) at will. After deleting the program, you’ll still have your original files, and if you exported your edited photos, you’ll have those, too.

Workflow

Both Lightroom and RawTherapee offer complete workflows; you can organize, edit, and export your files, all within the program.

File management

Lightroom file management

When you import images, Lightroom creates a catalog, which it uses to save your edits. You can create collections and search for your photos by keyword, EXIF data, tags, etc. The downside to this is that it works independently from your computer and hard drive – if you move a file outside Lightroom, the program won’t be notified and will subsequently fail to find the image.

All Lightroom edits are stored in an LRCAT file, which contains all the catalog data. That’s why moving a file to another location means losing the edits; even if you import it again, Lightroom won’t associate the new file with the original edit.

RawTherapee file management PP3 file

RawTherapee uses a file browser; this means you don’t need to import files, plus you can move them around outside of the program and still be able to find them again.

Edits are stored in PP3 sidecar files. As long as you copy the PP3 file together with the original image, you’ll always have the edits, even in a new location. Also, you can manage your photos with tags and ratings (the same as in Lightroom).

Photo editing

Lightroom Develop module

To edit your photos in Lightroom, you must import them and open the Develop module. Here, you’ll find tools to manage your files and edits along the left-hand side – for example, the Navigator and the History panel. The image is displayed in the center, and you’ll see all edits applied in real-time.

On the right, you can access all the editing tools, starting with the Basic panel and its essential sliders (e.g., Contrast, Exposure, Saturation, and Clarity). The next sections are designed for advanced editing, and Lightroom offers several tools for targeted adjustments as well. If that’s not enough, you can always send the image from Lightroom to Photoshop (assuming you get Photoshop as part of your membership plan).

RawTherapee Editor module

The RawTherapee Editor module is divided into three panels. On the left, you have Preview, History, and Snapshots; in the center, you have the image; on the right, you’ll find the editing tools.

In RawTherapee, you can do all the standard basic edits and many advanced ones, too. If this isn’t enough and you need to work with layers, you can link RawTherapee with Photoshop, or with GIMP if you prefer to stick with free and open-source programs.

Batch editing

editing in Lightroom

In Lightroom, batch editing is easy. You can use presets, which are automated sets of adjustments, to apply the same edit to multiple images, and there are tons of free and paid presets out there for you to choose from (or you can make your own). You can also batch edit by syncing adjustments from one photo to other photos in the Filmstrip. Another choice is to copy-paste the Develop settings.

batch editing in RawTherapee

RawTherapee also offers batch editing. You can copy and paste the same processing profile to multiple images in the Editor module, or you can batch edit in the Browser module via the batch-adjust option.

Saving and exporting

Exporting files in Lightroom

Lightroom doesn’t have a Save option. To get your edited photos out of Lightroom and save them to your computer or external hard drive, you need to use the Export button in the Library module or select Menu>Edit>Export.

RawTherapee exporting

In RawTherapee, you have two ways of saving your images. If you click on the hard drive icon, you can save the image immediately (as you can do with the Save As option in any standard program). However, this can “distract” your CPU resources and slow down your work, which is where the Queue comes in.

If you send the images to the Queue (which you can access from a tab on the left), you’ll have the benefit of processing all of your images at the end, making the most of your time and your computer’s power.

Cost

Lightroom pricing

Technically, Lightroom can’t be bought; you can only purchase a membership that allows you to use it. Depending on the membership plan and the way you pay (monthly or annually), the price can vary, though it starts at $ 9.99 USD per month.

All Photography plans include Adobe Lightroom, Cloud storage (from 20 GB to 1 TB), Adobe Spark, and Adobe Portfolio. Some upgraded plans may include Lightroom Classic, Photoshop, and other Adobe apps.

With a personal membership, you can download the program on two computers, but you can’t use them at the same time. Whenever you install Lightroom, you also need to download and install Creative Cloud.

RawTherapee pricing

RawTherapee is completely free, and you don’t even need to register before downloading. You get the full software, which you can install and use on as many computers as you want. It can also be installed on a portable hard drive.

Lightroom vs RawTherapee: which program should you buy?

RawTherapee vs Lightroom

As you can see, Lightroom and RawTherapee are both great for processing RAW files and editing pictures. The choice between them comes down to needs and personal preference. Let me go through some example scenarios to help you understand:

If you often edit your photos on your phone and like to easily move from your mobile devices to your computer, you’ll be better off with Lightroom, as there isn’t a mobile version of RawTherapee – though make sure you use Lightroom CC, not Lightroom Classic.

If you have an old computer or you are running low on storage space, you should definitely use RawTherapee. Not only is it lighter, but you only have to download one app, not two (as is required by Adobe).

If you only plan to edit on occasion, you might wish to avoid a monthly fee. In this case, RawTherapee is the software for you.

There are many things to consider when you choose between Lightroom and RawTherapee. Hopefully, this article gave you enough information to make the right decision!

Now over to you:

Have you tried Lightroom? How about RawTherapee? Which did you prefer? Share your thoughts in the comments below!

Lightroom vs RawTherapee FAQs

Is Lightroom better than RawTherapee?

Neither program is better than the other. They are both excellent tools and the choice really depends on personal preference, budget, etc.

Is RawTherapee a good alternative to Lightroom?

Yes. RawTherapee is a fantastic program, whether you are an editing beginner or you want to switch over from Lightroom.

Do I need to stop using Photoshop if I change from Lightroom to RawTherapee?

No. Using the Edit Current Image in External Editor option, you can send your files from RawTherapee directly to Photoshop. You can also send them to GIMP and other editors.

Can I watermark my images using RawTherapee?

No. To watermark your images, you need to use another free program, such as Darktable.

Is there a free version of Lightroom?

Lightroom offers a free trial before purchase – but after the trial is over, you need to buy an Adobe membership. Lightroom Mobile has a free version, but some of its features are only enabled with a paid subscription.

Can I use RawTherapee if I don’t shoot in RAW?

Yes. RawTherapee not only supports most RAW formats, but also JPEG, TIFF, PNG, and other common image file types.

The post Lightroom vs RawTherapee: Which Editor Should You Pick? appeared first on Digital Photography School. It was authored by Ana Mireles.


Digital Photography School

 
Comments Off on Lightroom vs RawTherapee: Which Editor Should You Pick?

Posted in Photography


How to Take the Perfect Selfie: The Right Angle, Lighting and Photo Editor

19 Sep

Taking great selfies requires the right light, angle, setting, and editing. Getting a great shot is so much more than just clicking a button. It requires skill, practice, and good technique. Come along and learn how to master the art of the perfect selfie using photography tricks and tools described below. In general, a great selfie is shot using an Continue Reading
Photodoto

 
Comments Off on How to Take the Perfect Selfie: The Right Angle, Lighting and Photo Editor

Posted in Photography


Affinity Photo vs Luminar: Which Editor Is Best in 2021?

09 Sep

The post Affinity Photo vs Luminar: Which Editor Is Best in 2021? appeared first on Digital Photography School. It was authored by Dawn Gilfillan.

affinity photo vs luminar: which is best?

Are you struggling to choose between Affinity Photo vs Luminar 4? We’ve got you covered.

In this article, we’re going to take a careful look at these two programs and evaluate their features, prices, user friendliness, and more. So whether you’re looking to buy your first image editing program or you want to upgrade from different software, you’ll leave knowing which of these programs is the better buy.

Let’s jump right in, starting with a quick overview:

Affinity Photo vs Luminar: overview

Both Affinity Photo and Luminar 4 offer a lot of functionality for the price. Interestingly, many of their features are worlds apart, though the programs do offer RAW support and conversion for photographers working with RAW files.

Affinity Photo

Affinity photo vs luminar

Affinity Photo’s goal? To be Photoshop on a budget. The program offers plenty of advanced features and tools (like channel mixing, liquify, and masking options) for fine-tuning and high-level image retouching. Affinity Photo also caters to graphic designers, thanks to its array of text tools and other design-centric features.

(In fact, if you’ve ever used Photoshop, Affinity Photo will certainly look familiar!)

Pros

  • A huge array of tools and adjustment features
  • Batch processing
  • RAW support
  • 90-day free trial
  • Focus stacking, panoramas, HDR, and astrophotography tools
  • Print and canvas options

Cons

  • No image management or organization features
  • Beginners may struggle to make sense of the layout
  • Not many presets, overlays, or LUTs available inside the software; here, the internet is your best bet

Luminar 4

affinity photo vs luminar

Luminar 4 takes a different approach to image editing. While it offers some similar features, such as layers and blending modes, it’s based around creative enhancements using Luminar Looks (Skylum’s version of presets), LUTs, and AI editing tools.

Luminar catalog

Unlike Affinity Photo, Luminar packs a photo organization panel. It’s very user friendly and easy for beginners. However, more experienced image editors and retouchers will miss a lot of advanced tools, such as in-depth compositing options, text tools, channel mixers, and LAB color.

Pros

  • Image library and organization
  • Very easy to use
  • Lots of built-in presets (Luminar Looks) and LUTs
  • Creative editing options (AI Sky Replacement, Sunrays, texture overlays, etc.)
  • RAW support
  • Integration with SmugMug, 500px, and more
  • Batch processing

Cons

  • Not many advanced editing tools, and some (like Dodge & Burn) are not the most accurate for detailed retouching work
  • No text or graphics tools

Layout and ease of use

Which has the better interface and ease of use, Affinity Photo or Luminar? Let’s take a closer look:

Luminar 4

Luminar welcome screen

The home screen in Luminar is well-designed. Although there is a lot crammed into the space, it isn’t overwhelming. Hover your mouse over an icon to learn what it is, and click to view the workspaces (which are organized into different categories: Essentials, Creative, Portrait, and Professional).

The Luminar Looks presets show up as a film strip along the bottom of the screen, so you can see from the thumbnails how a preset will look before applying it. You will also find different categories of Looks, including Aerial, Portrait, Landscape, and Dramatic. A handy button on the top menu bar lets you see the Before/After split screen, and I find this really useful for determining whether I’ve gone too far with my edits.

Luminar Edit module

There are plenty of tutorials available for Luminar 4 beginners, and the welcome screen gives you a quick run-through on importing images when you open the program for the first time.

Affinity Photo

Affinity Photo editing

As mentioned earlier, Affinity seems to have emulated Photoshop’s layout, which is fine if you’re already used to the Photoshop-style interface, as you’ll have an idea where each tool is and what it does. If you’re a beginner, though, it’s a bit of a steeper learning curve compared to Luminar.

Affinity Photo editing

Instead of workspaces, Affinity Photo uses something called Personas. There’s one for Photo, Liquify, Develop, Tone Mapping, and Export. Click on your chosen Persona to see the tools you’ll need for the job; for instance, in Develop, the huge plethora of tools down the left-hand side of the screen are replaced by a few editing essentials, perfect for getting basic editing processes out of the way.

You won’t find many presets in Affinity Photo, but you will find tools like Mesh Warp, Pen, Rectangular Marquee, and Clone Stamp. There’s only a limited range of built-in LUTs, but you can always find more on the internet. Plus, Affinity Photo offers every kind of advanced editing/retouching/graphic design tool you can imagine, as well as printing options.

Editing tools

Which program offers superior editing capabilities? It’s a close call.

Luminar 4

Luminar 4 utilizes AI technology for some of its editing tools, including AI Sky Replacement and AI Augmented Sky. With Luminar, it’s all about getting your editing done quickly and with minimum fuss, and the AI tools work okay, but I still have some reservations. At full strength, they often look a bit too strong, though you can always adjust the strength slider for a more natural look.

I’m impressed by the AI Sky Replacement (and had a lot of fun playing around with this!), plus there’s a huge range of skies to choose from, including sunsets, starry skies, and bright blue skies. I used a landscape shot of the beach and sea to test the sky enhancement functions, though you should be careful when applying AI Sky Replacement to images with objects along the horizon.

Luminar Essentials

Interestingly, the Luminar workspaces cater to different types of photographers. In the Essentials workspace, you’ll find all the basic (essential!) adjustment tools like Exposure, Highlights, Shadows, Smart Contrast, Denoise, and Saturation. There are also more advanced tools, including Details Enhancer, Vignette, and B&W Conversion.

The Creative workspace is where you’ll find all the fun special effects, including Glow, Fog, Sunrays, and AI Sky Replacement. The Portrait workspace has tools for enhancing eyes and whitening teeth, while the Professional workspace offers tools like Split Toning, Advanced Contrast, and Adjustable Gradient.

Luminar Looks

One of the big things missing from Luminar 4 is a set of selection tools, but unless you specifically need these, it shouldn’t be a deal-breaker.

Affinity Photo

Affinity Photo has a panel titled Adjustment, which includes basic enhancements such as Brightness, Levels, White Balance, and Contrast, along with advanced tools like Split Toning, Channel Mixer, LUT, and Threshold. Like Luminar 4, you can preview different editing effects before actually applying them.

Plus, you can easily combine adjustments and effects. Affinity Photo treats every adjustment as a layer, allowing you to control the opacity and blend modes for more creative control. One of the cool features offered in Affinity Photo – and absent from Luminar 4 – is the Tone Mapping tool. This creates an HDR image, which opens in a new window with a range of tone-mapped styles to choose from, including Natural, Detailed, and Dramatic.

Affinity Photo editing

Finally, the Develop Persona is used for RAW file editing, and it features tools such as Lens Corrections, Noise Reduction, and Chromatic Aberration Reduction.

Also note that exporting is easy with Affinity Photo. You get a big range of options to choose from:

Exporting in Affinity Photo

Bottom line: Affinity is bursting with tools for the advanced image editor. Some elements are even as good as Photoshop but at a significantly cheaper price. No, it’s not an editor I would recommend for a beginner, but it will probably suit those looking for more than automatic adjustments and a slew of presets.

Speed and performance

The power of your computer and graphics card make a big difference when using photo and video editing software. Both Affinity Photo and Luminar 4 are processor-intensive programs, so make sure you have enough memory available before hitting the download button.

I use a Windows 10 laptop that is more than capable of running both programs at once, but I trialed each program separately to see how well they performed. Luminar froze on occasion, but was faster to load images and adjustments than Affinity Photo. Affinity froze on me several times, and I did get the dreaded “Program not responding” message, but it was simply a case of waiting for a few moments before it started working smoothly again.

Price

When Adobe changed Photoshop and Lightroom over to subscription-only models, they annoyed a lot of photographers. In response, many software developers created their own one-time-license programs – including the makers of Affinity Photo and Luminar.

Both programs can be bought for a one-off price. Affinity costs just $ 54.99 USD (great value for the money, in my view). And you can install Affinity on up to two computers for individual commercial use, or up to five computers for home non-commercial use. Bear in mind that, if you have both Mac and Windows devices, you’ll have to buy a separate license for each operating system.

Luminar starts at $ 79 USD and can be installed on up to two computers (depending on the version you get). A single license can be used on a mixture of operating systems, so if you have both Mac and Windows computers, you’ll appreciate this extra convenience.

Affinity Photo vs Luminar: Which program is right for you?

Affinity Photo Layers

Both Affinity Photo and Luminar 4 are worth considering. However, you must determine what’s important to you before buying.

For instance, if you like quick, easy fixes, presets, image organization, and a whole workflow from start to finish, then Luminar 4 may suit you best. It’s easy to save your own custom presets for use on multiple images, too (which is a big time-saver if you need to apply the same style and color to shot after shot). Luminar 4 is a lot of fun to use, and it’s also beginner friendly.

Luminar Essentials edits

If you need to do deeper, more detailed edits or retouching, Affinity Photo is the better option. It’s also good for unique, creative images, thanks to tools such as liquefy, painting, drawing, and text. Landscape photographers, food photographers, and macro photographers will like the focus stacking features, too. It’s also excellent value for money, and you can start with a 90-day free trial, too.

Ultimately, there’s no outright winner, as each program will suit different types of photographers. But hopefully we’ve made your decision easier!

The post Affinity Photo vs Luminar: Which Editor Is Best in 2021? appeared first on Digital Photography School. It was authored by Dawn Gilfillan.


Digital Photography School

 
Comments Off on Affinity Photo vs Luminar: Which Editor Is Best in 2021?

Posted in Photography


Lightroom vs ON1: Which Photo Editor Is Right for You?

18 Aug

The post Lightroom vs ON1: Which Photo Editor Is Right for You? appeared first on Digital Photography School. It was authored by Dawn Gilfillan.

Lightroom vs ON1 Photo RAW: which editor is best?

Which program is best for photo editing, Lightroom vs ON1 Photo RAW?

In this comparison, we lay it all out for you. We discuss the pros and cons of these two popular programs, including:

  • Editing features
  • Photo organization capabilities
  • Price
  • Ease of use

By the time you’re done, you’ll know exactly which editing program is the better buy! Let’s dive right in.

Lightroom vs ON1: Overview

Lightroom Classic has been around for a while now, and the program has plenty of die-hard fans; when it was first released, it attracted a lot of attention, thanks to its user-friendly tools and helpful presets.

ON1 Photo RAW is the newer program of the two. It draws on Lightroom’s immense success while attempting to improve upon some of the latter program’s faults, making it an innovative, potentially appealing Lightroom alternative.

Here, we’ll run through a quick list of pros and cons for both programs before moving on to an in-depth look at their individual features.

Lightroom Classic

Lightroom Classic

Lightroom’s catalog system is very versatile and good for backing up your images. The library organization is similar to ON1, but it does have more sorting tools, like AI keywording and facial recognition.

There are more preset packages and third-party tools available in Lightroom compared to ON1, and it is also generally faster. You have the option to edit Lightroom images offline.

On the other hand, Lightroom doesn’t have adjustment layers (and ON1 does). Lightroom also doesn’t do focus stacking in panoramas and in HDR images, while ON1 offers these handy features.

ON1 Photo RAW

ON1 Photo RAW 2021

You don’t need to import photos into ON1 to edit them. Instead, as soon as you install the program, it will find all your photos; you can easily see them in the Albums section. ON1 also makes use of adjustment layers, and they are very similar to those in Photoshop. ON1 doesn’t have as many available preset packages as Lightroom, but the built-in options are very good.

ON1 just isn’t as fast as Lightroom for most tasks, and there is currently no offline editing feature. ON1 utilizes a database system instead of catalogs, which doesn’t offer as much versatility or security when backing up your images.

1. Photo organization capabilities

One of the main differences between Lightroom vs ON1 is in terms of how they store the edits you make to your images.

Lightroom Classic

Lightroom interface

Lightroom’s catalog system can seem a bit confusing, but it’s basically just a single (catalog) file that saves all the edits you make to every image. It also saves keywords, ratings, and other changes.

Lightroom offers non-destructive photo editing, which means your original files are always kept safe and unaffected by user adjustments. This is a major benefit – after all, everyone makes mistakes, and there are times when your editing will go too far astray. Thanks to non-destructive editing, you can scrap your changes and start fresh with the original.

ON1 Photo RAW

ON1 Photo RAW interface

ON1 uses a database system and creates a collection of files (not just one single file, as with Lightroom’s catalog). When you open ON1, all the photos on your computer will appear in the program so you don’t have to go searching for them. While this is nice, it picks up every single image on your computer, even files that you have downloaded from the internet – which can be an annoyance.

Also, like Lightroom, ON1 is a non-destructive photo editor.

One downside to ON1? You can’t back up the database within the software. You’ll need to put another system in place, such as backing up to an external hard drive or cloud.

2. Layout and ease of use

Both image editing programs are intuitive, but the layouts differ somewhat, and Lightroom is the more user-friendly of the two.

Lightroom Classic

Importing images into Lightroom is a breeze: simply click on Import Photos and Video in the File menu. This menu is also where you can optimize your catalog, import develop profiles and presets, export images, manage plugins, and lots more.

Once uploaded, you can select your images for editing and click Develop. You are then taken to a screen with a relatively easy-to-understand layout. Presets are arranged on the left-hand side of the screen, while editing tools are found on the right:

Lightroom editing layout

Lightroom’s interface is clear and uncluttered, so even a beginner will find the layout easy to navigate. Personally, I’m a big fan of the simple and user-friendly layout – both for importing and editing.

ON1 Photo RAW

The ON1 Photo RAW layout is slightly more confusing. Because the program has so many editing features, the tools appear crammed onto one screen. As with Lightroom, presets are on the left-hand side and editing tools appear on the right. However, that’s where the similarities end.

ON1 Photo RAW editing layout

As you can see in the photo above, the Mask, Text, Transform, and Crop tools are positioned near the presets instead of alongside the other editing tools. The presets are also shown as icons instead of text, which takes up even more room on the screen.

Overall, the effect is cluttered, and the editing interface is a lot to take in for a complete beginner.

3. Editing tools

Both programs have a good selection of editing tools, but ON1 has the edge here; it does the job of both Lightroom and Photoshop. Whereas Lightroom is designed for RAW conversions, adding presets, and basic editing prior to Photoshop work, ON1 Photo RAW is designed as an all-in-one, comprehensive editing program that lets you apply basic edits, but also create layers, add text, and more.

Lightroom Classic

Lightroom is an excellent RAW converter, and the range of presets you can buy is incredible. It was Lightroom that first pioneered the concept of adding presets to images, and this has been adopted by almost every image editing program on the market.

Run your mouse pointer over the Lightroom preset list (even if you haven’t purchased presets, Lightroom comes with plenty of built-in options), and your image will change accordingly. You’ll see a a preview of the preset in action, which is a great time-saver (especially if you have hundreds of presets to consider). ON1 Photo RAW doesn’t have this functionality; you must apply a preset to the image to see how it looks.

Over on the right-hand side, you have the main editing tools, starting with a histogram. Underneath this, you’ll find the Crop tool, the Graduated Filter, the Adjustment Brush, etc. Next are the essential adjustments like exposure, white balance, and contrast. Scroll even farther and you’ll find more advanced tools: color grading, lens corrections, sharpening, and more.

Lightroom advanced tools

That’s about it for editing, but along the top menu bar you also have the option to print, upload images to the web, create a slideshow, or design a photo book. I don’t often print from Lightroom, as I find it easier (and more color accurate) to do this in Photoshop, but there are plenty of templates to choose from.

Lightroom photobook template

ON1 Photo RAW

ON1 advanced tools

ON1 Photo RAW matches all of Lightroom’s editing features – except the range of specialist print options. This means you can print a photo, but there’s no option to design slideshows or photo books. ON1 also doesn’t have a color grading tool like Lightroom.

That said, ON1 does have layers and easy-to-apply effects like polarizers. ON1’s masking and retouching features aren’t as good as Photoshop’s, so professionals will struggle to gain the necessary fine control when editing, but beginners and enthusiasts should find the editing tools varied and useful.

Unlike Lightroom, ON1 has a very good, easy-to-use text tool with a variety of fonts available. Another great feature in ON1 is Portrait AI, which automatically evaluates images using artificial intelligence and applies adjustments to create the best possible result.

ON1 text feature

4. Speed

Which program is faster, Lightroom or ON1? All image editing programs are power-hungry, and it does depend on your computer. But in my experience, Lightroom is more responsive and faster than ON1, which can lag and freeze up.

If you’re concerned about speed, check out the Lightroom and ON1 program requirements before buying, and make sure your computer exceeds the disk space and memory recommendations.

5. Price

Lightroom plans

Lightroom is available only as a Creative Cloud subscription. Prices start from $ 9.99 USD per month for Lightroom and Photoshop with 20 GB of storage. However, the best value for money is the Photography Plan, which costs $ 19.99 USD per month. Here, you get Photoshop, Lightroom Classic, and Lightroom CC with 1 TB of online storage space, which lets you back up and sync around 20,000 RAW files or 200,000 JPEGs on your desktop and mobile devices.

ON1 plans

ON1 Photo RAW, on the other hand, can be purchased outright, though you can also go the subscription route. For a one-time purchase, you’ll pay $ 99.99 USD. If you’d prefer to subscribe to ON1 Photo RAW, plans start at $ 7.99 per month with 200 GB of storage, and go up to $ 179.99 yearly with 1 TB of storage.

Lightroom vs ON1: Which program is best?

Now that you’ve read a bit about Lightroom vs ON1 and seen the features, layout, and pricing, hopefully you have a better sense of which program will work best for you.

In my opinion, Lightroom is particularly suited to beginners because of the user-friendly interface. It’s also great for those who want to add presets and upload images to social media or create photo books and prints.

Ultimately, Lightroom is one of the best RAW converters out there, and if you need more advanced editing options than Lightroom alone can provide, you can purchase an Adobe plan that includes Photoshop. That way, you can do your initial RAW conversion and editing in Lightroom, then switch your images over to Photoshop for removing objects, masking, layers, composites, and blending modes.

Lightroom Classic

ON1 Photo RAW is an all-in-one image editor, meaning you can go from start to finish in the single program. It will suit photographers who like to use cutting-edge technology like the Portrait AI feature, which can save time when you have a lot of images to process.

ON1 will also suit those who want to take advantage of the available presets, texture packs, and LUTs. The text tool is a great addition to ON1, too.

The only real issue with ON1 is the cramped and cluttered layout, but the program is still usable and is liked by plenty of beginners.

If you’re still on the fence, you can try out ON1 Photo RAW for 14 days. Lightroom also has a 7-day trial option – so try both and see which works best for you!

ON1 Photo RAW

Lightroom vs ON1 FAQs

Can ON1 import a Lightroom catalog?

Yes, by using the Migration Assistant. This is intended for a one-off migration, not a constant syncing of your Lightroom images to ON1.

Does Lightroom Classic work on a mobile device?

Sort of. The mobile version of Lightroom works well on iPhones, iPads, and Android devices. And it’s free to download and use (though to access certain app features, you’ll need a Lightroom subscription).

Does ON1 Photo RAW work on a mobile device?

Yes, you can download and use the ON1 Photo RAW app for both iOS and Android devices. The app itself is free, but if you are a registered user of ON1 Photo RAW, you’ll get access to more advanced mobile editing features.

Can I use ON1 as a plugin in Lightroom?

Yes, you can! There are two main ways to use ON1 with Lightroom: via the Plug-In Extras command in the File menu, and via the Edit In command in the Photo menu.

The post Lightroom vs ON1: Which Photo Editor Is Right for You? appeared first on Digital Photography School. It was authored by Dawn Gilfillan.


Digital Photography School

 
Comments Off on Lightroom vs ON1: Which Photo Editor Is Right for You?

Posted in Photography


Nikon NX Studio Review: How Good Is This Free Photo Editor?

06 May

The post Nikon NX Studio Review: How Good Is This Free Photo Editor? appeared first on Digital Photography School. It was authored by Simon Ringsmuth.

Nikon NX Studio review

In order to write a good Nikon NX Studio review, it’s important to step back to see who this program is for and how it fits into the image editing landscape.

In 2006, Nikon released a software tool called Capture NX, which was designed for its fledgling line of digital cameras. Over the years, Nikon slowly added new features, but Capture NX was never a serious competitor to Adobe Lightroom, Capture One, or other popular image editing and management software. That all changed in early 2021; Nikon retired Capture NX (and its companion, ViewNX) and replaced them with Nikon NX Studio.

But is Nikon’s software ready for prime time, and can it hold its own against a growing list of competitors? What exactly does NX Studio do and who is it for? The answers might surprise you.

Nikon NX Studio Review Flower
RAW file processed with Nikon NX Studio.
Nikon D7100 | Nikon 50mm f/1.8G | f/2.8 | 1/3000s | ISO 100

Nikon NX Studio overview

In a very basic sense, Nikon NX Studio is like Lightroom – but designed specifically for Nikon shooters. It’s not really a fair comparison, though, because Nikon NX Studio isn’t supposed to be a replacement for Lightroom. The two have a lot of overlap, but when doing a one-to-one feature comparison, Nikon NX Studio comes up woefully short. However, NX Studio does have a workflow that appeals to a lot of photographers, as well as some advanced tools absent from Lightroom.

Nikon NX Studio is great for photographers who want to do more with their photos than what basic programs like Apple Photos can offer. It has tools for common edits such as white balance, brightness, color, noise reduction, cropping, and sharpness. Nikon NX Studio also goes one step beyond Lightroom by letting you perform basic edits on videos, such as trimming and stitching.

It also has one very important advantage over Lightroom and most other programs: It’s free, so you lose nothing by trying it out.

Nikon NX Studio Review Overview
Nikon NX Studio goes way beyond basic image editing, and it has some powerful tools that appeal to amateurs and professionals alike.

For enthusiasts and even professionals, there’s a lot to like about Nikon NX Studio as long as you keep your expectations in check and don’t mind some frustrating bugs and shortcomings. It’s not a full-featured digital asset management tool like Lightroom, though it does offer some basic file management and storage.

But where Nikon NX Studio really shines is in the sheer depth of its tools. The Lightness, Chroma, and Hue adjustments give you incredible control over editing colors, and the Color Point tool gives you fine-grained control that takes several steps to replicate in Lightroom.

Finally, Nikon NX Studio has a trick up its sleeve that no other image editor can match: it works with Nikon RAW files without needing to reverse-engineer the RAW algorithm or convert everything to DNG.

Nikon NX Studio pros

  • The price is great. It’s a free program and should be updated by Nikon regularly for years to come.
  • Lots of features that appeal to amateurs, hobbyists, and professionals
  • Basic movie editing tools are simple and practical
  • Everything takes place in a single interface without the need to switch between Library and Develop modules like in Lightroom

Nikon NX Studio cons

  • Very basic import process compared to Lightroom: no keyword management, applying presets, or metadata adjustments
  • Lacks Brush and Graduated adjustment tools, along with other editing options offered by competing programs
  • Lack of a simple Undo feature
  • Lots of bugs and glitches. Some would say this is expected with Version 1 of a program, but these issues happen more frequently than I would like
Nikon NX Studio Review Import
Nikon NX Studio utilizes a separate program called Nikon Transfer 2 to import images from a memory card or other source. It works fine, but it’s fairly simplistic in terms of functionality.

If you’re a Nikon shooter, you can’t go wrong with just downloading Nikon NX Studio to check it out. It’s free, and it won’t alter your current photos even if you use Lightroom, Luminar, or another program. You really have nothing to lose by trying it, and you might find that the results you get from your Nikon RAW files are much better than what you get in Lightroom. (Note that Nikon NX Studio only works with Nikon NEF RAW files. It will not load DNG files or RAW files from Canon, Sony, Fujifilm, and other manufacturers.)

While I do think Nikon NX Studio is worth trying out, let’s take a closer look at some of its characteristics to help determine whether it’s the right program for you.

Layout and ease of use

If you’ve ever used a program like Lightroom, Luminar, or Capture One, you’ll feel right at home in Nikon NX Studio.

The interface is pretty simple: the left side is where you access your photos in folders or albums. The middle is where you scroll through your photos or look at them more closely. Your tools are located on the right and clicking the title of a tool expands and collapses its options just like Lightroom.

Nikon NX Studio review Layout
The Nikon NX Studio layout is similar to other programs like Lightroom, Luminar, and Capture One. Photo storage on the left, editing tools on the right, and your image in the middle.

An Import button in the top-right corner will let you start loading images from a memory card. Additional icons at the top of the main window let you switch between views: thumbnail, map, 2 and 4 images at a time, before and after, and list, which users of Apple’s Aperture software will certainly appreciate. Along the bottom are more tools that let you show view overlays (such as a grid or a histogram), assign star ratings, and rotate photos.

All these buttons and options might seem overwhelming, but it’s very straightforward; you should be able to find your way around the interface after a few minutes of exploring.

One key difference between Nikon NX Studio and Lightroom is that the former stores your image edits in sidecar files, whereas the latter is based around a single massive database, called a catalog. Some prefer one type of storage over the other, but while there have been reports of corrupted Catalogs causing problems for some photographers, it’s not an issue I have experienced.

Still, if you want a powerful image editor but are wary of putting all your editing eggs in a single basket, Nikon NX Studio might be a good choice.

Performance

In terms of sheer speed and editing efficiency, Nikon NX Studio does leave something to be desired. On a 2020 27″ iMac with a 3.6 GHz, 10-core i9 processor, lots of RAM, and a large internal SSD, my edits were fairly smooth.

But running NX Studio on a machine just a few years old with a spinning hard drive felt positively sluggish by comparison. Adjusting any given slider, from White Balance to Highlights to Color Booster, resulted in a visible checkerboard pattern across the image while edits were applied. Each adjustment only took a second or two, but these little bits of time add up quickly when editing dozens or hundreds of images.

goose on the grass with checkerboard pattern
On slower computers, editing operations like changing the white balance can result in a tiny delay, during which time a checkerboard pattern is visible.

Other Nikon NX Studio features resulted in slow response times or outright crashes. Navigating through folders to locate images took much longer than I expected, and simple operations like cropping were slow and choppy. I generally zoom in to a photo to check for focus and sharpness and then zoom out for more editing, but even this relatively basic operation was slower and clunkier than I would have liked. After leaving NX Studio running for a few hours – not processing photos, but simply open in the background – it brought my Mac to its knees with a strange memory management error.

Memory Error
I left Nikon NX Studio running overnight; the next morning, I found that my computer had slowed to a crawl. It had some kind of memory leak that was using every spare scrap of RAM I had available.

I’m not saying that the program is unusable, just that users ought to approach it with a bit of caution. Programs such as Lightroom were just as buggy in their early incarnations and are much improved now, and I have no doubt the same will be true of Nikon NX Studio. It will get better over time, but right now you can expect to encounter some glitches.

However, it’s not all bad news in terms of performance. Loading Nikon NEF RAW files was snappy, navigating between editing panes was quick and easy, and import/export operations had no noticeable lag. When Nikon NX Studio works, which it usually does, it works quite well. But when it doesn’t work, it can be a bit frustrating.

Photo organization

It’s not uncommon for photographers to have tens of thousands or even hundreds of thousands of pictures to wade through. Nikon NX Studio isn’t going to win awards for groundbreaking AI-powered image management, but it does have some useful tools to help you organize your pictures.

Nikon NX Studio Review Folder Organization
Nikon NX Studio imports images to folders on your hard drive, not to a proprietary archive. To find your images, use the folders on the left-hand side.

In lieu of a Lightroom-style Catalog system, NX Studio shows you a hierarchical view of all the folders on your main drive and lets you navigate through them to locate your images. It’s not dissimilar from Luminar and others, and I prefer this method over the all-in-one archive system used by Apple Photos. When you import images from a memory card, you can create a new folder to store the pictures. You can create custom names for each import, as well.

When browsing through your pictures, you can assign star ratings, color labels, and keywords. There is a Filter bar that you can use to sort your photos according to these criteria as well as other information, but Nikon NX Studio does not have Smart Albums or other dynamic methods for automatically sorting your images. I use Lightroom’s Smart Collections to help me organize my images, but if you aren’t a fan of this method, then NX Studio will be fine.

Nikon NX Studio Review Filter
The Filter bar lets you sort by many different criteria.

Longtime users of Apple’s now-defunct Aperture software will find the Thumbnail List View to be particularly useful when managing photos. This shows a list-style view similar to what you see when browsing through your Mac OS Finder or Windows Explorer, with columns that display various parameters such as exposure information, file size, date modified, and more.

Nikon NX Studio Review List View
List View is a very useful way of viewing and sorting your images. It is very similar to List View in the Mac OS Finder and in Microsoft Windows Explorer.

While Nikon NX Studio’s photo management tools are not as robust as I would like, they’re certainly a good start. If you prefer a straightforward approach that does not rely on a proprietary catalog or database system, then there’s a lot to appreciate.

Photo-editing capabilities

This is where the rubber meets the road, and fortunately, Nikon NX Studio can hold its own against the competition in virtually all the areas that matter. While some NX Studio features are not as refined as other programs and some tools are missing in action, what it gets right, it really gets right.

There’s a long list of editing options at your disposal, including:

  • White Balance
  • Exposure Compensation
  • Active D-Lighting, which is unique to Nikon cameras and is a nice way to automatically brighten shadows and create a more even exposure
  • Brightness and Color
  • Levels and Curves
  • Lightness, Chroma, and Hue
  • Adjust Details, which includes Noise Reduction and Sharpness
  • Touch-Up, to remove spots and blemishes
  • Adjust Composition, which includes cropping, straightening, and perspective control
  • Camera and Lens Corrections

Once again, it’s worth remembering that Nikon NX Studio is a free program, and that fact alone makes the inclusion of all these options kind of amazing. While tools like a graduated filter, a radial filter, and an adjustment brush are missing, the options you do have should suffice for most photo editing. You can even create multiple custom sets of adjustment options that include only the tools you use in specific scenarios. This is quite useful if you prefer different tools when editing landscapes compared to editing portraits.

Nikon NX Studio Review Adjustments
You can create custom sets of editing adjustments, then switch to your custom sets with a simple click.

The Color Control Point editing tool is particularly useful, and one that I’d like to see in other applications. It allows you to click anywhere on your image and immediately have access to eight common editing sliders. Drag any of them to the right or left to increase or decrease that particular parameter. The top slider adjusts the size of the area to which the edits will be applied. It’s a highly useful tool for precise color editing, and the ability to adjust sliders right on the image instead of in an editing pane is something I have grown to appreciate a great deal.

Nikon NX Studio Review Color Control Point
The Color Control Point tool lets you click on any part of an image and use sliders to adjust colors on the spot.

The Lightness, Chroma, and Hue Adjustment takes an innovative and highly effective approach to manipulating color. While similar to the Hue, Saturation, and Luminance option in Lightroom, the Nikon NX Studio implementation offers useful options that professional and amateur photographers will appreciate.

You can use the eyedropper tool to select a color in your image, then click and drag up or down in the rainbow panel to adjust that color’s parameters. You can also change the angle of the rainbow, which means that your edits can be implemented more dramatically or more subtly. Finally, Width lets you target your edits to either a very narrow or very wide band of colors. It’s a powerful tool for global color adjustments.

Nikon NX Studio Review Lightness Chroma Hue Adjustment
Nikon NX Studio has a very useful tool for making global color edits to an image. Click and drag up or down on the horizontal line to adjust the parameters of a color, and adjust the Width to control the range of colors affected by a given peak or valley.

There are some important drawbacks to NX Studio’s photo-editing capabilities, and any Nikon NX Studio review would be remiss in not pointing them out.

First, there is no Undo option. Yes, you read that right; instead of an Undo, you can create a saved state for your edits then revert to that saved state at any point, but an actual Undo feature is missing.

Also, there is no History tool that shows you every edit and lets you step through them one by one. While Nikon NX Studio is nondestructive and all your edits can be changed or removed at any time, a History feature would help when doing lots of in-depth changes.

Other strange feature implementations are present, as well. After you apply a crop, you can’t actually make changes to it; you can start over with a new crop, but you can’t edit the crop once it has been applied. You also can’t darken shadows or lighten highlights – at least, not with the Shadows and Highlights sliders. The Retouch brush has no customization options at all other than its size. Finally, there is no way to make export presets, which could be a dealbreaker for those who rely on this feature in Lightroom and other programs.

Nikon NX Studio Review Export Dialog
The Export dialog in Nikon NX Studio has plenty of options, but its use is limited by the lack of export presets.

There’s a couple of ways to look at these drawbacks.

Compared to a program like Lightroom, NX Studio might seem limited. But on the other hand, you could argue that Nikon NX Studio is free, so there’s not much to complain about. It’s also currently on Version 1 and will no doubt be refined and upgraded over time. Many of the drawbacks have workarounds or alternative methods of accomplishing the same task, even if it does involve some extra steps. And finally, there is always a learning curve with new programs.

So are these missing features drawbacks, or is it more a matter of learning a new workflow? One could make a strong case for the latter over the former.

Who should get Nikon NX Studio?

While I can’t recommend Nikon NX Studio across the board, it’s a great option for many shooters. Certainly, Nikon users will appreciate all the tools NX Studio has to offer, especially for editing RAW files. If you are a hobbyist or working professional who needs a suite of powerful editing tools and you don’t mind some interface quirks, Nikon NX Studio could be right up your alley. Beginners might be intimidated by the plethora of buttons, options, and tools, especially compared to more basic image editors that are available for free on mobile phones and some computers. But Nikon NX Studio could be a good way for those individuals to start using a more advanced image editor without spending any money at all.

People who should definitely not use Nikon NX Studio are those who have a mobile-first workflow. There is no version of the program that works on phones or tablets, and it’s unlikely to be created anytime soon. If you primarily shoot and edit with a smartphone, you’re better off sticking with the tools you already have.

Nikon NX Studio Review 4-Up View

Nikon NX Studio review: final words

Nikon NX Studio is an outstanding program in many ways, and the fact that it’s free is certainly one of its most important advantages.

If you shoot in JPEG, you can use everything Nikon NX Studio has to offer, no matter your camera brand, while Nikon users will greatly appreciate its RAW editing capabilities. While there are certainly some important caveats to consider, as well as some messy bugs that will get ironed out over time, I certainly recommend you download it and give it a try.

Hopefully, this Nikon NX Studio review gave you some information to help you understand a bit more about the program and whether it will work for you!

Now I’d like to hear your thoughts:

Are you interested in Nikon NX Studio? Do you think you’ll use it? What do you like and dislike about the software? Share your views in the comments below!

Do I need to have a Nikon camera to use Nikon NX Studio?

Nikon NX Studio will only work with Nikon RAW files. RAW formats from Sony, Canon, Fujifilm, and others will not work, and neither will universal RAW formats like DNG. However, the program works just fine with JPEG images. So if you don’t use a Nikon camera but shoot in JPEG, you can easily use Nikon NX Studio for your editing and photo management.

Will Nikon NX Studio work on my mobile phone?

Nikon NX Studio is designed for desktop-based workflows; there is no mobile version. You can take photos on a mobile phone, transfer them to your computer, and edit them in Nikon NX Studio, but that workflow adds many more steps and probably takes too much time for most people to consider.

Is Nikon NX Studio better than Lightroom, Capture One, or Luminar?

There are advantages and disadvantages to all of these programs, and it’s impossible to say which one is better. Nikon NX Studio is free, but most of the others have free trial periods for new users. If you’re unsure of which to use, I recommend downloading them, signing up for free trials (if available), and making use of dPS’s many articles to help you learn. That way, you can make an informed choice and find the program that suits your needs.

Will Nikon NX Studio run on my computer?

Most computers made in the past few years will work just fine with Nikon NX Studio. I personally found better results when I was working with an SSD instead of a spinning hard drive, but almost any modern desktop or laptop will run the program just fine.

Can I use Nikon NX Studio to edit video?

While Nikon NX Studio does have a built-in video editor, its capabilities are very limited. It works for basic trimming and combining clips but not much else.

The post Nikon NX Studio Review: How Good Is This Free Photo Editor? appeared first on Digital Photography School. It was authored by Simon Ringsmuth.


Digital Photography School

 
Comments Off on Nikon NX Studio Review: How Good Is This Free Photo Editor?

Posted in Photography


Affinity Photo vs Photoshop: Which Photo Editor Is Best in 2021?

15 Apr

The post Affinity Photo vs Photoshop: Which Photo Editor Is Best in 2021? appeared first on Digital Photography School. It was authored by Simon Ringsmuth.

affinity photo vs photoshop: which photo editor is best

Which is the better photo editor, Affinity Photo vs Photoshop CC?

Adobe Photoshop was released in 1988 and has become the most widely used digital image editing tool in the world. The program is so popular that its name has become a verb – and Photoshop is now the de facto standard for industry-leading professionals and amateurs alike.

Photoshop has also spawned a host of competitors, including Affinity Photo, a worthy alternative for anyone who wants a full-featured image editor without the expense of Photoshop. But is Affinity Photo now the superior choice? Or are you better off sticking with Adobe’s classic program?

In this article, I’m going to compare Photoshop and Affinity Photo. I’m going to give you the benefits and drawbacks of each program – and you’ll leave knowing which program is right for you.

Affinity Photo vs. Photoshop: overview

When considering Affinity Photo and Photoshop, it’s important to remember that there is no one single correct program for everyone. Both are highly capable photo editors, and either one will serve the needs of most photographers. They each have advantages and drawbacks, as well as very different pricing models, and both work well for many photographers.

So try not to think of this as a binary choice or even a competition. It’s not about which program is better, but which program suits your needs.

Before getting into the weeds of how these programs are different, it’s a good idea to take a look at how they are alike. This helps establish a sense of common ground, or perhaps a starting point, that will make the differences stand out.

Both Affinity Photo and Photoshop offer a layer-based workflow, meaning all edits are non-destructive and can be combined with other edits. Both include RAW converters, which allow you to open and manipulate the lossless file formats used by amateur and professional photographers around the world.

Affinity Photo editing interface
Affinity Photo opens RAW files and lets you manipulate the same properties and parameters as Adobe Camera RAW, the RAW editor used by Photoshop.

Affinity Photo and Photoshop both feature a dizzying array of tools to let you edit images any way you want. You can create detailed selections, use complex layer masking, warp and transform parts of your images, use dozens of filters and adjustments, go back to earlier edits with a history panel, insert and manipulate text…the list goes on.

Comparing the two programs, then, becomes less about looking at a bulleted list of features and more about value. Affinity is significantly cheaper with a one-time price of $ 50 USD. Adobe Photoshop is much more expensive and is available only as part of a Creative Cloud subscription, the cheapest of which is about $ 120/year. And while you certainly get a lot for that yearly fee, Affinity Photo is no slouch.

Affinity Photo vs Photoshop Pricing
Photoshop is available as part of the Adobe CC Photography plan or for a standalone subscription. You can also find it bundled with other, more expensive plans, as well.

Affinity Photo doesn’t have the sheer quantity of features that Photoshop offers, but many of the tools in Photoshop aren’t used by a lot of amateur and semi-professional photographers, so it might not matter to you. For instance, Photoshop has tools for manipulating 3D objects and video, but if you just want to edit static 2D images, that probably isn’t important. Photoshop is also updated more frequently and has some interesting AI-based tools to alter faces and other image elements, but for some people, these aren’t worth the yearly fee.

User interface

Both programs follow a similar design language: tools on the left, options for customizing the selected tool on top, editing panels on the right, and a huge space in the middle of the screen for working on an image. Their tools share many core functions, as well. Both have tools for cropping, brushing, making selections, fixing blemishes, working with text and objects, and more.

Photoshop editing interface
The editing interface in Photoshop (shown here) is similar to the interface in Affinity Photo. They’re not identical, but they’re similar enough that if you’re familiar with one program, you can probably use the other.

The interface is not altogether dissimilar from Lightroom, Luminar, and other photography software. If you are new to Affinity Photo or Adobe Photoshop, it won’t take you long to figure out how to edit and where to find the tools and adjustments you need.

Adobe has a key advantage in terms of user interface design because it has built up so many tools and options over the years. But this is also its Achilles’ Heel and can be seen as a disadvantage, as well. Photoshop’s ever-expanding repertoire has resulted in a program with a staggering learning curve, and even simple options like changing the white balance on an image or refining a selection can lead to inordinate amounts of head-scratching and online searching.

Affinity Photo vs Photoshop Tooltips
Photoshop contains visual tooltips to help new users acclimate themselves to the buttons and options.

This has put Adobe in a bit of a tough spot – one that makes Affinity Photo seem quite attractive by comparison. Adobe must walk a fine line between catering to its professional customers, many of whom have been using Photoshop for years, and catering to new customers who find the growing feature set to be complicated and frustrating. Welcome screens, popups, tooltips, and other helpful hints stem the tide of confusion – but while these do help, it can still be difficult to locate the options you need to get your work done.

By contrast, the simplified nature of Affinity Photo seems downright pedestrian but remains quite powerful. Tools on the left are bright and colorful, and the adjustment panels on the right are a bit more streamlined for common use-case scenarios.

For example, adjusting the white balance is as simple as clicking the White Balance option and adjusting some sliders. In Photoshop there isn’t a White Balance option; you have to apply a Curves adjustment layer or use a filter to achieve the same effect.

white balance in Affinity Photo
Affinity Photo includes familiar adjustments like White Balance that are more complicated to implement in Photoshop.

This theme is prevalent throughout any comparison of Affinity Photo vs. Adobe Photoshop. Affinity Photo has a fresh, modern take on the interface elements that Photoshop invented. If you prefer a cleaner, simpler layout, then Affinity Photo might be the best option for you, but if you crave raw power and a slew of options, you might be better off with Photoshop.

It is worth noting that Affinity Photo also has a few tricks up its sleeve that Photoshop can’t yet match. Namely, speed: Adobe Photoshop is built on decades-old legacy code that makes some simple operations confoundingly slow. Tools like Liquify and even simple transformations are much snappier in Affinity Photo, and while Photoshop has made some great strides in recent years, there’s no denying that aspects of the program still feel slow and outdated.

Workflow tools

While both Affinity Photo and Adobe Photoshop have a huge number of editing tools, each program is at its best when you learn to use those tools to accomplish your work with minimal effort. Photoshop has a bit of an edge here if you want to make complicated, in-depth edits, but Affinity Photo is no slouch either.

For example, most of the items in Photoshop’s toolbar have sub-options with different variations on the same tool. There are three selection tools: Marquee, Lasso, and the Magic Wand. And each of those has its own subset of tools.

Selection Tool comparison
The tools in Photoshop are more comprehensive and contain a greater number of options and customizations compared to Affinity Photo.

From a workflow perspective, this bevy of options can be invaluable. You can get in, make your selections, and get on with your editing. And in that regard, Photoshop gets the nod over Affinity Photo. Once you learn all the options at your disposal and get familiar with the myriad keyboard shortcuts, Photoshop can dramatically cut your editing time. But getting to that point can take a lot of learning and a lot of patience, so some might prefer the relative simplicity – and fewer options – of Affinity Photo.

Both programs have all the standard adjustments you would expect: Brightness/Contrast, Exposure, Invert, and many others. These are applied using layers, and the layers can be blended using virtually the same sets of blend modes, including Darken, Multiply, Color Burn, Difference, Exclusion, Subtract, and so on. Layers can be moved up and down and combined in both programs, and both give you access to dozens of effects that can be applied, as well.

Photoshop layer effects
The Layer Effects panel in Photoshop contains many options for enhancing and editing your images, and it lets you customize the blend modes, as well.
Affinity Photo layer effects
The Layer Effects panel in Affinity Photo is similar but lacks the depth that Photoshop offers. Still, it should suffice for most people.

If you are thinking of transitioning away from Photoshop, there is one important thing to note:

While Affinity Photo does replicate many of the common keystrokes and shortcuts used in Photoshop, they’re not 1:1. You might find yourself pressing familiar keys and using shortcut commands out of habit only to realize that nothing happens, or worse, something happens that you didn’t intend. It can make the transition a bit rocky but might be worth it if it saves you time or money in the long run.

Compatibility

When you work with image editors, compatibility can be an issue. Photoshop’s PSD file format is the gold standard – but not necessarily because it’s the best, and certainly not because it’s the most efficient in terms of file size. Rather, after more than 30 years in this business, Photoshop’s PSDs have simply become the most widely used. PSD files are nondestructive, meaning they contain all the layers, history steps, adjustments, effects, and other elements of an image as it’s being edited.

Affinity Photo has a similar non-destructive file format, AFPHOTO. But as you might expect, it is not well known; it’s simply too new compared to the PSD format. While Affinity Photo can open PSD files and also export its own files in PSD format, Adobe Photoshop can’t do anything with AFPHOTO files. This can end up becoming a time-consuming hassle if you use Affinity Photo but find yourself collaborating or sharing files with Adobe Photoshop users (or vice versa).

Affinity Photo vs Photoshop Export
Affinity Photo can export images in AFPHOTO (as well as nearly a dozen other formats). But Photoshop won’t open Affinity Photo documents and likely never will. Adobe has almost no incentive to do so.

It’s currently Adobe’s playground, and we have to play by their rules for the time being. Adobe doesn’t need to spend time and money making Photoshop compatible with Affinity Photo files, but Affinity needs to work with PSD files if it is to be relevant in the image-editing space. The old saying, “If you can’t beat ’em, join ’em” comes to mind.

So if you go with Affinity Photo because you like the price or appreciate its tools and features, just know your documents won’t always play nice with Photoshop.

Support

Learning any new tool takes time and effort, and this is doubly true for image editors. There are so many options and features in both Affinity Photo and Photoshop; it’s enough to make you want to give up and go with the one-click simplicity of a program like Luminar. Especially if you’re new to digital photography.

Photoshop brush options
Just imagine trying to explain these Photoshop brush options to someone who has never used the program before.

When considering Affinity Photo vs. Photoshop, it’s important to take this into account and make sure you have access to the knowledge and training you need to get your editing done. While Photoshop has too many features to count, it also has over three decades of support behind it. The internet is jam-packed with every kind of Photoshop tutorial you can imagine: websites, forums, social media groups, YouTube tutorials, podcasts, classes, lectures, and Adobe’s own help files and rich knowledge base.

What’s more, since so many people use Photoshop, it’s not hard to find someone who can help you. Most friends, coworkers, and even casual acquaintances who use Photoshop will be happy to show you a few tricks or help you learn how to use the program.

Affinity Photo vs Photoshop Image Border
I knew Photoshop could do a simple border with rounded corners, but I didn’t know the exact steps. A quick video call with my cousin, who uses Photoshop professionally, got me all the information I needed.

This is hardly the case with Affinity Photo. Affinity has its own set of video tutorials, as well as sample images you can import and experiment with to learn the basics. But while these are a good place to start, they’re just not at the same level as what you’ll find in Photoshop.

Tutorials will improve as more people use Affinity. But until then, you might find yourself frustrated when you can’t figure out more advanced features and aren’t able to find the help you need.

Editing and the cloud

As photo editing moves away from the desktop and into the cloud, it’s important that your tools can keep up with your workflow (and that you can adapt them as needed). Many photographers today want to edit images on tablets or even phones and have their pictures available whenever and wherever they want.

Thankfully, both Affinity Photo and Adobe Photoshop are up to the task, but they approach it in different ways.

Affinity Photo has an iPad app, available for a very reasonable fee, that mimics most of the functionality of the desktop version. It can’t do things like batch export, but it reads AFPHOTO files, and edits on the iPad are also available on the desktop version.

However, Affinity does not have a cloud-based infrastructure to support file syncing and storage. This means you have to transfer your images manually or sync them to a service like iCloud – then you must make sure all your files are properly synced again after you edit, lest you lose some of your changes.

Photoshop handles this differently, and it’s all due to the subscription fee you pay to use the program. Since every Photoshop plan comes with some degree of cloud storage from Adobe, it’s possible to have a cloud-based workflow where everything is stored remotely. This means you can load all your PSD files and other assets into your Adobe Creative Cloud storage, edit your images on desktop or mobile, and everything is automatically synced in real time.

Adobe cloud storage
Adobe gives you the option of storing files in the cloud; this is part of your Photoshop subscription.

Neither one of these approaches is necessarily better, but it’s important to determine which you prefer. Affinity Photo’s one-time pricing structure means it can’t support the ongoing costs of cloud servers for its customers. But if you already pay for cloud storage through another platform, then you might prefer Affinity’s approach.

On the other hand, Photoshop’s method is great for a lot of people, especially those who want a cloud-based workflow.

Affinity vs Photoshop: Which editing program is right for you?

At some point, you have to stop reading and just make a decision. There are definitely some good reasons to go with Affinity Photo, and there are some advantages to Photoshop. Here’s my advice if you’re on the fence and not sure which one is right for you:

Get Affinity Photo if you want an inexpensive, full-featured photo-editing program. While it doesn’t have decades of history in the photography community, it has an extensive list of features and workflow tools to suit the needs of almost anyone. Certainly, it’ll handle everything a casual or hobbyist photographer requires, and if you aren’t actively earning money with your images, then a one-time fee of $ 50 makes Affinity the better choice.

example of Affinity Photo artwork
You can create some amazing artwork in Affinity Photo. And if you need inspiration, you can download sample images like this one (which are designed to help you learn the program).

Subscribe to Photoshop if you want a mile-wide set of features developed over several decades, as well as an endless supply of websites, articles, videos, books, and entire courses to help you learn how to use them. There are also many plugins you can get to extend the functionality of the core application; that way, you can tailor Photoshop’s capabilities to your needs. In terms of sheer product ecosystem, Photoshop is the clear winner.

While some have accused Adobe of resting on their laurels now that they have a steady stream of subscription income, that’s not really a fair criticism when it comes to their flagship product, Photoshop. Photoshop continues to add new options for demanding professionals while making the onboarding process easier for beginners. Adobe has also been incorporating artificial intelligence tricks such as allowing you to age (or de-age) human faces, alter smiles, and even change the direction that people are looking.

Neural filter
Adobe’s AI-based Neural Filters let you apply all sorts of strange, interesting adjustments such as changing expressions, smoothing skin, and aging (or de-aging) people.

The heart of the Affinity vs. Photoshop debate comes down to a simple question: What do you want to do to your photos? By identifying your needs first and then looking for a solution, you can be sure that the program you choose will more closely align with your requirements. It might be Affinity, it might be Photoshop, or it could even be something else.

Both Affinity Photo and Adobe Photoshop have free trials, and I recommend going that route before spending any money or getting too invested in one particular application. Download both products, try them, and see what you think. Then you can decide the Affinity Photo vs. Photoshop question for yourself.

Now over to you:

Have you used Affinity Photo and Photoshop? Which program did you prefer? Share your thoughts in the comments below!

The post Affinity Photo vs Photoshop: Which Photo Editor Is Best in 2021? appeared first on Digital Photography School. It was authored by Simon Ringsmuth.


Digital Photography School

 
Comments Off on Affinity Photo vs Photoshop: Which Photo Editor Is Best in 2021?

Posted in Photography


PortraitPro 21 Review: A Comprehensive Editor for Portrait Photographers

14 Jan

The post PortraitPro 21 Review: A Comprehensive Editor for Portrait Photographers appeared first on Digital Photography School. It was authored by Carl Spring.

PortraitPro 21 review a comprehensive editor for portrait photographers

It was only a few months ago that I reviewed Anthropics PortraitPro 19, where the ease of use, the speed, and the AI technology really impressed me. Here we are only a few months later, and Anthropics has introduced PortraitPro 21. I was lucky enough to get my hands on a copy to see what has improved, what is new, and whether the updated software is worth the investment.

Also, spoiler alert: We have a special offer at the end of this PortraitPro 21 review, so make sure you take a look!

PortraitPro 21 review

What’s new in PortraitPro 21

As always with Anthropics, there’s a long list of new features that really make PortraitPro 21 stand out. These include:

  • Sky replacement
  • Lighting brushes
  • Clone tool
  • Denoising/Sharpening
  • History tool
  • Color styles
  • Color copying
  • Hair highlights

There are actually even more new features, including a master slider for skin lighting and coloring, layer presets, optimized color-space handling, the ability to move catchlights, SVG backgrounds, new layers, backgrounds and overlays, free stock photos, and new tutorials from the creators.

If I offered an in-depth discussion of every new feature, you would probably be reading this for days. Instead, why not go and download your free trial of the software on the website? That way, you can check out the program for yourself. 

In the meantime, let’s look at some of the new PortraitPro 21 features in greater detail.

PortraitPro 21 review before and after

Sky replacement

This feature is one that portrait photographers will love. There is nothing worse than capturing amazing shots against a blank sky, knowing you will need to edit them later. Swapping the sky on multiple images can be laborious and time-consuming. But in PortraitPro 21, replacing skies can be done with the click of a button.

Using technology from Anthropics LandscapePro software, this feature does not simply mask and drop in the new background. It also changes the color and tone of the image to match the new sky, giving a more natural result.

PortraitPro has quite a few skies for you to choose from, but if you are looking for something specific, you can always add in your own. 

Sky replacement examples

Lighting brushes

PortraitPro 21 includes a series of lighting brushes. These can be used to create specific effects such as light streams or realistic relighting elements. 

You are able to select exact colors and alter the strength of the brushes, which allows you to quickly get the perfect effect. These brushes are able to separate the background and foreground for you, so you can really get creative. 

Lighting brush effects PortraitPro 21

Clone tool

The addition of the Clone tool means you can remove troublesome areas from your photos. And the presence of the Clone tool means there is no reason to use other software to perfect your edits.

As with all tools in PortraitPro 21, the Clone tool is easy to use and allows completely adjustable precision so you can get the exact result you want.

Ultimately, it’s a great addition to the feature set of PortraitPro. And while it is a tool that most will recognize and is not as groundbreaking as others, it’s one that will be hugely appreciated by all users.

Using the clone tool in PortraitPro21

Denoise/Sharpening

Denoise and sharpening tools are another new addition to this version of PortraitPro.

Yes, these tools are available in other editing programs. But as you are probably beginning to see, the addition of these features to PortraitPro 21 means that you have no real need to switch between programs to get your final result – making PortraitPro 21 a more all-in-one editing solution for portrait photographers.

PortraitPro 21 review

History tool

The History tool continues the trend of the Clone tool. It’s a feature that users of other editing software will be well aware of, and it’s highly valuable.

Specifically, it allows you to move back to a specific point in your edit so you can rework an image without needing to start over. 

The history brush in PortraitPro 21

Color styles

Filters will be familiar to everyone who reads this, because we frequently have these in our social media apps.

PortraitPro now includes a series of color styles that can dramatically change your image in just a few clicks.

Color styles examples in PortraitPro 21

Hair highlights

PortraitPro 21 features a variety of new tools for working with hair.

These include tools that add highlights, as well as change hair color and vibrance. And you can fine-tune these to achieve “salon-level” results.

Hair highlights in PortraitPro 21

PortraitPro 21 review: Performance

As always, I spent some time getting to grips with PortraitPro 21. Having used previous versions, I was familiar with the interface. But as with PortraitPro 19, I was amazed by Anthropics’s excellent tutorials. 

In fact, there are many more tutorials in PortraitPro 21, which give new users confidence right away. Even as a previous user of PortraitPro, it was good to go through a series of tutorials on the new features. These allowed me to immediately understand what is possible in PortraitPro 21. 

I started with the hair tutorial, which gave convincing results quickly and easily. From there, I fine-tuned to my liking. 

Hair features
I loved how the tutorials helped me get started, but then I fine-tuned to my own taste.

After that, I experimented with the new sky replacement feature. Due to my lack of outdoor photography over the last 12 months, I used the tutorial image as a starting point for this feature, and the results were impressive.

Changing the sky on the test image highlighted the importance of choosing your replacement sky wisely. Certain skies won’t work on certain images.

However, Anthropics has included so many different skies for you to choose from that, for every situation, there will be a replacement sky that matches your scene. Again, the ability to fine-tune really allows you to dial in the detail and increase the realism. 

Sky replacement in PortraitPro 21
There are so many different sky options built into the software.

Using TIFF files

After working on the many image tutorials, I wanted to use some of my own images. I always feel this is the real test.

And I was hugely impressed.

My images worked exactly the same as those in the tutorials. Everything was fast, and the software’s AI technology picked features out flawlessly. The highest compliment I can pay the software is to say that I didn’t notice any slowdown between the images I used myself and those in the tutorials. 

Face selection AI demo in PortraitPro 21
Even with a shallow depth of field, PortraitPro 21 picked out the face almost perfectly.

To push the software, I used 16-bit TIFF files in the Adobe RGB color space. The images opened fast, and PortraitPro 21 picked out the features flawlessly. Applying presets took a little longer than the test images, but considering I was working on 16-bit TIFF files, I was really impressed. 

I loved the fact that little tips popped up in the bottom corner of the screen, reminding me of how to tweak things. I used an image with an incredibly shallow depth of field to test the feature-finding abilities, and again, I was very impressed.

For the first image I tested, I used the Clone tool to remove a couple of small blemishes. Even though I was editing TIFF files, the software worked perfectly.

With the blemishes cloned out, I simply added a preset and tweaked it to taste. I had a finished image in less than 5 minutes. This was much quicker than when I edited the image manually. One quick and simple export later, I had a beautiful image ready to go.

Before and after retouch
This full retouch only took 5 minutes.

The only thing I will say is that some of the presets are a little more extreme than my personal style. However, the great thing about PortraitPro is that you can create your own presets simply and easily.

In fact, I tend to do this on a shoot-by-shoot basis, starting with a preset and tweaking it to suit the shoot I am working on. I can then apply these presets quickly and easily to the whole set of images from the shoot before sending proofs to a client.

Working with presets is taken to a whole new level with the Studio Max version of PortraitPro 21, where you can batch process several images in seconds.

Batch processing

Setting up a batch of images in PortraitPro
Import images, select your style, and click Go. Batch processing is an incredibly powerful feature in PortraitPro 21.

For a working photographer, the batch processing in Studio Max is a huge timesaver when you need a consistent retouch across a range of images. PortraitPro’s face recognition means that you can trust the software to pick up the face and apply the retouch for you automatically.

To test this feature, I exported full-sized JPEGs from a styled shoot. After creating a look with a single image, I used the batch feature of Studio Max to apply this style to a group of ten images. In less than one minute, all the images had saved and were ready to go. I simply clicked two buttons.

This feature alone changes how I deliver portrait and headshot proofs to clients. For so many working photographers, batch processing is going to be a game-changer. Imagine being able to deliver headshot proofs to clients with such little effort.

batch of images from a wedding photoshoot
A variety of poses didn’t fool the software. Everything was ready to deliver in under a minute.

Who is it for?

In my last review of PortraitPro, I said, “PortraitPro is an amazing tool for those who are new to retouching portraits. It is simple yet incredibly powerful, and gives you pleasing results within seconds. However, it offers much more and encourages you to go back to the software and personalize your retouching.“

So much has changed since then. In fact, PortraitPro 21 has more features that make it even easier for me to recommend. It is possibly the most feature-rich portrait editing software out there. 

If you’ve loved previous versions of PortraitPro, then you will love this even more – especially with the special offer for dPS readers (see below!).

Note that there are three PortraitPro 21 versions: Standard, Studio, and Studio Max.

PortraitPro 21 Standard is great for many people. It is a standalone software that allows you to work with JPEG or 24-bit TIFF files. For many photographers, this will be perfect. 

By upgrading to PortraitPro Studio, you get the Photoshop/Lightroom plugin that so many of you will love, as well as the ability to work with RAW, DNG, and 48-bit TIFF files. It also has color-space conversion. 

Finally, for those who shoot professionally or need the ability to retouch a batch of images in a few clicks, the Studio Max version of PortraitPro 21 will save you so much time (and professionals all know time is money!) that I cannot help but recommend it. 

Sounds amazing! How do I get it?

You can download your free trial of PortraitPro 21 right here.

But if you’re thinking about purchasing the software, note that there is a 50% off launch offer, plus dPS readers get an extra 15% off with the coupon ZC1990. So click here to grab your discounted copy of PortraitPro 21!

Anthropics is a paid partner of Digital Photography School.


The post PortraitPro 21 Review: A Comprehensive Editor for Portrait Photographers appeared first on Digital Photography School. It was authored by Carl Spring.


Digital Photography School

 
Comments Off on PortraitPro 21 Review: A Comprehensive Editor for Portrait Photographers

Posted in Photography


The World’s First Completely AI-Powered Photo Editor Will Debut Before the Year Is Out

26 Oct

The post The World’s First Completely AI-Powered Photo Editor Will Debut Before the Year Is Out appeared first on Digital Photography School. It was authored by Jaymes Dempsey.

Skylum’s Luminar AI, billed as “the first image editor fully powered by artificial intelligence,” will come available before the year is out.

Luminar AI is the world's first completely AI-powered photo editor

Already, the image editor has created controversy among photographers thanks to its automated, AI-based approach to image editing, with some claiming that Luminar AI’s easy, no-experience-necessary approach is problematic – or even cheating.

And while we don’t know exactly how the program works, Skylum has released several videos showing off some of Luminar AI’s standout features.

world's first AI-powered photo editor

Highlights include:

  • Composition AI, which automatically straightens your images and suggests cropping based on compositional guidelines and feedback from professional photographers
  • Face AI and Skin AI, which automatically retouch your subjects’ faces for improved teeth, lips, skin, and much more
  • Sky AI, which allows you to instantly swap skies while automatically adjusting for changes in lighting and color
  • Atmosphere AI, which lets you enhance your images with weather effects (such as haze, steam, drizzle, fog, and mist)

To see some of these AI effects in action, check out Skylum’s latest video:

While Luminar AI will be offered as a standalone editing program, Skylum’s most up-to-date software, Luminar 4, already packs some AI-based features (including a popular sky-replacement option). But Luminar AI promises to take AI editing to the next level, opening up advanced post-processing effects to a much larger audience.

Will Luminar AI do everything for you?

It doesn’t seem like it. As Skylum explains, you have to make creative choices; Luminar AI will do a lot of editing work for you, but you’ll remain at the helm.

world's first AI-powered photo editor

As for the Luminar AI release:

The date is currently unknown, but Skylum promises a “holiday season” release. I’d expect an early December debut, though mid-December or late November certainly isn’t out of the question.

In terms of price, you can currently preorder Luminar AI for a discounted rate:

$ 74 USD for a standard copy of Luminar AI, or $ 139 USD to download both Luminar AI and Luminar 4.

So if Luminar AI’s simple approach to editing appeals to you, make sure you take a look while the discount still lasts! You can view the software here.

Now over to you:

What do you think about Luminar AI? Do you like the idea of AI-based editing? Or does it feel like cheating? And will you purchase the program? Share your thoughts in the comments!

The post The World’s First Completely AI-Powered Photo Editor Will Debut Before the Year Is Out appeared first on Digital Photography School. It was authored by Jaymes Dempsey.


Digital Photography School

 
Comments Off on The World’s First Completely AI-Powered Photo Editor Will Debut Before the Year Is Out

Posted in Photography


Introducing the New dPS Editor and Content Manager, Jaymes Dempsey

15 Oct

The post Introducing the New dPS Editor and Content Manager, Jaymes Dempsey appeared first on Digital Photography School. It was authored by Darren Rowse.

Introducing the New dPS Editor and Content Manager, Jaymes Dempsey

We’ve had a quiet change of guard in the editorial role here at dPS. And the reason it’s been so smooth is that our new editor Jaymes Dempsey will be familiar to you as one of our current writing team members. He has been an understudy to Caz for a while now and has easily slipped into the editing role. Before I introduce you to Jaymes, a quick word from Caz

From Caz:

All the changes taking place on a worldwide scale have led me to do a lot of soul searching (as I’m sure it has for many). This exploration has made me realise I need to be focussing on my creative pursuits as they make my heart truly sing. While I have enjoyed being the Managing Editor of dPS and interacting with you all, I’m looking forward to continuing my traveling around Australia and creating as I go.

You are now in great hands with Jaymes Dempsey and the dPS team. I wish Jaymes all the best in his new role and I wish all of you the best on your photography journey!

A very big thanks to Caz for the energy she brought to the team and her role. We wish her all the best for her adventures around Australia and will always look forward to her latest updates.

About Jaymes Dempsey

Jaymes is a photographer and writer from Ann Arbor, Michigan. At 13, Jaymes decided he wanted to become a bird photographer; at 14, he decided that macro photography was the better option; now, over a decade later, he’s passionate about pretty much all photography, no matter the genre.

That said, Jaymes loves getting outdoors with his camera, and nature photography of all sorts (including bird, macro, and landscape photography) will always hold a special place in his heart. He also spends his evenings photographing downtown Ann Arbor, where you can often find him struggling to lug around an unreasonably large tripod and camera setup.

But Jaymes isn’t just passionate about photography; he also loves to help other photographers learn and grow. Jaymes believes that everyone is capable of being a great photographer, no matter their background or equipment, which is why he continues to do what he does!

Jaymes brings years of writing, editing, and content management experience to the table. He runs his own instructional photography blog, and his work has been published in popular photography magazines across the internet. In fact, it was Digital Photography School that first inspired Jaymes to starting writing about photography, and he has spent the last several years as a regular dPS contributor, which is one of the many reasons he is delighted to be coming aboard as Editor and Content Manager!

Jaymes is thrilled to take on a larger role within dPS, and he looks forward to interacting with the wonderful community that is Digital Photography School.

We hope you join us in welcoming Jaymes into his new role.

The post Introducing the New dPS Editor and Content Manager, Jaymes Dempsey appeared first on Digital Photography School. It was authored by Darren Rowse.


Digital Photography School

 
Comments Off on Introducing the New dPS Editor and Content Manager, Jaymes Dempsey

Posted in Photography