RSS
 

Posts Tagged ‘D500’

Report: Nikon firmware for using CFexpress Type B cards with D5, D850 and D500 will arrive ‘before the end of 2020’

12 Oct

Back in February 2019, Nikon announced it was working to develop a firmware update for its D5, D850 and D500 DSLR cameras that would bring support for using CFExpress Type B memory cards. Since then, we haven’t heard a word about these development from Nikon, but Nikon Rumors says it ‘can confirm’ the much-anticipated firmware update will arrive before the end of the year.

According to Nikon Rumors’ report, the firmware update will arrive ‘before the end of 2020.’ Nikon Rumors says Nikon ‘may say something about [these updates]’ this coming week when it launches its Z6 II and Z7 II mirrorless cameras.

Image credit: B&H Photo

Despite promising a firmware update, Nikon never confirmed the details of what kind of performance we can expect from CFExpress Type B cards when used with its D5, D850 and D500 DSLR cameras. While CFExpress Type B support will make it easier to use the open and more popular format — not to mentioned larger maximum capacities, since XQD cards top out at 240GB compared to the current 1TB maximum capacity of CFExpress cards — it doesn’t necessarily we’ll expect improved speeds over using XQD cards when using them inside the camera. However, you will see improved speeds over XQD cards when importing the cards to your computer if you’re using a CFExpress Type B memory card reader.

We contacted Nikon for a comment on the updates on Friday October 9, but haven’t received a response. We will update this article if we get any further information from Nikon.

Articles: Digital Photography Review (dpreview.com)

 
Comments Off on Report: Nikon firmware for using CFexpress Type B cards with D5, D850 and D500 will arrive ‘before the end of 2020’

Posted in Uncategorized


Review of the Nikon D500 for Wildlife and Bird Photography

01 Jul

The post Review of the Nikon D500 for Wildlife and Bird Photography appeared first on Digital Photography School. It was authored by Shreyas Yadav.

Roller with Nikon D500 and Nikon 200-500 f/5.6

Fast action is at the heart of Wildlife photography. Wildlife action is fast and unpredictable. Most of the wildlife, including predators, are active during early dawn and late dusk. During the edge of the day, light conditions are low. Having a range of focal lengths is essential to photograph distant wildlife shots.  The weather conditions are harsh in the wild. Moreover, wildlife photographers try to find a camera which is capable of capturing stunning images in every possible situation in the wild.

Nikon crafted a flagship DX-format DSLR camera – the Nikon D500, with excellent high ISO performance, a faster frame rate, and a fast and accurate focus – even in low light.

What it is?

Nikon D500 with the Nikon 80-200 f/2.8 lens mounted on Gitzo Tripod

The Nikon D500 camera body weighs around 870g (30 oz) including battery and XD card. It is a crop sensor (DX format) DSLR with a 20.9 MP CMOS sensor. The ISO range is from ISO 100 to ISO 51200. This ISO range is useful in getting better image quality even in low light. In addition to high ISO performance,  frame rate and autofocus performance of the Nikon D500 is excellent. Frames per second for Nikon D500 is whooping 10 FPS. The autofocus is fast and accurate in low light as well. Nikon D500 is fully capable of focussing up to f/8 with center focusing points. These key features make the Nikon D500 excellent for Wildlife and Bird photography.

This article is a field-review of Nikon D500 from the perspective of Wildlife Photographer. This review will help you in understanding how the Nikon D500 performs in the field.

Note: All the wildlife and bird images are photographed in the natural forest with uncontrolled light conditions and within their natural habitat.

Images are captured with the Nikon D500 and the Nikon 200-500 f/5.6 lens with a bean bag. Images are captured either from a safari jeep or from a safari boat.

Specifications

  • Sensor and processor – DX format (23.5 mm x 15.7 mm) CMOS sensor with EXPEED 5 processor
  • ISO – ISO 100 to ISO 51200 (ISO Expandable from range ISO 50 to ISO 1640000)
  • AF Modes – Single Servo (AF-S), Continuous Servo (AF-C), Manual and Full-time Servo in Live View
  • AF Area Modes – Single Point AF, Group Area AD, 3D Tracking, Dynamic-area AF with 25, 72 and 153 points, Auto Area AF
  • Power – EN-EL 15 Lithium Ion Battery with MH-25a charger
  • Storage cards – SD, SDHC, SDXC, and XQD cards. One slot for SD card and another slot for XQD card
  • Dimensions and weight – Approximate weight of the body including Battery and card is 870 g (30 oz) and dimensions are (Width x Height X Depth) 5.8 in (147 mm)  x 4.6 in (115 mm) x 3.2 in (81 mm)
  • Frame rate  (FPS: Frames per second) – 10 FPS in Continuous High Mode and for Continuous Low mode FPS Selectable from 2 to 9 FPS
  • Shutter release modes – Single, Continuous Low (2-9 FPS)  and Continuous High (10 FPS), Mirror Up, Self Timer and Quiet release
  • Shutter speed range – Slowest shutter speed is 30 s, and Fastest shutter speed is 1/8000 s
  • Metering modes – Spot metering, Center-weighted metering, and  Matrix metering
  • Exposure mode – Manual (M), Aperture Priority (A), Shutter Priority (S) and Programmed Auto (P)
  • White Balance  – Auto, Cloudy, Direct Sunlight, Flash, Fluorescent, Color Temperature (2500 k to 10000 k)
  • Flash – No Built-in Flash and External Flash is required
  • Image format – JPEG (Basic, Normal, Fine), NEF / RAW (12-bit or 14-bit with an option of Lose less compressed, Compressed and Uncompressed)
  • Lens compatibility – Full compatibility with Nikon AF lenses with G, E, D type and  DX-format lenses. Partial compatibility with PC lenses, AI-P, and Non-CPU lenses

Controls and ergonomics

AF-ON is useful in back button autofocussing. The focus area selection button is next to the AF-ON button. The Nikon D500 has a touch screen, and it can tilt up to a certain angle.

Buttons for selection of White Balance, Exposure Mode, Metering and Image Quality.

Shutter release mode dial.

Buttons for Exposure compensation, ISO selection, and movie recording.

Focus mode selection button.

Controls

Controls on the camera feel perfect for wildlife photography.

Here is why:

  • Exposure selection mode – This button helps to select the exposure modes – Manual (M), Aperture Priority(A), Shutter Priority(S) and Programmed Auto (P)
  • Frame rate setting – This dial helps to set the Frame rate as Single ( S), Continuous Low ( CL), Continuous High ( CH ), Timer and Mirror lockup
  • ISO and exposure compensation setting – the ISO button allows you to change the ISO quickly
  • Focus point selection dial – The Focus point selection dial helps select focus point
  • Focus mode and Focus area mode selection – This button, along with Primary and secondary dials ( Dials used to change the shutter speed and Aperture), is used to select focus modes as Single, Continuous and Auto. The same button is used to choose focus areas such as Single, 3D, Dynamic with 25,72 and 153 focal points, Group area and Auto-area
  • Metering selection button – You can select Spot, Center of Matrix metering from this button quickly. In Wildlife photography switching between Matrix and Spot metering is often required depending on the light conditions
  • AF- ON button – This is one of the most useful buttons on the Nikon D500 for wildlife photography. If the bird is standing on a tree branch or takes quick flight, the AF-ON button helps to capture the image with accurate focus.

Build quality and weather sealing

  • The Nikon D500 is mostly made up of magnesium alloy, carbon fiber, and plastic
  • The weight and size of the Nikon D500 are suitable for all day shooting and even hand-holding. The size of the D500 is perfect while you travel in the wilderness and it is perfectly sized while hiking and traveling in the safari vehicle.
  • Body toughness of the Nikon D500 is decent but not great as that of Nikon D5. I find the durability of earlier versions, such as Nikon D200, D300 or D700 was better than D500. However, the build quality of Nikon D500 feels slightly better than the Nikon D7100 or the Nikon D7200 but up to the standard of flagship DX body.
  • Protection against dust and water splash is decent enough
  • I have used Nikon D500 in moderately dusty environments and medium drizzle. The camera performs fine. In fact, I clean the camera after a photoshoot in the rain or heavy dust and I recommend you do so too. This type of weather sealing may be sufficient for mild dust and water splashes, but it doesn’t look good enough in extreme weather.

Ergonomics and handling

  • Ergonomically, the Nikon D500 feels just right. Important command dials for wildlife and bird photography are located on the camera body itself. This helps you to change the settings quickly.
  • Hand-holding, the Nikon D500, feels better. One caveat is the video recording button is located a bit oddly. Despite using it multiple times, I still get confused in locating the video recording button. Apart from the video recording button, you will find the buttons and dials are at the right place with the correct size.

Camera performance from the perspective of Nature and Wildlife photographer

Autofocus performance

Osprey in flight. Focus performance of the Nikon D500 for Birds in flight is excellent. Exif : 1/800s , f/8 and ISO 450

Bird action happens fast and can be erratic. Wildlife movement is also fast as it occurs at dawn or dusk. The ability of the camera to focus fast and accurate is a must. With the Multi-Cam 20K Autofocus Sensor module, Nikon D500’s autofocus capabilities are excellent. The Nikon D500 focuses accurately (provided you choose the appropriate focus mode and focus area mode).

I use back button autofocus for focusing. There is a dedicated button for back button autofocus, which is AF-ON.

Hare in the clutter. The Nikon D500 precisely acquires focus on the main object even through the forest clutter.

The Nikon D500 focusses extremely well in following conditions:

  • Daylight
  • Cloudy and rainy weather
  • Low light
  • Distant objects
  • In the forest clutter and forest canopy
  • Dusty and snowy weather
  • Birds in flight and animals in action

In terms of autofocus performance, the Nikon D500 is an absolute winner.

Deer crossing the safari track. The camera’s focus performance for distant objects is excellent. This deer was crossing the Safari road. The distance between the deer and our vehicle was around 100 meters

Image quality – Colors, details and dynamic range

Colors of the peacock. Color rendition and image quality of the Nikon D500 is great. Exif: 1/100s, f/5.6 and ISO 720

Colors, tonal range, and dynamic range of the Nikon D500 images is excellent. Metering of the Nikon D500 is fantastic. It evaluates and produces correct image exposure.

Stare of an eagle. The Nikon D500 captures the details perfectly. Exif: 1/400s, f/5.6 an ISO 500

For most of my wildlife images, I use Matrix metering. For some tricky light situations, such as harsh lights or shadows, and if the animal is dark or bright, I switch to Spot metering mode. Matrix metering will give you excellent light exposure.

Jungle fowl calling. Feather details are excellent. Exif: 1/250s, f/5.6 and ISO 450

The elephant in its kingdom. Colors and details of the elephant are accurate. Exif: 1/1000s, f/5.6 and ISO 2200

The dynamic range of the Nikon D500 is improved as compared to earlier versions of the DX format Nikon cameras. If the light is sufficient, I set the exposure compensation to +0.3 or +0.7. Exposure compensation shifts the histogram towards the right. It helps in bringing out the details and enhancing the colors in an image.

Nikon D500 review for wildlife and bird photography 7

The Dynamic Range of the Nikon D500 is wide. The camera was able to capture the eyes and feathers in the shadow. Equally, the Nikon D500 captured the highlighted crest on the head perfectly.

High ISO and low light performance

Image quality and ISO performance in low light are much improved in the Nikon D500. The camera ISO has a range from ISO 100 to ISO 51200. In controlled light conditions or lab test, the Nikon D500 Images may look less noisy. However, when you are shooting with the Nikon D500 in the real jungle and natural light conditions, you have to be realistic when you select your ISO.

Nikon D500 review for wildlife and bird photography 6

Peacock at ISO 1600

I use a maximum ISO up to 6400 in most cases, and for some rare wildlife moments, I go up to ISO 12800. In the forest, especially during the early morning or late evening, an ISO of up to 6400 helps.  With ISO 6400, I can get a sharp image with excellent dynamic range. The colors are also good. These images are perfectly usable for big prints and web-sized images.

Nikon D500 review for wildlife and bird photography 5

Bond of Nature. Family portrait at ISO 4000

Whereas, if you go ridiculously high on ISO such as ISO 51200, you will still get an image, but you will have to apply Noise reduction in post-processing. Also, the image loses the fine details. If you are going to print the image, select the reasonable high ISO at the available light conditions.

Bottom line

The Nikon D500 has improved high ISO and low light performance. Up to maximum ISO 6400, images are great. The sharpness and colors are fantastic and noise levels are low and manageable in post-processing.

Nikon D500 review for wildlife and bird photography 4

Sambar deer at ISO 6400. It was almost dark in the forest. Luminance noise is visible in the image.

Nikon D500 review for wildlife and bird photography 3

Mongoose at ISO 6400. It was almost dark in the forest.

White balance

Nikon D500 review for wildlife and bird photography 2

Fish eagle on the perch. Auto White balance for the Nikon D500 produces color temperatures and tint accurately.

The auto white balance of the Nikon D500 is accurate. The camera produces white balance without any shift in color or tint. All the color temperatures look right.

Other than Auto White balance, there are different white balances available such as Daylight and Shade. All produce good results.

For wildlife and bird photography, I recommend you choose Auto White Balance. It will help to reproduce the correct white balance for your images. If you want to add creative effects, you can always tune the raw image in post-processing.

Bonus: My D500 camera settings for wildlife and bird photography

  • Image Quality: RAW
  • NEF (RAW) Recording: NEF RAW Compression: Loose-less compressed and Bit Depth: 14-Bit Depth
  • Color space: Adobe RGB
  • Picture Control: Standard (SD)
  • ISO: Auto ISO with Maximum ISO as 6400 (It will depend on the lighting conditions, but I find 6400 is the right balance for image quality and low noise)
  • Autofocus mode: AF-C (Continuous)
  • Autofocus Area mode: Dynamic (25 points) or Group area focus
  • Exposure mode: Manual (Shutter speed and Aperture will be set based on the available light in the environment). You can also use Aperture priority as an Exposure Mode.
  • White Balance: Auto
  • Metering: Matrix
  • For autofocus, use Back button autofocus: AF-ON
  • Shutter release mode: Continuous High CH (10 FPS) or Continuous Low CL (6 FPS)

Conclusion and recommendations

Pros

  • 10 FPS (Frames Per Second)
  • Fast and accurate focus even in low light
  • Good High ISO Performance
  • Superb image quality and dynamic range
  • Excellent ergonomics
  • Perfect location of camera buttons and dials
  • Autofocus with central autofocus points up to Aperture of f/8

Cons

  • No Built-in flash and GPS
  • Location of the video recording button
  • Above average Build quality and weather sealing (Not the best in class)

In summary

The DX sensor, superior autofocus performance, high ISO performance, best in class frames per second (10 FPS), and travel-friendly size makes the Nikon D500 perfect for wildlife and bird photography.

You will love using Nikon D500 in the wild.

What do you think about the Nikon D500 camera? Please do let us know in the comments below!


Nikon D500 review for wildlife and bird photography

The post Review of the Nikon D500 for Wildlife and Bird Photography appeared first on Digital Photography School. It was authored by Shreyas Yadav.


Digital Photography School

 
Comments Off on Review of the Nikon D500 for Wildlife and Bird Photography

Posted in Photography


Nikon releases firmware version 1.20 for its D500 camera

23 Apr

Nikon has released firmware version 1.20 for its D500 camera. The firmware update, which comes two years after the camera was initially released, adds the ability to connect via Wi-Fi to devices running SnapBridge (version 2.5.4 or later) and fixes a number of additional issues.

Specifically, Nikon says it’s addressed an issue where focusing on the edge of the frame wasn’t accurate, a problem where the camera would sometimes stop working while shooting in continuous high-speed release mode and a bug where the camera would sometimes remain on even after the power button was turned to ‘Off.’

You can download the firmware version 1.20 for the Nikon D500 from Nikon’s website.

Nikon releases firmware version 1.20 for the D500

Changes from “C” Firmware Version 1.15 to 1.20

• The camera can now connect via Wi-Fi to devices running SnapBridge. Before using this feature, upgrade to the following version of the app:

– SnapBridge version 2.5.4 or later

• Fixed the following issues:

– The camera sometimes had trouble focusing on subjects in the focus points at the edges of the frame.
– The camera would sometimes stop responding during shooting in continuous high-speed (CH) release mode.
– The camera would sometimes not turn off after the power switch was rotated to “OFF”.

Articles: Digital Photography Review (dpreview.com)

 
Comments Off on Nikon releases firmware version 1.20 for its D500 camera

Posted in Uncategorized


Olympus E-M1X versus the E-M1 II, Panasonic G9, Fujifilm X-T3 and Nikon D500

24 Feb

Introduction

With ‘Deep Learning’ autofocus, crazy-fast burst speeds and refined ergonomics, the Olympus E-M1X is the most focused action and sports shooting camera that Olympus has ever made. And though it retains a Four Thirds sensor like the E-M1 II, Olympus is touting the X as a credible alternative to the flagship Nikon D5’s and Canon EOS-1D X II’s of the world: in the right circumstances.

We’ll look at comparisons against the D5 and 1D X II in a future article, but for now, we wanted to take a closer look at how the E-M1X stacks up against other Four Thirds and APS-C cameras with sports-shooting chops. It’s true that the E-M1X is the only camera in this comparison with a true double-grip chassis, but its competition is fierce nonetheless.

Against the E-M1 Mark II

Olympus has been clear that the E-M1X does not replace the existing E-M1 II, and both will live alongside each other in their lineup. But since the E-M1 II was already such a capable camera and you can get one at a steep discount compared to the X, we figured we’d start with a look at how these two stack up against each other.

The most immediate change is obviously the body. Not only in terms of size, but also battery life (doubled on the X, since it has…double the batteries). There are also significant differences between the two in terms of their controls. By and large, there are more buttons on the X that are dedicated to a single purpose, and the dual 8-way joysticks free up the four-way controller to act as four distinct custom buttons.

Against the E-M1 Mark II

Another benefit of the larger body on the E-M1X is that it makes room for an all new in-body image stabilizer, now rated at up to 7 stops without a stabilized lens, and up to 7.5 stops with certain lenses such as the Olympus 12-100mm F4 Pro. The E-M1X is also officially rated to IPX1 standards; the E-M1 II is certainly a well sealed camera, but Olympus makes no claims regarding formal ratings for it.

Both cameras have the same viewfinders, the same rear screens and the same
(or very similar) sensors

Olympus also doubled the processors in the X relative to the Mark II, enabling not only the ‘Deep Learning’ autofocus that detects motorsport vehicles, aircraft and trains, but also the hand-held high-resolution mode that spits out 50MB files. And Olympus has told us that it’s tweaked its C-AF algorithm in the X (note, this is not the C-AF + Tracking algorithm) to allow for better autofocus performance when you keep an AF area over your subject.

As for the rest, well, there’s not much to tell. Both cameras have the same viewfinders, same screens and the same (or very similar) sensors and very similar menu systems. For all intents and purposes, unless you need a tougher camera, want a beefier camera to use with bigger lenses or are in love with the Olympus ecosystem and want the best possible autofocus performance your bucks can buy, it’s probably best to just stick with the E-M1 II for now.

Against the Panasonic Lumix DC-G9

Let’s start with Panasonic’s Four Thirds stills-shooting flagship, the G9. Although at first glance there doesn’t appear to be much between the two in terms of core specs, the experiences of actually using each of them are more disparate than you might expect.

But let’s start with those specs, just ’cause. While the E-M1X shoots at 18fps with autofocus, the G9 ups the ante with 20fps. But they both have 20MP Four Thirds sensors with native ISO ranges of 200-25600, they both have fully articulating rear touchscreens, AF joysticks and in-body image stabilization.

But whereas the E-M1X has an on-sensor phase detection autofocus system that is able to recognize subjects like aircraft, trains and automobiles, Panasonic has stuck with its Depth from Defocus technology in the G9’s contrast-detection autofocus system. The result is that there is ‘flutter’ in the G9’s EVF when shooting moving subjects, as the lens rapidly wobbles in and out of focus to reconfirm critical focus. The ‘keeper rate’ of in-focus shots on the G9 is actually quite good, but it can be difficult to see while shooting if your subject is in focus at all. It’s a bit disconcerting until you get used to it.

Against the Panasonic Lumix DC-G9

There are other considerations, such as the G9’s top-plate LCD that displays shooting settings, something missing on the Olympus. Both cameras have high-resolution modes, but only the Olympus lets you hand-hold the E-M1X to get those extra pixels. The G9′ s video spec is rather more impressive too. It shoots 4K/60p, while the Olympus tops out at 4K/30p. Missing a built-in battery grip, the Panasonic is of course smaller, and with around half the rated battery life of the Olympus.

Both cameras give great results from their Four Thirds sensors given enough light. In the end, we lean towards the Olympus for outright autofocus performance, but the Panasonic is the stronger option for those who also dabble in video.

Against the Nikon D500

Okay, with the E-M1X’s main Four Thirds competitor out of the way, let’s look at how it stacks up against Nikon’s APS-C flagship, the D500.

With a resolution of 21MP, the D500 is only slightly above the E-M1X in this regard – but the larger sensor will come with less noise, more dynamic range and better low light performance than the E-M1X. Physics is physics, simple as that.

The larger sensor in the D500 will have less noise, more dynamic range, and better low light performance

And while the D500 comes without any form of ‘Deep Learning’ in its autofocus system, it does have a highly capable 3D Tracking mode to track moving subjects. So it won’t automatically detect, say, a car, but if you manually tell the camera what to track, the D500 will stick to it with remarkable tenacity. By contrast, Olympus’ non-subject specific tracking is nowhere near as ‘sticky’ as the Nikon.

Against the Nikon D500

The viewfinder experience differs from one camera to the next, and not just because one is optical (Nikon) and one is electronic (Olympus). The Olympus’ viewfinder is noticeably larger than that on the D500, but because it uses LCD technology, contrast is lacking and blacks can appear somewhat ‘washed out.’

The D500 also tops out at 10fps, slower than the E-M1X but still respectable. Despite only having a single battery, the D500 is rated for more shots per charge than the E-M1X, in part because it doesn’t have to power its viewfinder. But the Olympus has incredible image stabilization, and Nikon’s lens lineup offers limited solutions for getting near the reach of the Olympus lineup without spending more money and carrying more weight.

In the end, both cameras will reward you with an insane number of in-focus ‘keepers’ and good image quality – but the Nikon will handily beat the Olympus as light levels drop and ISO values rise, while Olympus gives you more reach in a smaller overall package.

Against the Fujifilm X-T3

Aha! You weren’t expecting Fujifilm to make an appearance, were you? But the X-T3 is a credible contender, offering further evidence that Fujifilm is quickly learning from both its past and its competitors. It wasn’t that long ago that Fujifilm offered dismal video and slow autofocus, yet now the X-T3 is a stills / video hybrid camera that is among the best APS-C cameras we’ve ever used. So how does the E-M1X look against it?

The X-T3 has the highest resolution of any camera in this slideshow

With a new sensor offering 26 megapixels of resolution, the X-T3 will have the highest resolution of any camera in this slideshow. It also reads out very fast, allowing for 20fps burst shooting using the electronic shutter, and 30fps with an added 1.25x crop that yields 16MP images.

But what good are burst speeds if your subject is out of focus? Good thing the latest autofocus system in the X-T3 is really good, with a solidly capable tracking mode that works similarly to Nikon’s 3D Tracking. Also like the Olympus, there’s no top-plate LCD to check your settings, but that may not matter if you make use of the analog dials. And one last small-but-significant distinction: the E-M1X has a large AF-L / AE-L button that can be assigned to AF-ON for back-button shooters, and the X-T3’s AF-L and AE-L buttons are comparatively small and placed less conveniently.

Against the Fujifilm X-T3

Despite its relatively large sensor, the X-T3 will also be the smallest camera in this comparison – but that portability comes with compromises. The Fujifilm’s smaller grip is less well-suited to large lenses than the Olympus, and battery life is comparatively poor. But build quality is excellent, even if Fujifilm won’t commit to an ingress protection rating like Olympus will. Despite having excellent video capabilities, the Fujifilm has no in-body stabilization, limiting video shooting possibilities for some users, though it has a much nicer electronic viewfinder and zero-blackout shooting in those electronic bursts.

Like Panasonic’s G9, the Fujifilm X-T3 may be best seen as a more appropriate all-rounder for most people. But Olympus should be concerned about the little Fujifilm, particularly as the system has some excellent lens support that signals how seriously the company is taking sports and action shooting (see the XF 100-400mm zoom and the 200mm F2 prime). Fuji also offers – arguably – some of the best JPEG color in the business, which is not only an Olympus strong suit but also very important to action shooters that don’t have time to process thousands of Raw files.

The wrap

In looking at the E-M1X in comparison to these excellent crop-sensor cameras on the market today, you can’t help but wonder if Olympus really has their work cut out for them.

It occupies an interesting niche in the market. Olympus is clearly catering to users that may either aspire to own a professional double-grip DSLR, or perhaps already own an SLR of some sort but are tired of carrying it around. These users must be shooting in pretty decent light to avoid ultra high ISO values compromising image quality on the Four Thirds sensor and yet, these users must not want to compromise at all on autofocus capability.

There’s no denying that the E-M1X is an amazing piece of technology wrapped in what is perhaps the best-built camera body any of us have laid our hands on. In the right hands and in the right circumstances, it’s capable of astounding imagery. We’ll continue to put the camera through its paces as we press on with our final review.

What do you think of the E-M1X? Do you own any of the other cameras mentioned in this comparison? Do you want to pick up a copy of the Olympus for your very own? Let us know in the comments.

Articles: Digital Photography Review (dpreview.com)

 
Comments Off on Olympus E-M1X versus the E-M1 II, Panasonic G9, Fujifilm X-T3 and Nikon D500

Posted in Uncategorized


Nikon Custom Modes of the D750 and D500. Which mode is best?

28 Nov

Customization is a big trend. From 3D printing to personalizing phones to our face, customization is becoming a requested product feature and a competitive advantage. Cameras also try to provide more and more customizable features to cater to our individual shooting styles. In this article, I will present and compare the Nikon custom modes of the D750 and the D500 including:

  • U1/2 and
  • Memory banks

A D750 features ‘U1/2’ and a D500 the ‘Memory banks.’ In this article, you will learn ways to set both up. Shooting scenarios showcasing the usefulness of custom settings will be included. Finally, I will share my preferred settings for each one, as well as some thoughts on both methods.

1 Nikon Custom Modes

The location of U1/2 on the D750

Location and activation of U1/2

Generally a warmly received feature, U1/2 can be found on the top dial of the cameras that include them.

The way to move between them is to push the button next to the dial and spin the dial until the required setting aligns with the white indicator line next to the dial. This then becomes the active combination of preselected settings.

Location and Activation of Memory Banks

On the other hand, Memory Banks are not assigned upfront directly to physical controls. Instead, these are selectable through the menus or are assignable to button and dial press-and-turn combinations.

There are different ways to access and activate banks. The most common are:

  • Through the ‘photo shooting’  and ‘custom’  menus shown below. It is the top option on both menus. These switch between the four (A/B/C/D) available photo shooting menu banks (in the photo shooting menu) and the four (A/B/C/D) available custom setting banks (in the custom setting menu). This is the longest way to set banks up, as it resides deeper in the menus.
2 Nikon Custom Modes

Screen of photo shooting menu on the D500

3 Nikon Custom Modes

Screen of custom setting menu on the D500


  • Through the ‘info’  button at the back of your camera. Pressing this opens up a menu and the two topmost options are: ‘photo shooting menu banks’ and ‘custom settings banks.’ There is no way to change the order in which they are shown.
  • Through the ‘my menu’  tab. With this menu, you assign them in any ranking that suits you. A variation, for quicker access, is to first place either of them (but only one at any time) as the top item in ‘my menu.’ To follow, assign the shortcut ‘access top item in my menu’ to any permissible button. The buttons / / / work for this shortcut (sub-selector press).
  • Through the assignable button and dial press-and-turn combinations. This method applies exclusively to ‘photo shooting menu banks.’ The buttons that can be pressed in combination with any command dial rotation are / (sub-selector press) / (movie record button next to the shutter button). For the combination with the movie record button to work, the live view selector needs to be in rotated to .
4 Nikon Custom Modes

Live view selector to photography mode position on the D500

A Conceptual Way to Approach Custom Settings

Now you should know how to access and activate both custom settings. I will now discuss the rationale behind them using them.

Firstly, I will talk about useful ‘generic’ concepts:

  1. Camera settings (core/output/fine-tune)
  2. Photographic parameters (scene variables/photographic intent/enablers)

These concepts are a framework for you to consider in the use of custom settings. I prefer this framework, rather than simply answering ‘which custom settings are best for portrait, sports, nature or any other photography genre?’ I have intentionally left out perspective (I consider this primarily impacted by lens selection) and composition (as this is the photographer’s prerogative).

1. Camera Settings

Core Settings: Aperture, shutter speed, ISO, and metering. These are at the heart of photography, regardless of genre. Most of these are changeable on the fly while shooting through the dedicated button and/or dial press/turns.

Output Settings: Most of the settings of the ‘photo shooting’ menu. These affect the output file type, size and look, such as file quality (raw and jpeg), picture control system (standard, vivid etc.), and white balance. An exception is the ISO setting, which I consider core.

Fine-tune Settings: The menu options of the ‘custom settings’ menu. These are important adjustments to the way the camera looks at and reacts to the scene/subject.

2. Photographic Parameters

Scene variables: I keep it simple, by including (available) light levels and subject movement only.

Photographic intent: This is the part where you decide what you want to convey or achieve through your photograph. Do you want to freeze or show movement? Go high or low key on the scene? Are you isolating your subject from its surroundings or showing some background detail? These (and many more) are the meaningful aesthetic choices, which make each photographer unique.

Enablers: Out of the many props/modifiers available to photographers, I include here the flash and the tripod. These two (arguably filters as well) make possible, more than anything else, the realization of our vision in diverse genres of photography (e.g. landscape, long exposure, night photography, macro etc.). Additionally, each of them has their own distinct group of settings to maximize their effectiveness. 

How Do U1/2 and Memory Banks Approach These Concepts?

Any given scene can be broken down to any pair of variables (marked with x) in the table below.

5 Nikon Custom Modes

I argue that superimposing our photographic intent on these sets of variables, assisted by suitable enablers, is the art and technique of photography. In my view, the custom settings number one goal is to facilitate effortless interplay between variables, intent, and enablers.

To achieve this, they should allow a quick switch from one bundle of the core, output and fine-tuning settings to another. U1/2 and Memory Banks do this in different ways, as I will demonstrate below.

U1/2 Table

Key: U1 (User-defined 1), U2 (User-defined 2), C1 (Core 1), C2 (Core 2), O1 (Output 1), O2 (Output 2), F1 (Fine-tuning 1), F2 (fine-tuning 2)

6 Nikon Custom Modes

Memory Bank Table

7 Nikon Custom Modes

The tables above summarize the difference in the logic of U1/2 and Memory Banks.

  • U1/2 are vertical combinations of selected settings of all types of camera settings.
  • Memory Banks is a matrix combination (i.e. mix and match) of primarily ‘Output’ and ‘Fine-tuning’ camera settings. The exception is the inclusion of the core ISO setting on the photo shooting Menu Banks. Turning on the ‘extended photo menu banks’ option in the ‘photo-shooting’ menu allows for the other settings (aperture/shutter/manual priorities, aperture, and shutter values as well as exposure and flash modes) to be embedded in the photo shooting banks.

Applying Custom Settings to Real-Life Shooting Scenarios

Generic Shooting Style

Before I provide some examples of real-life shooting using both custom settings, I will make a few important working assumptions about a ‘generic’ shooting style:

  • You shoot various genres of photography regularly in a mixed way (i.e. you would opt for the maximum settings’ range and flexibility within easy reach)
  • You do not employ back button focus. I propose you do so. It can increase your focusing and composing options, as well as your speed of shooting considerably.
  • You are not a full-time raw or jpeg only shooter. Myself, I shoot raw 95% of the time/shots.
  • You do not use auto ISO. I propose you do, as on the field it can make life a little less complicated.
  • You have and know how to use a flash and a tripod.

Typical Shooting Situations

Now, I will walk you through one of my typical shooting situations – walking around town or traveling, to show what I ideally expect from my custom settings.

Scenario One:

As I am strolling along, I see a nice background for a portrait. I want my camera to be on the ready with pinpoint focus accuracy (AF-S single point) with a nice shallow depth of field. Depending on surrounding light levels and contrast, I may or may not want to add flash-fill or even overpower available light using high-speed sync, so it is handy to be able to quickly access a convenient flash exposure starting point.

8 Nikon Custom Modes

Portrait of a friend taken with the D750

Scenario Two:

Along the road, a cute animal is playing. I’d like to shoot it as it moves, freeze it or do a nice pan. My camera needs to be ready to follow motion (AF-C combined with any preferred focus area mode). Also, I need quick flexibility on my shutter speed selection from a 1/1000th sec (to freeze action) down to around 1/30th sec (to pan).

9 Nikon Custom Modes

A portrait of a dog taken with the D500

Scenario Three:

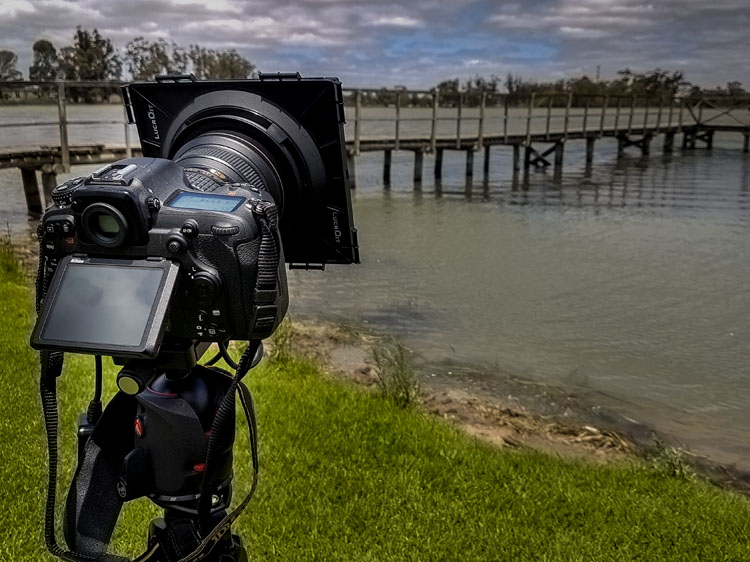
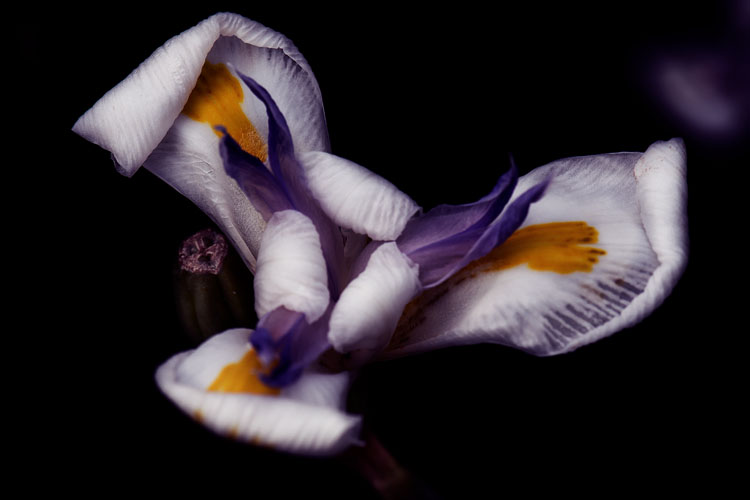
I enter a beautiful garden. Flowers are perfect to photograph close-up (macro) so I set up my tripod. Here, I require a deeper depth of field and pinpoint focus accuracy again (AF-S single). If the light is not plenty, I may need a longer than usual exposure.

Turning ‘on’ long exposure noise reduction and exposure delay, provides better image quality in these scenarios. To further mitigate shake risk, I also engage mirror lock-up. Unfortunately, mirror lock is not pre-configurable in U1/2 or in Memory Banks.

10 Nikon Custom Modes

A Flower close-up taken with the D750

Scenario Four:

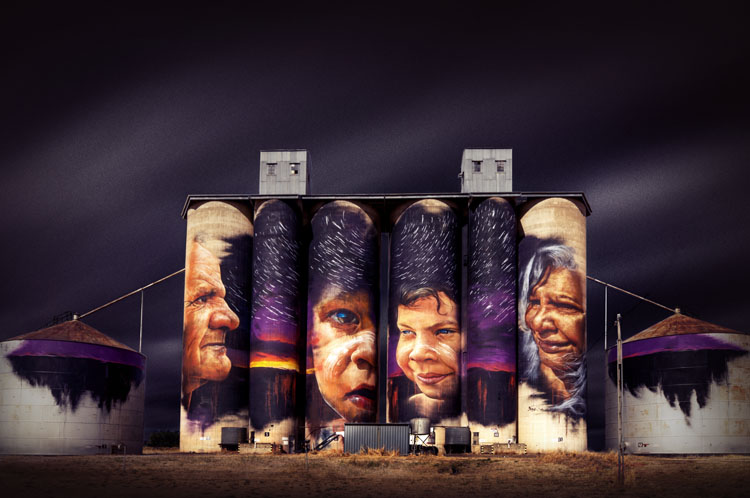
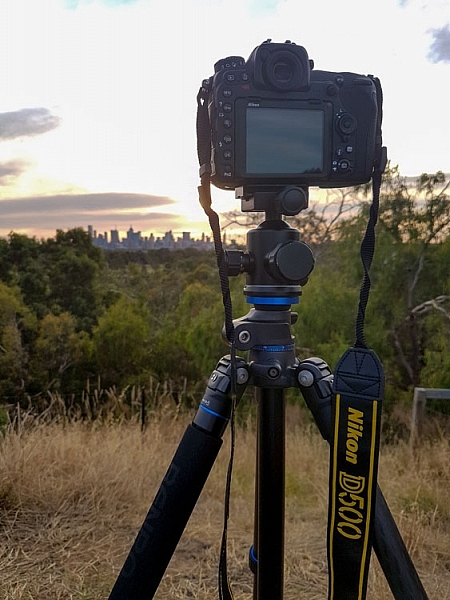
On any trip, it is great to take a nice landscape photo. In this case, the macro settings above, more or less apply. If there is plenty of light, shooting handheld is not an issue.

11 Nikon Custom Modes

A landscape taken with the D750
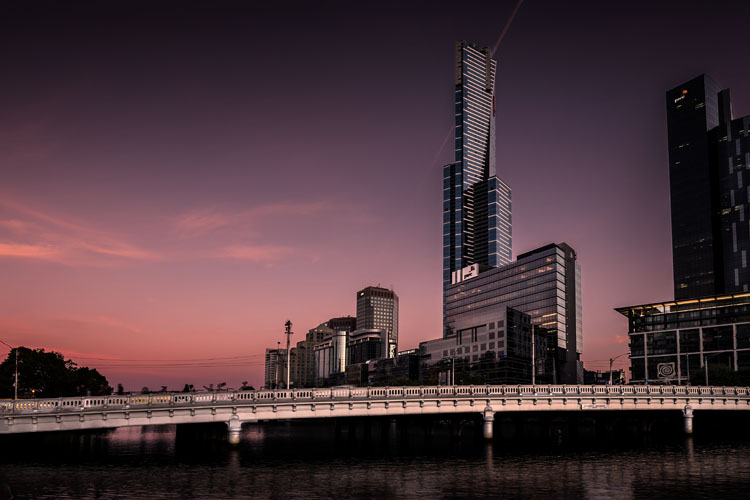
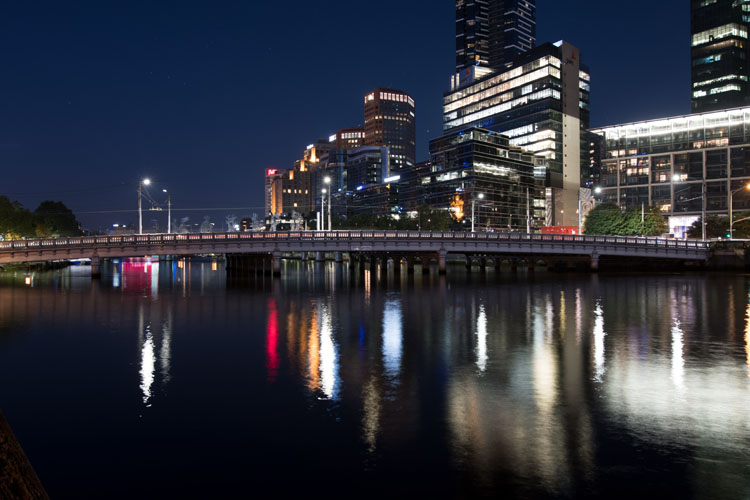
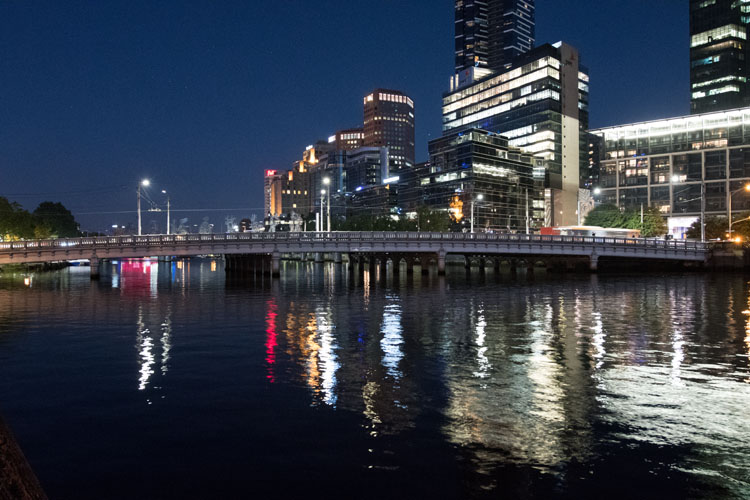
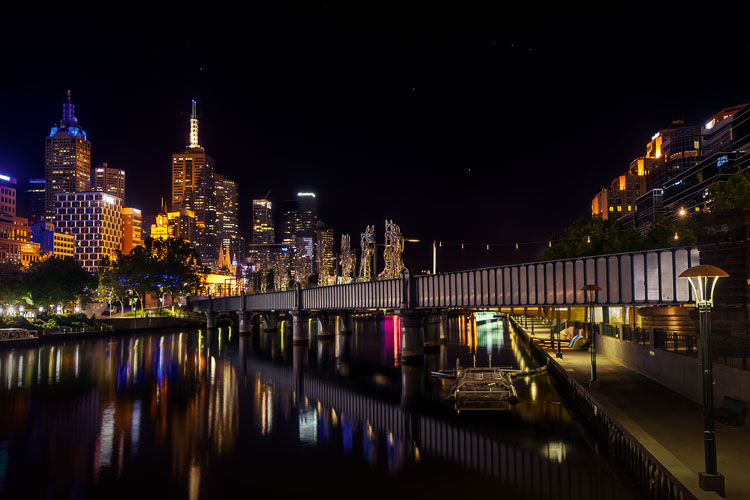
Scenario Five:

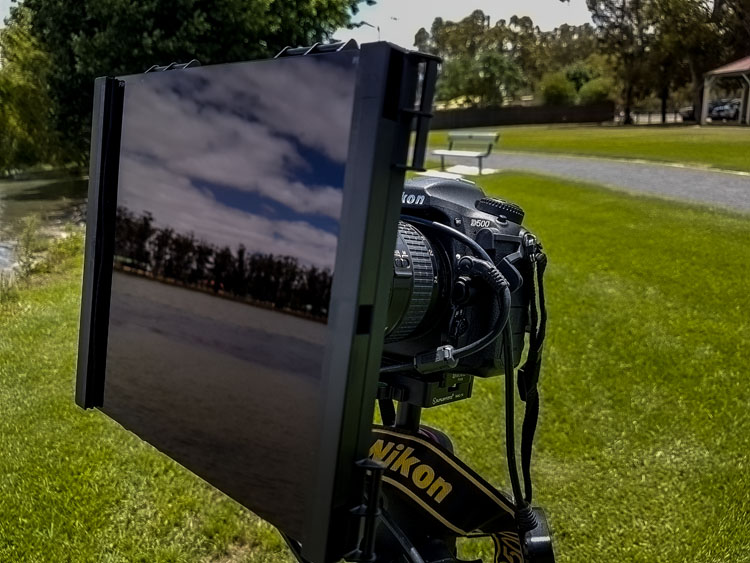
Finally, during a town-by-night walk, a nice long exposure is always memorable. Again, the macro scenario settings and my trusty tripod come in handy.

12 Nikon Custom Modes

A long exposure taken with the D500

Based on these realistic hypothetical-shooting scenarios, it is evident that settings vary considerably from auto-focus mode to shutter speed and aperture, to flash or no flash etc. You may also want to give your camera to someone for a quick snap, without having the time or inclination to explain focus, recompose or other settings.

If there is an ‘auto’ option on your modes dial then all is good, if not, then resetting to ‘waiter’ or ‘dumbbell’ mode (as full-auto is also known to some) is not quick nor easy without custom settings.

Now, I will briefly show my settings for both modes and a few tips to further increase their flexibility.

My Settings for U1/2

U1 is my ‘General Shooting Mode’ and the settings are shown in the screen below. If you employed back-button focus, then you would use AF-C instead of AF-S

13 Nikon Custom Modes

My U1 settings in D750

U2 is my ‘Flash Shooting Mode’ and the settings are shown in the screen below.

14 Nikon Custom Modes

My U2 settings in D750

It is important to mention that you have additional options by customizing M/A/S modes.

The Settings I Use For Memory Banks (Extended Banks ‘ON’)

My photo shooting banks are named A=General B=JPG C=Shutter D=Manual

The custom banks are named A=General B=Flash C=Tripod D=Waiter

I have set banks this way to be able to move from my usual working best quality output (e.g. A/A) to basic point and shoot output (e.g. B/D) within just a few seconds by using the ‘info’  button and changing the ‘custom settings’  banks.

Tips to maximize both methods:

  1. Create and rank items in ‘my menu’. This will allow quick access and change of settings that are not pre-programmable in any mode (e.g. mirror lock up).
  2. Especially for Memory Banks, use the ‘save/load settings’ option onto an SD card (one you will not format). Also, store the settings file on any drive for safekeeping. This will give you a quick restore method, in case you forget what your initial Memory Bank settings were after many changes, as banks are not ‘sticky’.
  3. Read on the net for other ways that users have set their U1/2 and banks. Their needs and style may suit yours. 

So Which Method is Best?

After comparing U1/2 with Memory Banks for versatility in the above scenarios, my conclusion is that banks provide me with the highest flexibility thanks to their matrix structure. However, banks demand greater discipline in their set-up and use to remain helpful. This is because U1/2 are ‘sticky’, while banks are not.

Once settings are saved in U1/2, no matter what changes you make while shooting with U1/2 selected, you will not impact the saved settings. Simply reselect U1/2 and you are at your initial settings in a blink, hence ‘sticky’. However, all 8 banks save settings dynamically in real time as you apply them during your shooting. Following is a simplified example to elaborate:

You have U1 set up as A-priority, AF-S at f/5.6 and matrix metering. During your shoot, you move from the matrix to spot and f/8. Do you want to go quickly back to your base settings? Simply turn the dial from U1 to U2 and then back to U1 again, and you are back to f/5.6 and matrix.

In banks (both custom and shooting), if you wanted to keep your selected bank identical to the starting configuration, you would need to manually bring metering and apertures back to their initial values.

Conclusion

So, in the grand scheme of things, I have no complaints from either method in the Nikon Custom Settings. I am glad to have both available. I value the ease of use of U1/2 and I love the greater choice that Memory Banks give me. For example, being tripod-ready for landscape or macro, without having to remember to change many settings makes things easier and quicker.

It would be great to have an option to easily save and restore banks in camera to provide the best of both worlds, or to have the quick recovery of U1/2 with the greater choice of the banks.

Join the discussion and let us know your preferred method and way of programming Nikon Custom Settings on the D750, D500 or any other camera featuring U1/2 or banks.

The post Nikon Custom Modes of the D750 and D500. Which mode is best? appeared first on Digital Photography School.


Digital Photography School

 
Comments Off on Nikon Custom Modes of the D750 and D500. Which mode is best?

Posted in Photography


Rare Nikon D500 ‘Rex Edition’ still works despite run-in with German Shepherd

27 Jun

Just a day after purchasing the camera new, a customer of Belgian camera shop PCH brought his Nikon D500 back in with some, uh, unique cosmetic modifications. His German Shepherd ‘Rex’ got ahold of the camera and gave it a bit of a makeover, chewing through most of the lens hood and memory card port cover.

As highlighted in the video above, the D500’s magnesium-alloy build prevented Rex from doing any real structural damage. And amazingly, the camera seems to be in perfect working condition, aside from a lingering dog-chew-toy-smell noted by PCH. If nothing else, it’s a testament to the D500’s toughness, and reminder to dog owners to keep new cameras out of reach from curious pets.

Articles: Digital Photography Review (dpreview.com)

 
Comments Off on Rare Nikon D500 ‘Rex Edition’ still works despite run-in with German Shepherd

Posted in Uncategorized


Nikon D7500 vs Nikon D500: Which is better for you?

13 Apr

D7500 vs D500

The launch of the D7500 presents an interesting quandary for camera buyers: should I buy the D500 or save some money and get the D7500?

We’ll look at the differences between the two, to help illuminate the question for you. Which one is ‘best’ will be a choice for you, of course, since it’ll depend on what you shoot and what you need.

Image quality

With the same sensor and the same generation of processing, there’s no reason to expect there to be any difference in image quality between the D7500 and D500. The 20MP sensor in the D500 is very good (albeit not significantly different from the D7200’s chip, when viewed at the same size), and Nikon knows a fair bit about generating JPEGs.

Autofocus

For us, one of the most significant factors will be how closely the D7500 can match the D500’s autofocus. It gains the much higher resolution metering sensor used for subject tracking, along with nominally the same processing (though Nikon’s Expeed naming system doesn’t necessarily mean they have the same chip).

However, the D7500 doesn’t gain the AF module from the D500, which means it can only offer 51 AF points, rather than 153 points. Critically, 99 of the D500’s AF points are cross-type, compared with just 15 of the D7500s, which is likely to give the bigger camera a huge advantage when you use off-center AF points. The difference in AF module also means it misses out on the incredibly broad AF coverage that the D500 offers.

Even so, the processing and meter module should ensure the autofocus and, in particular, the subject tracking, works better than the already rather good D7200. It remains to be seen whether it can match the uncannily good performance of the D500.

Speed

On top of whatever difference there proves to be in terms of autofocus, the D500 is a faster camera. It can shoot 10 frames per second, to the D7500’s 8 and, at 200 uncompressed Raws in a burst, can keep shooting for four times as many frames as the D7500. If high-speed action is your thing, it’s a pretty simple choice.

The hardware enabling that extra speed is visible everywhere: the D500 uses XQD and UHS-II SD cards, while the D7500 makes do with a single, UHS-I compatible slot. The D500 also offers a USB 3 connector, rather than the D7500’s USB 2.0 socket, which leads to faster transfer, if you’re not using a card reader for some reason.

Viewfinder

The D7500 has the same viewfinder as the D7200, which is a rather nice pentaprism finder with 0.94x magnification and 100% coverage. This makes it one of the largest viewfinders you can get for the money. However, this is still smaller than the D500’s finder which, at 1.0x magnification (0.67 in full frame terms), and 100% coverage is the largest viewfinder we’ve ever encountered on an APS-C camera.

This may sound like a small difference, but it’s a difference you’ll benefit from, every frame you shoot with the camera. That may not, in itself, swing the balance for you (it’s probably not, in itself, a $ 700 feature), but it’s not an insignificant difference.

Higher-end body

The physical differences between the two cameras are relatively minor but are exactly what you might expect to distinguish between an enthusiast model and an enthusiast/pro crossover one. Probably the biggest difference is that the D500 has a joystick for positioning AF point, rather than relying on the multi-way controller on the rear panel.

The D500 body is also a little bigger and has a better grip and its construction feels a little more solid. Again, much as you’d expect. For action shooters who like to back-button focus, it has a dedicated AF-ON button, which the D7500 lacks. For low light shooters, the buttons on the left-hand rear of the D500 are illuminated.

The more expensive camera has a 2.34m dot (1024 x 768 pixels) rear LCD, rather than the 920k dot (640 x 480) panel on the D7500. Both are mounted on tilting cradles but the D500’s screen has a more rugged-seeming surround, rather than cover glass that extends out to the edge of the cradle.

The final big ‘pro level’ feature the D500 gets which is missing from the D7500 is a shutter rated to survive 200,000 cycles, rather than 150,000. This extra 33% shutter life is likely to be significant for anyone who’s using the D500’s 10fps shooting and 200 shot-per-burst buffer, day in, day out.

Flash

Somewhat perversely, the D7500 might have an advantage when it comes to strobery. For a start it has a built-in flash, which the D500 lacks. The built-in unit in the D7500 can be used as a commander, allowing the use of the infra-red version of Nikon’s Creative Lighting System of wireless flash control and triggering.

The other potential advantage of the D7500 is the absence of a 10-pin connector on the front of the camera. Why is the absence of a connector a good thing? Quite simply it means you can attach Nikon’s WR-R10 radio frequency dongle without having to buy the WR-A10 adapter. The WR-R10 allows access to the newer, more robust radio-based ‘Advanced Wireless Lighting’ system.

Of course, leaving the WR-10 hanging out of the side of the D7500 is less secure than plugging it into the 10-pin socket on the front of the D500. However, given the WR-A10 adapter isn’t the sturdiest thing in the world, the difference might not be that huge. Either way, it means the D7500 can be used to radio control SB5000 speedlites just as well as the D500 can.

Video

As with image quality, there’s little to choose between the D500 and D7500 in terms of video. Both offer 4K UHD output from a 1.5x crop of their sensors and both record with the same codecs and formats. There’s little to separate the two cameras, beyond the fact that the D500 comes with a small clip to retain an HDMI lead if you’re shooting with an external recorder.

It’s also good to see that the D7500 has gained power aperture: a means of controlling the aperture when in live view mode. Like the D500, the D7500 has two function buttons on the gripward side of the lens mount, which can be assigned to open and close the aperture while shooting video. Both camera have the Flat Picture Profile, which is intended to offer a little extra flexibility in the grading process but in a way that’s not as unfamiliar to stills shooters as a true logarithmic response would be.

Other differences

The remaining differences are subtle. The D500 has NFC, which makes the initial configuration of the SnapBridge Bluetooth/Wi-Fi system quicker. This benefit only exists for Android users, though, since Apple doesn’t let you use the NFC capabilities of its devices. Once it’s set up, for better or worse, SnapBridge should work in the same way on both cameras.

Finally, the D500 is rated as having more battery life. However, its 1240 shots-per-charge rating is helped by not having a built-in flash. The D7500 manages to get 950 shots per charge (including flash) out of its battery, but we doubt there’s much difference in the real world if you use them the same way.

Kit lens

If none of the differences up to now haven’t swayed you, you may find the decision ends up depending on where you live.

Say what!?

One of the biggest factors in choosing a camera is what lens it comes with. Even if you already have a bag full of Nikkors, a new camera can often be bought bundled with a kit lens at a competitive price, which is worth buying even if you intend to list it on eBay.

Nikon Europe offers the D7500 in a kit with the 16-80mm F2.8-4.0 VR, whereas Nikon USA doesn’t, as yet. As its specs suggest, it’s a really useful and flexible lens. It’s also pretty small and light, which just increase that utility. If no other difference has already made the decision for you, then we’d suggest getting a D7500 with a great all-round lens is a better choice than spending a similar amount of money on the D500.

Articles: Digital Photography Review (dpreview.com)

 
Comments Off on Nikon D7500 vs Nikon D500: Which is better for you?

Posted in Uncategorized


CP+ 2017: Not special enough for you? Nikon shows off 100th Anniversary D5 and D500

25 Feb

CP+ 2017: Nikon shows off 100th Anniversary D5 and D500

Nikon is celebrating its 100th anniversary this year, and as part of the celebrations, the company has unveiled special editions of its professional D5 and D500, alongside the ‘holy trinity’ of F2.8 zooms.

Here’s the D5, in its special gunmetal finish and special gunmetal flight case, with special body cap, special shoulder strap and special booklet, full (presumably) of special information.

CP+ 2017: Nikon shows off 100th Anniversary D5 and D500

As special editions go, this one is admirably restrained.

CP+ 2017: Nikon shows off 100th Anniversary D5 and D500

Here’s a boring old normal D5 (yawn) pictured with the special 100th anniversary strap. Nikon has released precisely zero information about any of these special editions and accessories as far as we can tell, so it’s unclear whether this strap will be available for general sale. 

CP+ 2017: Nikon shows off 100th Anniversary D5 and D500

Not to be left out, here’s the D5’s baby brother, the D500 in a matching gunmetal finish, inside a matching, but slightly smaller gunmetal flight case. So special. So limited. 

CP+ 2017: Nikon shows off 100th Anniversary D5 and D500

Bow down before the ‘holy trinity’. Here are the 14-24mm F2.8, 24-70mm F2.8 and new 70-200mm F2.8E, in matching special finishes, in a matching special flight case. Even the hoods look like they’ve been given a lighter finish, but its very hard to tell from behind the glass display case. At any rate, it’s special. There’s absolutely no doubt about that. 

CP+ 2017: Nikon shows off 100th Anniversary D5 and D500

Again, we have no idea whether this exploded 70-200mm F2.8E will be available to purchase as a collectable item, and if so how much you’ll pay. We’d hope it will cost considerably less than the regular lens though, because this very special anniversary edition is entirely useless for photography. Why? Because it’s been cut in…

Sorry, wrong article.

CP+ 2017: Nikon shows off 100th Anniversary D5 and D500

As part of its 100th anniversary, Nikon is (literally) showcasing some key products from the past 100 years. The original Nikon F is in there, alongside an F4 and a Nikonos, and of course the D1. Also included is a Df. Maybe by the time Nikon’s 200th anniversary comes around they’ll have released a Df2.

Articles: Digital Photography Review (dpreview.com)

 
Comments Off on CP+ 2017: Not special enough for you? Nikon shows off 100th Anniversary D5 and D500

Posted in Uncategorized


Review of the New Flagship DX Camera – The Nikon D500

20 Jan

Everyone thinks they need a full frame camera but are they really that much better? Most people feel the only reason they have cropped sensor cameras is because they can’t afford a full frame one. Then you have to wonder why Nikon have produced one that is not full frame and comes with an expensive price tag. So who would be interested in the new Nikon D500? There are a lot of people who would love this camera and what it has a lot to offer.

Earlier this year Nikon released the new flagship D500 camera as part of their DX range or cropped sensor line-up. It is fast and designed with a specific user in mind. It is also one of the first cameras Nikon has produced that is using Snapbridge, the new phone app that allows you to take photos and upload them to your phone for sharing on social media straight away.

Nikon D500 review

The Nikon D500 – image courtesy of Nikon.

Price out the Nikon D500 on Amazon or B&H Photo’s site.

First impressions

Unlike many of the other DX cameras, it is quite large. People tend to think that cameras with cropped sensors are smaller, but the D500 is in the Pro range and you can see that just by looking at it. It looks like a camera that a professional photographer would use, and many indeed do.

One of the first things I noticed was how similar many of the controls and the layout is to the D800. In many ways, it seems like a cropped sensor version of that camera. This also means that most of the buttons are around the camera body, so you don’t have to keep going back to the menu to change settings. There are everywhere, but it doesn’t make it confusing. You can make changes without really having to stop and look at what you are doing.

Nikon D500 review

Sunset image shot with the Nikon D500.

If want to do long exposure photography there is a small blind in the viewfinder that will close to stop light leaking into your image. It means you never have to worry about whether or not you have the cover for it. You just need to remember to use it when doing long exposures. Very handy.

ISO and noise

The D500 is Nikon’s replacement for the popular D300 range that they stopping making a few years ago. The D300 was fast and great for many types of photography, however, the ISO range was not good. As soon as you increased the ISO the images became very noisy.

It also didn’t go very high, with ISO 3200 being the maximum. The D500 ISO goes up to 512,000, so it will get you images no matter the shooting conditions. The level of noise in the images is also significantly better and not as noticeable.

Review of the New Flagship DX Camera - The Nikon D500

Image shot using a tripod with the Nikon D500 at ISO 200.

Review of the New Flagship DX Camera - The Nikon D500

Image shot with the Nikon D500 hand held at ISO 6400.

Megapixels and image size

The camera is 20 megapixels, which is enough for most people. A RAW image is around 25 MB. Not as large as some cameras, but still large enough that you have to consider how you will store them. Jpegs are a lot smaller, but you don’t get as much information to work with as shooting RAW.

Battery

The battery is very similar to the battery for the D800 but it is a new version, so should only be used in the D500. If you have similar batteries for other cameras it is a good idea to mark them in some ways so they don’t get mixed up. You don’t want to be putting the wrong battery in the camera. While the battery is different the charger is the same.

The battery lasts a long time and you can safely go out for a day of shooting and not use much. Like most Nikon cameras you can go out and shoot for a few days without having to recharge it. Though that is dependent on how many photos you take. Of course, if you do a lot of chimping (image review on the camera) or use LiveView frequently the battery will run out faster. Likewise, if you’re shooting in the cold.

The batteries do typically last a long time as well. You can use a battery for quite a few years before you start noticing that it doesn’t last as long.

Remote shutter release

Review Nikon D500 DX camera

Using some ND filters and the MC-36 remote shutter release on the Nikon D500 for some long exposures.

When you are looking at a new camera you need to be aware of all the accessories and whether or not you will have to buy a lot of new ones. The remote shutter release that I purchased for the D300s, the MC-36, was fine for the D800, and it is also good to use on the D500. That makes it a good match for the gear I already have. It is something you need to consider anytime you are buying a camera, it isn’t just the expense of the camera, but what other equipment you may need as well.

Review Nikon D500 DX camera

A long exposure of some recently painted silos using the D500.

Focusing area

The focusing area takes up larger space in the Nikon D500 than it does in other bodies. It has the same focusing center as the Nikon D5, their top pro model, but on the cropped sensor of the D500. In practice, that means you can focus on subjects almost up to the very edges of the viewfinder. You can focus on a much larger area than other DX cameras.

If you want to use spot focusing, but have found it hard in the past because you couldn’t focus on subjects at the side, it is now possible to do that. Any camera that makes focusing easier for you has to be good.

Memory card


The D500 has two slots for memory cards. You can put an SD card in one, and the other is for XQD cards, which are reasonably new but only needed for a few Nikon cameras. It is mainly used in the higher end bodies that are fast and shoot a lot of frames per second, which is why the card is used. Normal cards would find it hard keeping up with the speed and writing the images. If you are taking photos at 10 frames a second it is important.

Apparently, you can buy the cards at all good camera stores. Though, you would also need a memory card reader for it as well.

Touchscreen

The screen at the back is a touchscreen which makes it easy to scroll through your images. It works a lot like your smartphone. You can make the images bigger or smaller and flip through them with your fingers.

leannecole-nikon-d500-review-15

The back screen of the D500 can be moved for better viewing and is also a touchscreen.

Crop factor

The Nikon D500 has the 1.5x crop factor. Basically, that means that if you have a full frame lens, like the 70-200mm, when you use it on the D500 the lens becomes essentially like a 105-300mm. It is the advantage of using a DX camera body with high-quality lenses.

Nikon D500 review

It is all set up to take some sunset photos of the city of Melbourne.

Who is the Nikon D500 for?

The most likely person to buy this camera is someone who is interested in the 1.5x crop factor. Photographers who can’t afford those great big long lenses, but want to be able to get as close as they can to the action. Having the ability to make a 300mm lens go to 450mm is fantastic. The longer the telephoto lens, the more expensive it is, so the cropped sensor is great for that reason.

leannecole-nikon-d500-review-20

The sunset shot with the Nikon D500. The DX camera allowed me to get a lot closer with the 80-200mm, this was at 277mm.

Sports photographers would also be interested where speed and getting closer to the action is very important. Full frame is great, but to get a camera that is fast enough to shoot lots of frames per second you would need to spend around $ 6500 on a Nikon D5 or similar. If you don’t have that kind of money, $ 2000 USD will get you the Nikon D500 which will do many of the things that the others can, but you also get the cropped sensor.

There are many other kinds of photographers who would benefit from the D500 as well. Bird and wildlife photographers would love being able to get more length with their lenses. The 10 frames per second capability of this camera would also be an advantage for capturing birds and animals on the move.

Macro photographers will get a lot closer to their subjects with their lenses, and when you put on extension tubes, a whole new world will be seen.

leannecole-nikon-d500-review-23

Taken using the D500 and the Nikon 105mm macro lens, with the cropped sensor you can get in a lot closer than you can with a full frame.

Snapbridge app

This is a new app that Nikon has developed that makes it possible to connect your smartphone with the camera. It is unlike others that use Wi-Fi to do it, Snapbridge stays connected to your phone all the time. You can upload photos, use it to take your photos, and it also keeps your camera’s firmware up to date.

It is available for Apple iPhones and Android, though it is a little harder to use with an Android.

Using the camera

I found the camera easy to handle and work my way around. Then again, I’ve been using Nikon cameras for many years, and as previously stated I found a lot of similarities with the D800. I found the weight fine, but others who picked it up thought it was heavy. Then again, you would expect a camera of this quality to be that heavy. Good quality cameras of this caliber are always a bit hefty.

The fast frame rate blew me away and as someone who always likes to bracket photos to get more options, I really enjoyed it. With the D800 I would never do more than three shot hand holding, but with the D500 I felt there was enough speed to let me do five. I also really enjoyed just listening to how fast it was.

leannecole-nikon-d500-review-14

Using the D500 for night photography in Melbourne.

If I had one criticism, it would be that there is an overall blue cast and how, in some cases, it made the blues far bluer than they really were. I’m not a fan of blue in images, so I didn’t like it, but I know a lot of other photographers would.

Overall

The Nikon D500 is a great camera and anyone who purchases it will really enjoy using it. Full frame is great, but if you are a photographer who likes to zoom in, then the DX may suit you more. If you shoot sports, birds, wildlife or macro, look at this camera, it could be just what you need.

Price out the Nikon D500 on Amazon or B&H Photo’s site.

leannecole-nikon-d500-review-19

The sun as it sets and the camera taking photos.

googletag.cmd.push(function() {
tablet_slots.push( googletag.defineSlot( “/1005424/_dPSv4_tab-all-article-bottom_(300×250)”, [300, 250], “pb-ad-78623” ).addService( googletag.pubads() ) ); } );

googletag.cmd.push(function() {
mobile_slots.push( googletag.defineSlot( “/1005424/_dPSv4_mob-all-article-bottom_(300×250)”, [300, 250], “pb-ad-78158” ).addService( googletag.pubads() ) ); } );

The post Review of the New Flagship DX Camera – The Nikon D500 by Leanne Cole appeared first on Digital Photography School.


Digital Photography School

 
Comments Off on Review of the New Flagship DX Camera – The Nikon D500

Posted in Photography


Gear of the Year 2016 – Barney’s choice: Nikon D500

19 Dec

From almost the minute it was announced, somewhat incongruously, at the Consumer Electronics Show in January (well, it does have a touchscreen, I suppose), the Nikon D500 looked like it was going to be a hit with DPReview’s readers. After so many years we had almost lost hope that Nikon would replace the D300S, which soldiered on well into its dotage, and well beyond the point where it was able to keep up with the likes of Canon’s EOS 7D II. 

But replace it Nikon did, and in impressive fashion. I won’t waste your time listing specifications (you can find all of that here) in this article, but suffice to say it’s unlikely that the D500 will look outdated any time soon.

The D500 boasts a 153-point AF system, of which 55 can be manually selected. But it doesn’t just boast a lot of autofocus points, it also offers them across most of the width of the frame.

Despite its obvious appeal, I was a little hesitant to make the D500 my choice for Gear of the Year because of all the people on the DPReview team, I’ve probably used it for the least amount of time. But my experience of shooting with it for our September Field Test, with National Geographic photographer, friend to the wolves and all-round man-crush Ronan Donovan was a definite highlight of 2016.

Most of our video shoots are organized far in advance, and planned almost down to the last detail. Camera features are carefully aligned with shooting situations, locations are scouted ahead of time, and the shoot proceeds predictably, and more or less according to plan.

Most Field Tests are like that, but some are not. The D500 shoot was not.

A combination of factors including limited availability of D500 bodies, limited availability of Ronan, an already packed pre-Photokina schedule, the vicissitudes of rural Montana’s postal system some inconveniently-positioned wildfires meant that we weren’t able to plan the shoot quite as carefully as we might have liked.

A Tight Timeframe

In fact, we ended up with a mere 24-hour window of time in which to work with Ronan, filming at a remote wildlife reserve in Montana, more than 10 hours’ drive away from DPReview’s home base of Seattle. The cameras only showed up a couple of days before we were due to head to the reserve, so it was essential that D500s didn’t fail or present any major surprises on location. If that had happened, there wouldn’t have been enough time to troubleshoot.

The broad width of the D500’s autofocus coverage, and its impressive 3D AF Tracking mode combine to offer unparalleled accuracy when it comes to tracking subjects around the frame. Even flying against a similarly-colored, cluttered background, the D500 had no trouble accurately tracking birds of prey on the Montana video shoot.

For instance, had the D500 been susceptible to dust or high temperatures, or had it simply presented too steep a learning curve for Ronan and me to pick up and use more or less straight out of the box, we would have been in trouble. Similarly, if it had been incapable of focusing on the fast-moving birds we were pinning our hopes on capturing, or if its autofocus system gave out in low light, we might have been forced to scrub the shoot for lack of coverage.

That’s the gear, but the concept itself also presented some risk. When you center a video shoot around wildlife photography, it’s a good idea to build some extra time into the schedule as insurance against the unexpected. With such a tight window, multiple extra shoot days weren’t an option. Things were further complicated by wildfire haze and a 30mph wind on the day of our shoot, which threatened to reduce both air quality and audio quality, as well as keep the birds we were hoping to photograph on the ground or tucked away in the branches of trees.

Ominously, a frequent visitor to the reserve told me when we arrived that he had seen fewer birds during his vacation this year than any previous year he could remember. Gulp.

This image is one of a sequence taken after dark. Even in such low light, the D500 accurately tracked these swans landing on a lake, and at ISO 258,032 the images are grainy, but after careful processing they still contain plenty of detail and natural color.

Fortunately despite the wind and the haze, we did find some birds, and although the wind blew out a lot of our audio, we still managed to record plenty of usable sound. Ronan was great on camera and quickly got to grips with the D500, and the D500 itself shrugged off the dust and heat and did everything that we asked of it. And we asked a lot.

In a 24-hour shoot we baked our three D500s in the sun, froze them overnight taking time-lapse shots of the stars, covered them in dust, and repeatedly asked them to focus track small, distant birds at long focal lengths. Even more challenging was shooting after dark, when we attempted 10 fps AF tracking bursts of trumpeter swans flying at night, and grabbed unplanned images of an owl, lit only by the headlamps of our truck. 

Sharp Focus

The reason we were able to get all of those images with relatively little trial and error is that the D500’s autofocus system seems to have been sent from the future by benevolent aliens, whose mission – apparently – is to help us take better photographs. 

In 3D AF tracking mode, the camera managed to accurately follow our small, erratic subjects around the frame, even in very low light. When 3D AF tracking didn’t work so well, one of the several other autofocus modes invariably delivered the results we needed. Group Area AF, for instance, proved especially useful for the smaller birds.

The D500’s 1.5X crop turns a 500mm lens into an effective 750mm. This is very handy when shooting skittish birds like this hawk. 

Once we’d wrapped the shoot and Ronan had left, I spent a couple of hours the next day on my own, getting some additional images in the bag before we left the wildlife reserve. With the film crew otherwise occupied, I posted up near a fence where we’d seen hawks the previous day, and waited to see if they’d come back. They did, and I spent a pleasant couple of hours shooting them wheeling around the sky, with the D500 accurately tracking them around the frame even as they moved in front and behind of low trees and bushes.

If you make the mistake of getting too close to one of these birds of prey, you might end up regretting it. This image is one of a sequence of shots which show a juvenile hawk diving at me, at a closing speed of roughly 100mph. This image shows the bird starting to open his wings to pull out of the dive a few feet above my head. 

Less pleasant was a diving attack from one of the juveniles, which dropped on me from a hundred feet or so, folding its wings and coming straight for the camera, like a beaked dart. I fired off a few shots before losing my nerve but remarkably, despite the incredible closing speed of the bird and my shaking hands, the D500 nailed several sharp images of the hawk before it pulled out of the dive at close to 100mph, a few feet about my head. I took the hint and moved on.

I headed to a small lake and shot an unbroken sequence of images of a pelican taking off and circling around the lake. With an XQD card installed, the D500 can maintain its 10 fps continuous shooting rate almost indefinitely, while maintaining accurate focus the entire time. I like pelicans. They’re very sedate. Less… attacky. 

Although there are higher-resolution cameras on the market, 20MP is enough resolution for high-quality landscape imaging. Raw files from the D500 also offer a wide latitude for post-capture adjustment.

With these sequences, plus Ronan’s shots from the previous day, we knew we had enough images to really show the D500 at its best. Despite the challenging shooting conditions, the D500 did everything we asked of it, and more. After more than ten years writing about digital cameras, I’m not easily seduced by impressive-sounding specifications or fancy new features. I knew the D500 was good before the Montana video shoot, but I didn’t know how good. That experience impressed me enough to make the Nikon D500 my pick for Gear of the Year 2016.

Nikon D500 real-world samples

Please do not reproduce any of these images on a website or any newsletter / magazine without prior permission (see our copyright page). We make the originals available for private users to download to their own machines for personal examination or printing (in conjunction with this review), we do so in good faith, please don’t abuse it.

Unless otherwise noted images taken with no particular settings at full resolution. Because our review images are now hosted on the ‘galleries’ section of dpreview.com, you can enjoy all of the new galleries functionality when browsing these samples.

$ (document).ready(function() { SampleGalleryGridV2({“galleryId”:”4137508448″,”isMobile”:false}) })

Nikon D500 Sample Gallery

109 images • Posted on Apr 29, 2016 • View album
Sample photoSample photoSample photoSample photoSample photoSample photoSample photoSample photoSample photoSample photoSample photoSample photoSample photoSample photoSample photoSample photoSample photoSample photoSample photoSample photoSample photoSample photoSample photoSample photoSample photoSample photoSample photoSample photoSample photoSample photoSample photoSample photoSample photoSample photoSample photoSample photoSample photoSample photoSample photoSample photoSample photoSample photoSample photoSample photoSample photoSample photoSample photoSample photoSample photo

Articles: Digital Photography Review (dpreview.com)

 
Comments Off on Gear of the Year 2016 – Barney’s choice: Nikon D500

Posted in Uncategorized