Have you ever seen some stunning pictures of insects, where you can clearly see each individual element of their compound eyes, or looked through your Instagram feed marveling at photos of flowers where you can see the tiniest detail on each individual petal? If so, welcome to the wonderful world of macro photography, one in which the little things in life are not only celebrated, but magnified to glorious proportions, and even the most mundane objects around us can take on beautiful otherworldly qualities when examined under near-microscopic detail.
This particular type of photography is not only stunningly beautiful but often prohibitively expensive, at least for the casual hobbyist. A good macro lens can easily set you back several hundred dollars, and that’s not counting the accessories like a good tripod, a ring flash, and other gear that is liable to turn this past-time into a debt-inducing money pit. Thankfully there are several good alternatives like extension tubes and lens-reversing rings to aid you in your quest for beautiful macro photography, but my personal favorite is one of the cheapest options available: close-up filters.
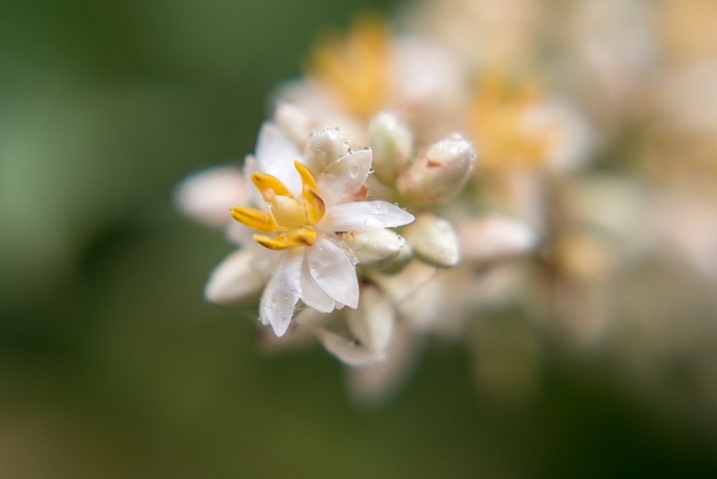
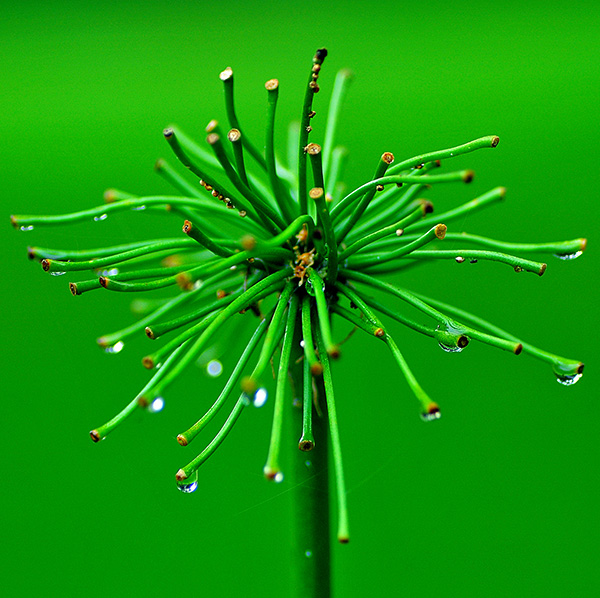
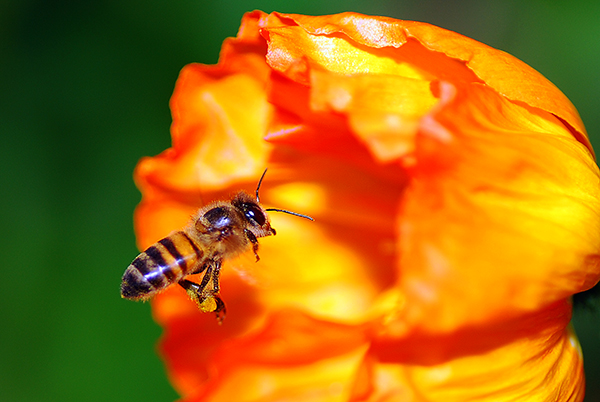
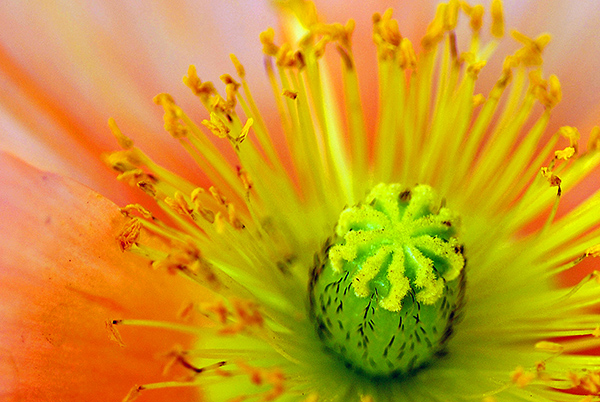
This image, and all the other macro-style shots in this article, were not taken with an expensive macro lens but with a $ 35 set of close-up filters I screwed on to my 50mm lens.
A true macro lens is designed to create true 1:1 (life-size) replications of very small things on the image sensor of your camera. If you have a coin that is 2cm diameter, a high quality macro lens will be able to take a photograph of that coin wherein it is literally the same size on your camera’s image sensor. Taking these types of photographs requires a host of light-bending optical gymnastics on the part of your lens. In the process there are almost always tradeoffs in image sharpness and overall light-gathering ability, which is why macro lenses cost so much money, because they contain special glass elements to minimize any optical imperfections.
Close-up filters rely on a very simple, very old, idea to make it possible for any normal camera lens to focus on objects that are, as their name implies, very close to your lens. All lenses have a minimum focusing distance, which is as close as you can get to an object and still have it be in focus. A +2 filter will make it possible for a lens with a minimum focusing distance of 1 meter to now focus on something .3 meters away. A +10 filter would decrease the minimum focusing distance to .09 meters. The math is slightly complicated, but suffice it to say the higher the number on your filter, the closer your lens will be able to focus.
Close-up filters are also very inexpensive and you can often find a set with three or four filters for under $ 40 that will work with your lens.
A close-up view of close-up filters
So what is a close-up filter? Simply put, it’s basically a magnifying glass that you screw onto the front of your camera lens. Just like their investigative counterparts wielded by famous fictional detectives through the ages, close-up filters rely on a single curved piece of glass that bends light in such a way as to enlarge whatever you are viewing. Don’t let the nomenclature confuse you; nothing is being filtered, but light is being altered before it enters your camera lens, in the same way that a magnifying glass alters light to make objects appear bigger.
The set of filters required to take a photo like this costs about the same as a movie and a large popcorn.
Limitations
Using close-up filters is a great way to get started with macro-style photography, but they have some very important limitations that you need to be aware of to start. First of all, they only do one thing, which is shorten the minimum focusing distance of your lens. You can’t use them for normal photography, since all you will see when you attach one to your lens is either a big blob of blur, unless you focus on something very close to your camera. It’s the same phenomenon that happens when you hold a magnifying glass at arm’s length instead of right next to your face, and it severely limits the usefulness of close-up filters.
True macro lenses work for a variety of photographic situations, and due to their high-quality construction are generally much sharper than non-macro lenses, which make options like the Canon 100m f/2.8 or Nikon 105mm f/2.8 so highly praised. Screwing an inexpensive close-up filter on the front of your camera might let you get fun shots of flowers, but it will in no way equal the astounding optical properties of a true macro lens.
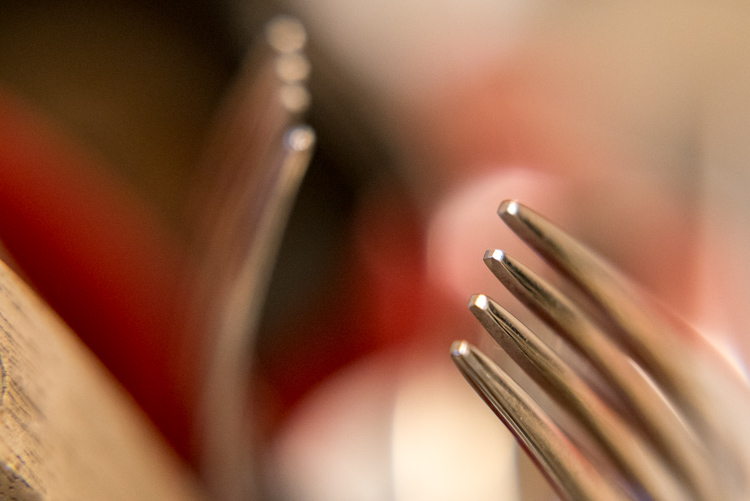
Even something as mundane as forks sitting in a dish rack, can turn into a work of art when viewed up close.
Another downside of close-up filters is that the images you create with them are not at all the same as what you can get from dedicated macro gear. Photos are generally much softer, will usually exhibit unpleasing artifacts like chromatic aberration, and don’t allow you to have the same pleasing background blur that you would get without the filters attached. Finally, while macro lenses will let you focus on objects that are very close as well as far far away, close-up filters will only let you focus on subjects that are right next to your lens. All these limitations might sound important, but they’re really not that big of a deal. Once you learn to work around them you can get some stunning images from your camera using close-up filters.

Close-up filters are nowhere near as sharp and optically brilliant as a true macro lens, but they can still produce some pretty decent results.
Advantages of close-up filters for macro photography
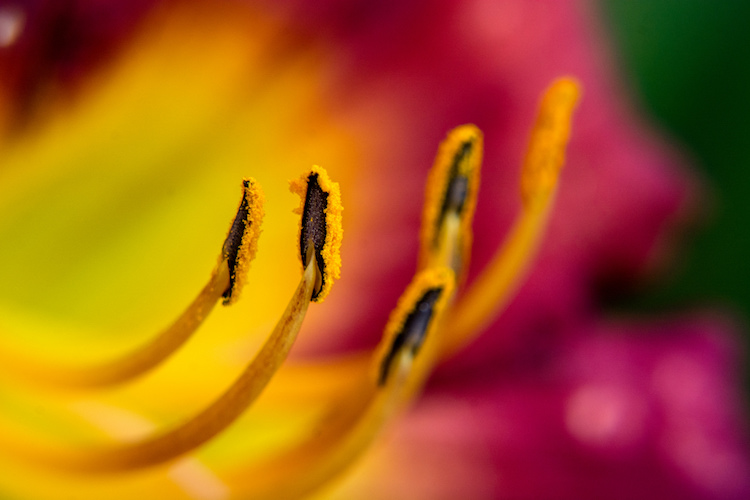
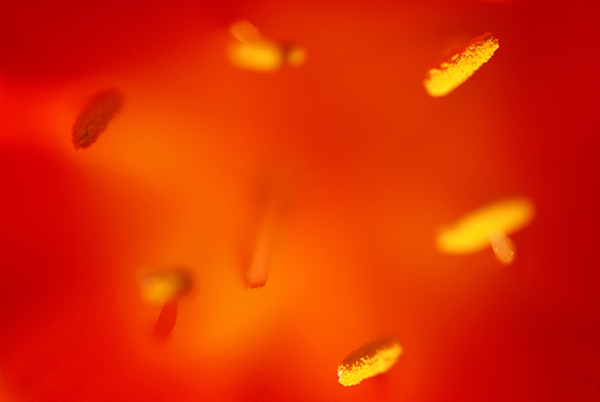
After spending so much time pointing out the flaws with close-up filters you may wondering why you would want to even bother with them in the first place. As I mentioned earlier they are an incredibly inexpensive way to dip your toe into the waters of macro photography, and the results you can get from such a simple piece of glass will likely be far beyond what you ever thought possible shooting with your normal gear. The photo below of a yellow lily was taken with a standard 50mm lens and a +10 close-up filter, which is a fairly standard, inexpensive option. It’s not at all uncommon to find sets that include +1, +2, +4, and +10 filters all in one package that costs $ 40 or less.
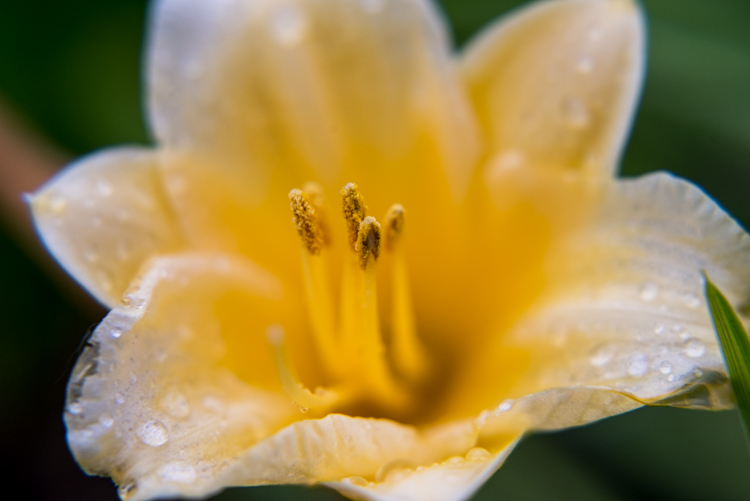
An un-cropped image taken with +10 and +2 filters attached to a 50mm lens. Note the severe blue fringing on the edge of the petals, which is the result of using filters instead of a true macro lens.
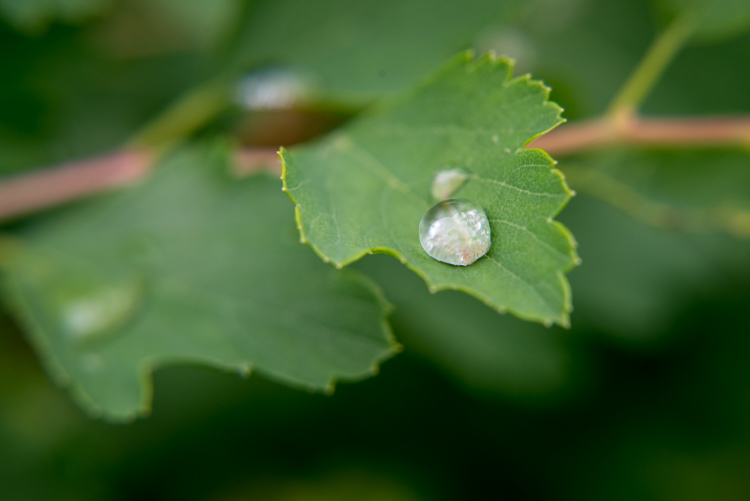
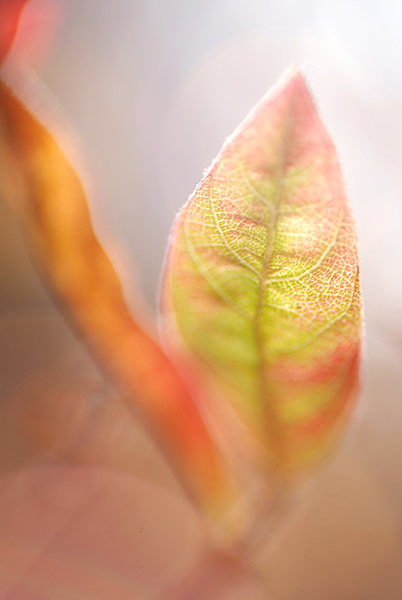
After I shot that picture I took the filters off my lens and took another photo of the same flower as close as my lens would allow. As you can see there is a dramatic difference between the two images and even though the top picture is not as sharp as an image taken with a dedicated macro lens, the results are perfectly fine for someone just looking to dabble in this type of photography, without spending much money.
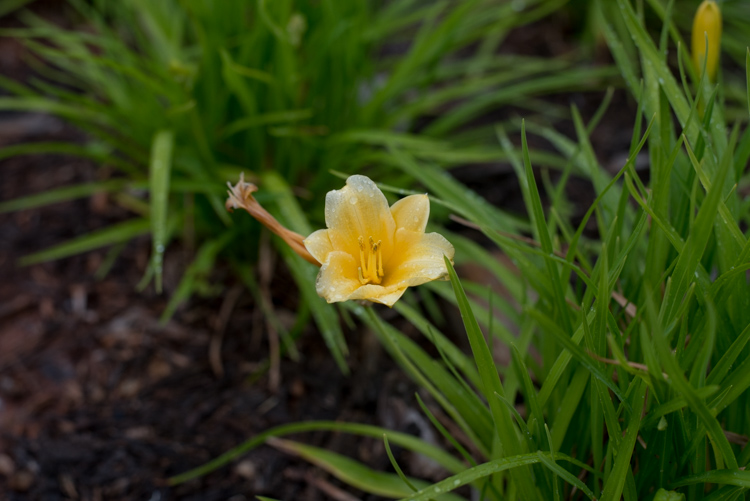
The exact same flower. Without the filters, this was as close as my 50mm lens would focus.
Another fun feature of filters is that most of them can be stacked on top of each other, to get even greater magnification. To make the jewelry images below I used three filters on my 50mm lens: a +10, +4, and +2 all screwed into each other, and attached to the lens itself. I set the ring down on an iPad that was turned off to get a little bit of reflection, and while the result is not something I would use in a catalog or on a billboard, it’s more than enough to suffice for my needs.
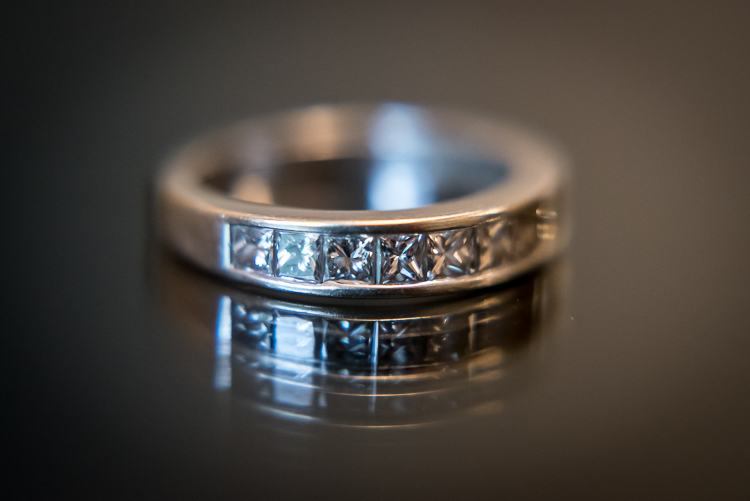
It might look fancy, but the gear required to take this photo was pretty basic and inexpensive.
Unlike other faux-macro solutions, like reversing rings or some of the cheaper extension tubes, close-up filters still allow you to use autofocus. Even so, you might get best results if you focus manually or use focus bracketing to make sure you get just the right shot. Finally, one of my favorite aspects of close-up filters is how small and portable they are. I like to keep a +10 and +4 in my camera bag and if I find myself in a situation that would be good for some macro shots it’s fast and easy to screw one on, take a few shots, and put it back in my bag.
Are pictures taken with close-up filters as sharp and detailed as one would require for them to be printed in a magazine? No, not by a long shot. For truly brilliant close-up photos you need the right gear like a macro lens, but hopefully you can see why close-up filters, despite their limitations, do a decent job of getting you halfway there.
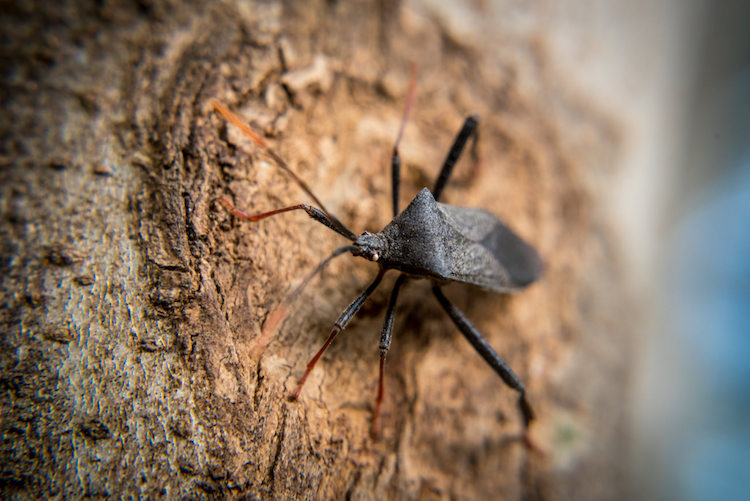
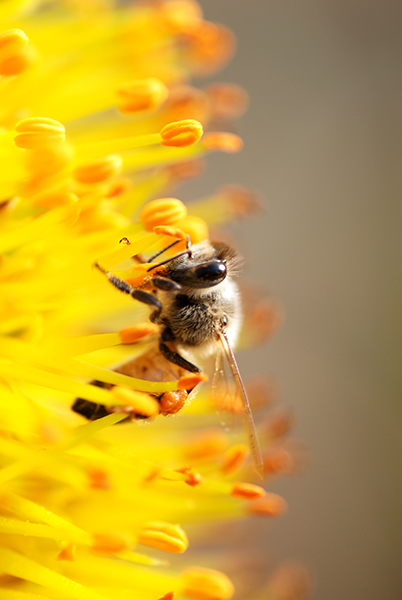
This insect is about the size of a quarter, but it appears exquisitely detailed and larger than life when photographed with a close-up filter.
Choosing the right close-up filters
Since close-up filters do not involve a lot of complicated technology and contain no moving parts, it’s hard to go wrong when looking for a set to buy. However there are a few considerations that you need to keep in mind.
First, look for a set of filters that fit your lens. Check the thread size of your lens by looking for the symbol for the Greek letter phi and the numbers immediately before or after it will be the size you need (look inside the back of your lens cap). Common sizes are 52, 55, or 58mm, but depending on your individual lens it could be quite different so make sure to find the size that fits your lens before you buy any filters.
Next it’s a good idea to get filters that are made from metal and glass, not plastic. Filters with a higher build quality are easier to screw on and off, less likely to get scratched, and may even include special anti-reflective coatings. You can sometimes find brand name options made by the big manufacturers like Canon and Nikon, but I get plenty of good results with third-party filters from companies like Hoya or Polaroid, and the results are just fine and they cost a fraction of the price as their officially-branded counterparts.
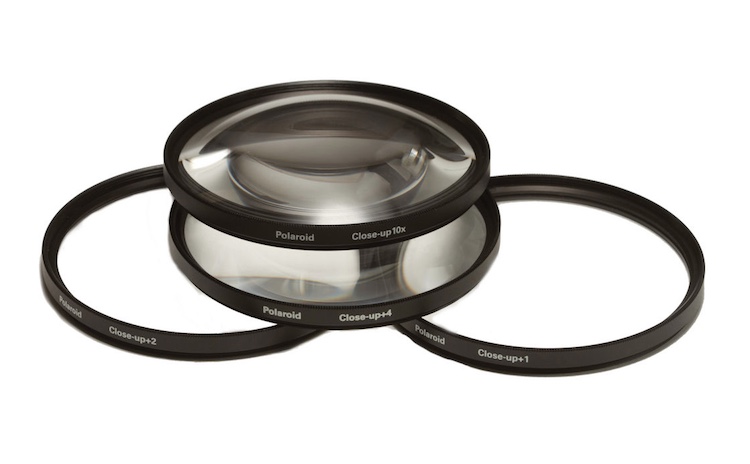
A set of close-up filters filters like this will help you get macro-style images without breaking the bank.
I hope this article has helped you learn a bit more about this inexpensive but quite practical solution for taking macro-style shots. Do you have any experience shooting with close-up filters? Are you the kind of photographer who prefers to shoot with actual macro lenses? I’d be interested in hearing your thoughts in the comments below, and please feel free to share your favorite macro photos.
googletag.cmd.push(function() {
tablet_slots.push( googletag.defineSlot( “/1005424/_dPSv4_tab-all-article-bottom_(300×250)”, [300, 250], “pb-ad-78623” ).addService( googletag.pubads() ) ); } );
googletag.cmd.push(function() {
mobile_slots.push( googletag.defineSlot( “/1005424/_dPSv4_mob-all-article-bottom_(300×250)”, [300, 250], “pb-ad-78158” ).addService( googletag.pubads() ) ); } );
The post Macro Photography on a Budget: An introduction to Close-up Filters by Simon Ringsmuth appeared first on Digital Photography School.

Digital Photography School


You must be logged in to post a comment.