RSS
 

Posts Tagged ‘Blur’

How to Blur the Background in Photoshop: Step-By-Step Guide

29 Jul

The post How to Blur the Background in Photoshop: Step-By-Step Guide appeared first on Digital Photography School. It was authored by Megan Kennedy.

how to blur the background in Photoshop

Do you want to know how to blur the background in Photoshop? While it’s generally best to create a shallow depth of field effect in camera, there are ways to create a realistic blur in Photoshop.

In this article, I’ll share two easy methods to produce a Photoshop blur effect, and I’ll also discuss when and why you should think about blurring the background in the first place.

Let’s get started.

How to blur the background in Photoshop: Field Blur

Photoshop’s Field Blur filter allows you to place pins on an image, which will introduce a blurred background effect.

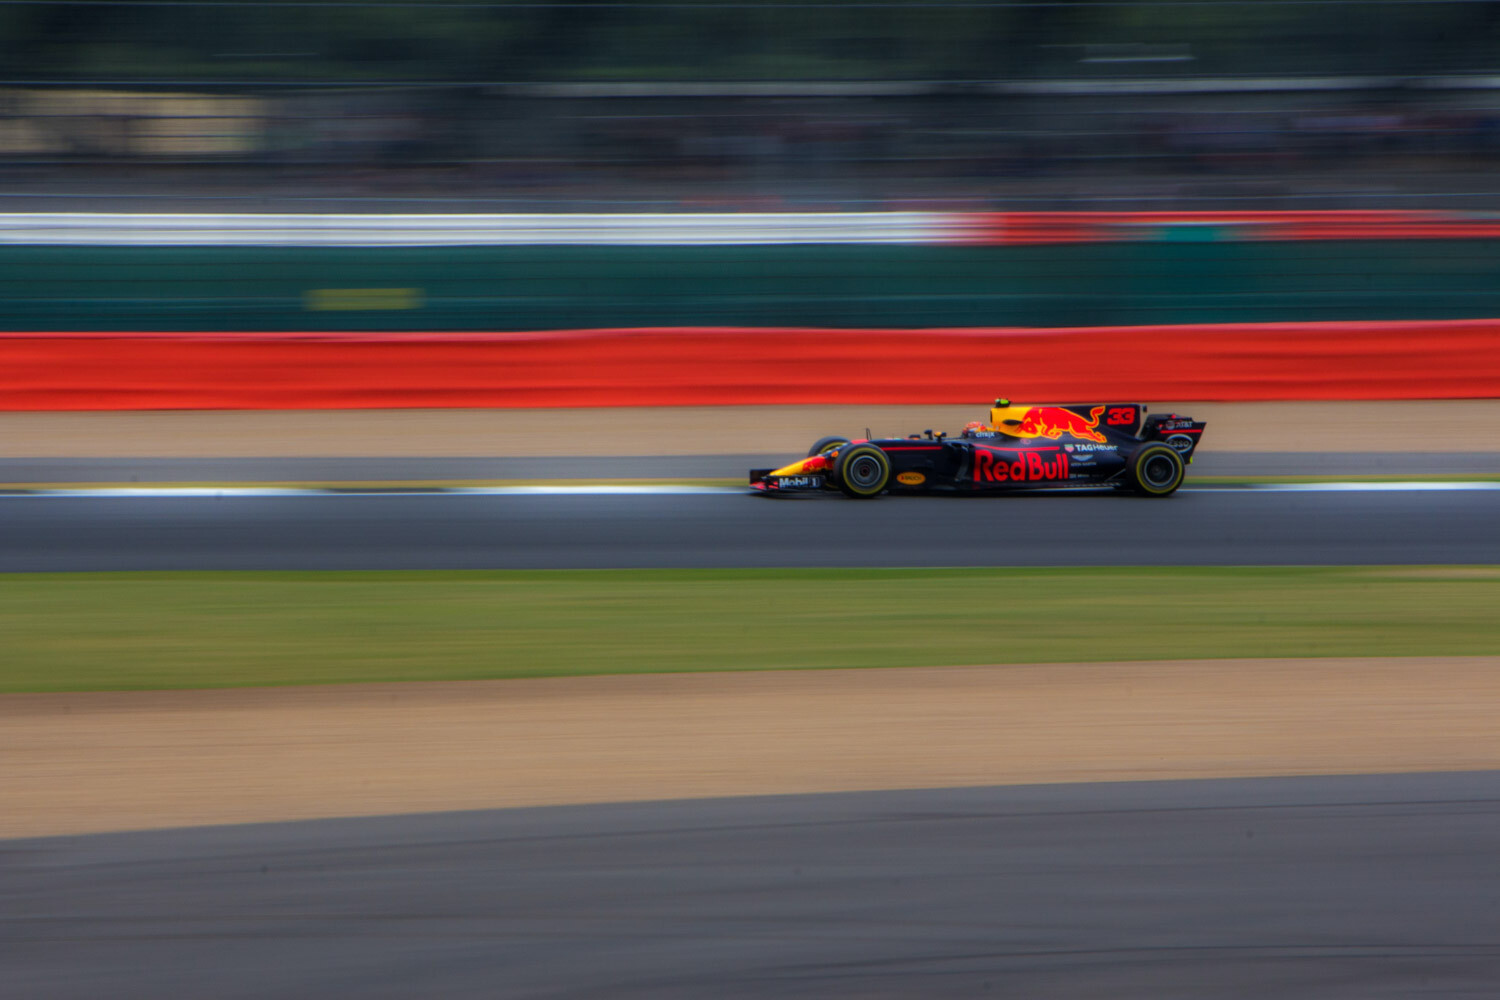
To begin, open an image in Photoshop. For this example, I’m using a starter image with a relatively even degree of sharpness. The image also has room for significant foreground and background blur, so with the right tools, the effect should look very realistic.

Blur the background in Photoshop Field Blur starter image
Canon 5D Mark II | Canon EF 24-105mm f/4L IS USM | f/8 | 1/40s | ISO 200

Step 1: Convert the layer to a Smart Object

First things first:

Before you create any blur, convert the Background layer to a Smart Object. In a moment, you’ll be applying a Field Blur filter – and if your layer begins as a Smart Object, you’ll be able to adjust your blur filter at any time (long after it’s been added to the image).

So right-click on the Background layer (in the Layers panel) and select Convert to Smart Object:

convert to smart object

The layer name will change from Background to Layer 0. The Smart Object icon will also appear in the bottom right corner of the layer’s thumbnail preview:

smart object in Photoshop

Step 2: Add the Field Blur filter

With Layer 0 selected, click the Filter menu, select Blur Gallery, and then Field Blur.

The Field Blur window will open, and you’ll see an initial pin positioned in the center of your image, creating a uniform blurred effect.

To start customizing the blur, reposition the initial pin by dragging it around the image. Also, by dragging the outer ring clockwise and counterclockwise, you can increase or decrease the intensity of the effect.

Field Blur pin Photoshop
A Field Blur pin.

To build up the Field Blur effect in the background of a photograph, you’ll likely need more than one pin. In the Field Blur window, position your cursor over an area in the image and click once; this will add a new pin.

Then move the pin and/or adjust the intensity of the blur accordingly. To maintain sharpness in the foreground, place a pin over a foreground subject or zone and set the blur to 0.

(Note: You can delete pins by selecting them with the mouse and hitting the Delete key.)

As you work with the Field Blur filter, Photoshop will automatically assess the space between each pin to create an even result. In the example below, the difference in blur between the foreground pin (with the blur set to 0) and the background pin (with the blur set to 25) is blended to create a smooth effect that transitions across the entirety of the image.

However, some images will require more pins than others (depending on your desired outcome), so don’t be afraid to experiment a little.

Blur the background in Photoshop Field Blur Stairs pins

Also, the Filter Gallery screen does contain a few extra adjustment panels, including Bokeh sliders and a Blur slider. The Bokeh effect is a little hit and miss, but it can be used to enhance the appearance of points of light, while the Blur slider works the same as adjusting Blur on a pin. And noise can be adjusted through the use of sliders on the Noise tab.

Field Blur extra tools

Once you are happy with the Field Blur effect, click OK. To make additional adjustments to the filter at a later time, simply double-click on the Blur Gallery effect in the Layers panel. The Field Blur window will open again, and you’ll be able to add further refinement.

Here’s my result:

stairs with background blur applied in Photoshop

How to blur the background in Photoshop: Iris Blur

The Iris Blur filter is another tool included in Photoshop’s Blur Gallery. It enables the selective blurring of an image, and it offers a more customizable range of depth of field controls compared to Field Blur.

Step 1: Convert the layer to a Smart Object

As with the Field Blur effect discussed above, start by opening your image in Photoshop and converting it to a Smart Object.

First, right-click on the image layer and select Convert to Smart Object. The name of the layer will change from Background to Layer 0, and a Smart Object icon will appear in the bottom right corner of the layer’s thumbnail preview.

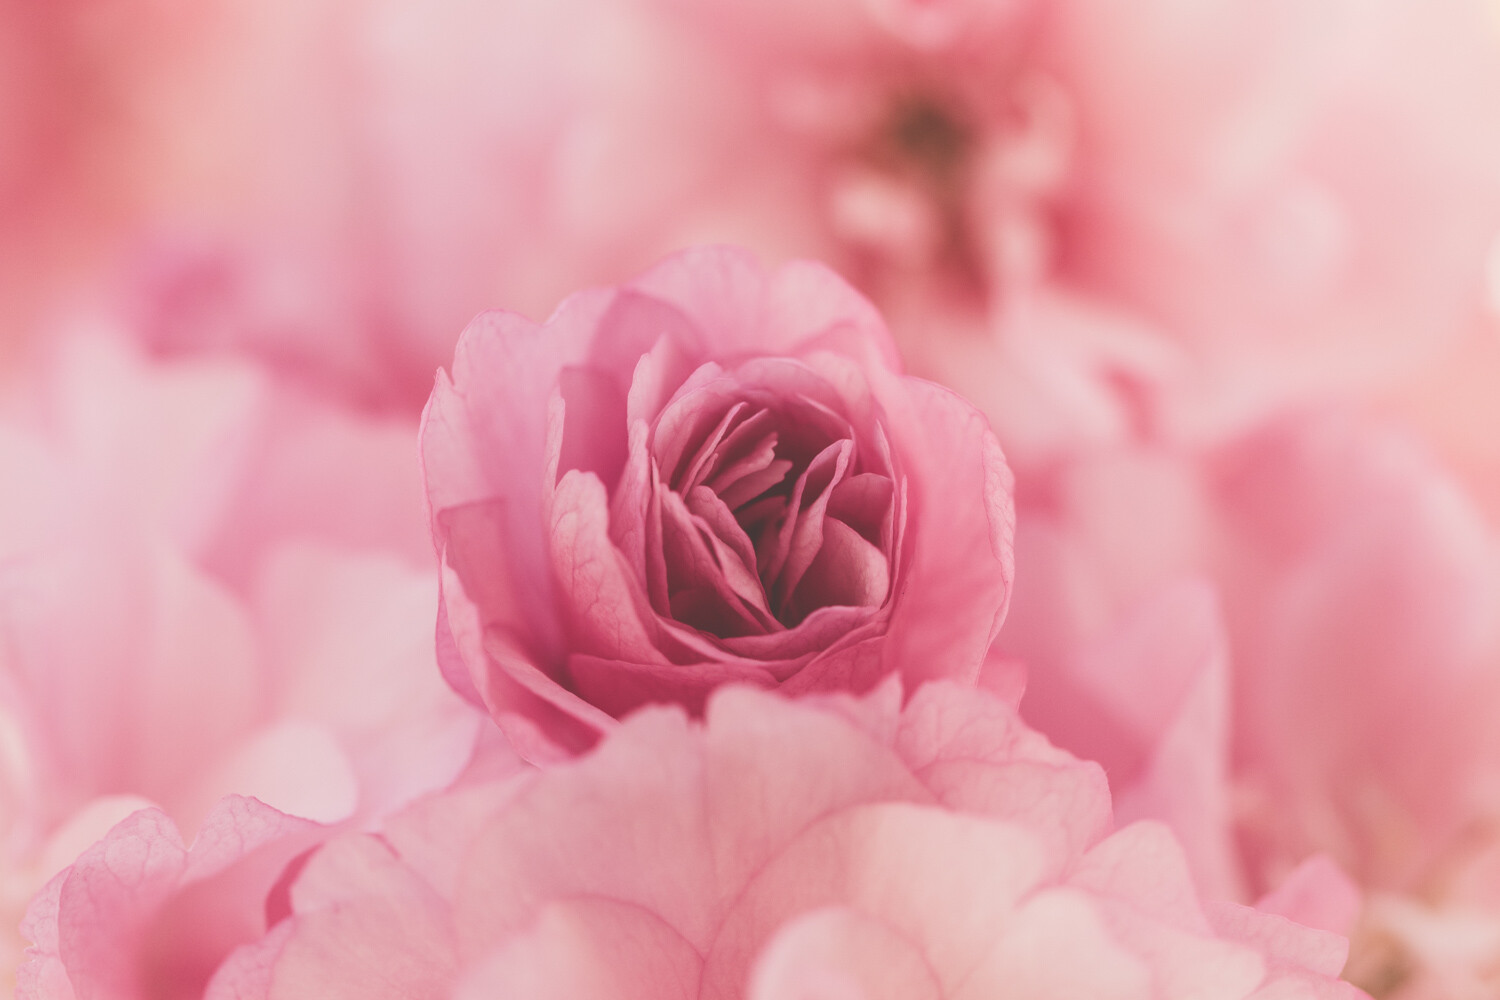
Here’s the image I plan to blur; it has a bit of background blur already, but we can make it more impactful with the Iris Blur filter:

Blur the background in Photoshop Iris Blur starter image
Canon 5D Mark II | Canon EF 24-105mm f/4L IS USM | f/4 | 1/125s | ISO 200

Step 2: Apply the Iris Blur filter

With Layer 0 selected, click on Filter>Blur Gallery>Iris Blur.

The Iris Blur window will open, and the first Iris Blur pin will be positioned in the center of your image.

You’re free to reposition the Iris Blur by dragging the pin. You also have a number of options for customizing the effect; by carefully manipulating the various handles surrounding the central pin, you can introduce a realistic background blur. I’ve labeled the handles below:

Iris Blur filter

And here are the corresponding effects:

  1. A = Roundness Adjustment. Dragging makes the blur shape either circular or square.
  2. B = Blur Ring. Controls the degree of blur applied to the image.
  3. C = Feather Points. Dragging adjusts where the blur effect begins.
  4. D = Ellipse Handle. Dragging makes the ellipse rounder or more oval in shape.

As with Field Blur, multiple Iris Blur pins can be placed on the image to exaggerate or limit the spread of the blur effects. However, unlike Field Blur, the amendments made to each Iris Blur pin are global, so every pin’s blur level is adjusted to match the active pin.

To customize the blur of an individual pin, adjust the Focus dropdown slider located at the top left of the Blur Gallery window:

Iris Blur focus slider
The Focus slider is located toward the top left of the Blur Gallery interface.

When you are finished, click OK. If you want to go back and edit any Iris Blur effects later, double click on the Blur Gallery filter layer (beneath the main image layer) in the Layer Panel. The Iris Blur window will open, allowing you to rework your edits.

Here’s a slightly exaggerated example of the results obtained with Iris Blur:

Iris Blur effect

When is blurring the background a good idea?

The Field and Iris Blur filters are simple and impactful Photoshop tools. But when should you use them to blur the background in Photoshop, and when should you leave the background as-is?

You might want to use Iris or Field Blur if

  • you want to draw attention to a subject;
  • you want to delineate between a foreground and background;
  • you want to convey depth;
  • you want to create an abstract effect.

Of course, there are plenty of other times when a Photoshop blur effect will do the trick. In general, look for images that feature a strong subject and/or exhibit a degree of open space or perspective that helps differentiate between foreground and background. You might even select an image already exhibiting a moderate amount of blur and enhance the effect in Photoshop.

How to blur the background in Photoshop: conclusion

Now that you’ve finished this article, you should be able to produce a realistic background blur using Photoshop.

Of course, it’s generally best to create blur using in-camera effects (e.g., a wide aperture for a shallow depth of field). But the Iris Blur and Field Blur filters offer a simple and effective way to create beautiful effects in post-processing.

So experiment with the Blur filters. Test out different effects. And your photos are bound to turn out great!

Now over to you:

Do you have any tips for blurring the background in Photoshop? Do you have a favorite background blur method? Share your thoughts in the comments below!

The post How to Blur the Background in Photoshop: Step-By-Step Guide appeared first on Digital Photography School. It was authored by Megan Kennedy.


Digital Photography School

 
Comments Off on How to Blur the Background in Photoshop: Step-By-Step Guide

Posted in Photography


How to Capture Motion Blur in Photography (6 Tips)

19 May

The post How to Capture Motion Blur in Photography (6 Tips) appeared first on Digital Photography School. It was authored by Darren Rowse.

capture motion blur in photography

Are you looking to capture motion blur in your photography?

While photographing motion blur might seem difficult, it’s actually pretty easy; with a bit of camera know-how, you’ll be taking stunning photos like a pro.

capture motion blur photography

And that’s what this article is all about: giving you the tools and techniques you need to get beautiful results!

Note that motion blur can look great in any photography genre, so don’t try to limit yourself. Instead, embrace the power of the blur!

1. Slow down your shutter speed

Here’s the fundamental motion blur tip:

Use a slow shutter speed.

You see, the reason for motion blur is simply that your camera’s shutter remains open for a significant period of time. In other words: you get motion blur when your shutter speed is long, whereas you freeze the action when your shutter speed is short.

So the number one tip for capturing movement is to select a longer shutter speed.

motion blur in front of buildings

If your shutter speed is too fast (e.g., 1/4000s), you’re not going to capture much movement. But if you dial in a lengthy shutter speed (e.g., five seconds) you won’t need your subject to move much at all before you start to see blur.

How long should your shutter speed be? Here, the speed of your subject comes into play. A moving snail and a moving racecar will give you very different results at the same shutter speed. The slower your subject, the slower the shutter speed needs to be to create blur.

The other factor that comes into play when determining shutter speed is how much light exists in the scene. A longer shutter speed lets more light into your camera and runs the risk of blowing out or overexposing your image. Below, we’ll cover some ways to let less light in (so you can use long shutter speeds without overexposure concerns).

Bottom line:

There’s no one-size-fits-all shutter speed for motion blur. It’ll depend on the speed of your subject, the brightness of the scene, and how much motion blur you want to capture. The key is to experiment!

2. Stabilize your camera

There are two ways to get a feeling of motion in your images:

  1. Have your subject move.
  2. Have your camera move.

But for the type of photo we’re after today, it’ll be the subject that’s moving. In such cases, you need to do everything you can to keep your camera perfectly still. Otherwise, you’ll capture a blurry subject – but you’ll also end up with a blurry background.

How do you stabilize your camera?

boats in the water

A tripod is ideal, but you can also place your camera on some other steady object (e.g., a table or a bench). I’d recommend using a remote shutter release or a self-timer mechanism; that way, you can trigger the shutter without touching your camera (because the more you touch your camera, the more likely it is that you’ll introduce blur).

3. Try Shutter Priority mode

As you know, the shutter speed is crucial to achieving a beautiful blurred look. Even small changes will have a big impact upon your shot – so you should use a camera mode that gives you full control over your camera’s shutter.

You have two options. First, you can switch your camera to full Manual mode. It’ll work well, and it’s a good idea for more experienced photographers – but in Manual mode, you’ll also need to select your aperture and ISO (and you’ll need to make sure that the shutter speed, aperture, and ISO interact to create a perfect exposure). So if you don’t yet feel confident working in Manual mode, you have another option:

Shutter Priority mode.

With Shutter Priority, you set the shutter speed (and the ISO, if you so choose), but your camera will set the aperture to ensure the shot is well exposed. It’s a very handy mode for motion blur photography because it ensures you get the movement effect you’re after while also capturing generally well-exposed images.

motorcyclist motion blur photography

How to compensate for long shutter speeds when there is too much light

Remember what I said about a long shutter speed?

The longer the speed, the more light that will get into your camera, and the brighter your photos will be.

So unless you compensate for this, whenever you try to capture motion blur, you’ll end up with overexposed shots.

Below, I’ll suggest three easy methods for preventing this overexposure.

(Note: A fourth method is to simply wait for the light to change – i.e., for it to get darker. Many shots that incorporate blur are taken at night or at dawn/dusk for this reason.)

1. Use a small aperture

Here’s the first, and simplest, method of preventing overexposure:

Narrow the aperture.

Because the narrower the aperture, the less light that will hit the camera sensor.

If you’re shooting in Shutter Priority, your camera will actually narrow the aperture for you. As soon as it detects a slow shutter speed, it’ll close down the aperture and deliver a well-exposed shot.

But if you’re shooting in Manual mode or Aperture Priority, the aperture can generally be changed via a dial on your camera.

One thing to bear in mind:

Adjusting the aperture won’t just affect your photo’s exposure. Aperture also affects the depth of field, which refers to the amount of the scene that’s sharp. A wide aperture creates a limited depth of field, like this:

watch with spinning hands capture motion blur photography

Whereas a narrow aperture ensures the entire scene is sharp throughout:

capture motion blur photography car driving

So while it’s easy to combine a deep depth of field with a well-exposed motion blur image, working with a shallow depth of field while also ensuring well-exposed motion blur can be tough. If you’re after a shallow depth of field effect, you’ll need to counteract overexposure another way, as I explain in the next section:

2. Decrease your ISO

If you’ve tried narrowing your aperture and still aren’t getting you the results you need, or if you’re after a shallow depth of field, here’s an alternative method for preventing overexposure:

Drop your ISO.

ISO impacts the sensitivity of your digital camera’s sensor to light, where a higher number will induce greater sensitivity (and therefore a brighter exposure) and a lower number will induce less sensitivity (and therefore a darker exposure).

train moving fast with platform

You can adjust your ISO in Manual mode or Shutter Priority mode, so simply dial in a low ISO (such as 100) and watch as your exposure decreases. Of course, there’s a limit to how low you can drop your ISO; once you get to ISO 100 or ISO 50, your camera won’t allow you to go any further. But it’s always worth checking whether a lower ISO is an option because it’s a simple way to prevent overexposure.

3. Try a neutral density filter

Say you’re after a motion blur photo, but you just can’t get the exposure dark enough. You’ve narrowed the aperture, you’ve dropped the ISO, but your shots keep coming out overexposed.

You still have another, more dedicated option:

A neutral density filter. It’s a piece of glass that blocks light from passing through your lens – sort of like sunglasses – and lets you use a long shutter speed while preventing overexposure.

For example, if you’re shooting a seascape in bright sunlight and you want to blur the water, you’ll end up with a blown-out, overexposed scene – even with a narrow aperture and low ISO. But pop a neutral density filter over your lens, and you can slow the shutter speed right down while keeping a perfect exposure.

long exposure seascape blur

(By the way, a polarizing filter can have a similar effect, though it’ll also impact the look of your images by cutting out reflections.)

Note that neutral density filters come in many strengths. You can get a basic, subtle ND filter, one that’ll slightly darken the scene. Or you can buy an ultra-powerful, 10-stop ND filter, which will allow you to dramatically lengthen your shutter speed in bright sunlight.

A quick note: two more creative techniques to try

If you want to capture images with motion blur but you’re looking to come away with uniquely artistic results, here are two other techniques to consider:

  • Slow sync flash. This lets you capture a relatively sharp subject while creating a moving, blurry background, and it’s a great way to create in-your-face shots.
  • Panning. Here, you simply follow a moving subject with your camera; the subject will generally come out nice and sharp, while the background stretches and blurs.
panning with motorcycle

Motion blur in photography: conclusion

Well, there you have it! Six easy tips to capture motion blur in photography.

So remember these tips. And the next time you’re after some creative motion blur photos, you’ll get stunning results!

Now over to you:

Have you tried taking motion blur photos? Did it go well? Do you have any tricks or tips? Share your thoughts (and images!) in the comments below!

capture motion blur photography racecar

The post How to Capture Motion Blur in Photography (6 Tips) appeared first on Digital Photography School. It was authored by Darren Rowse.


Digital Photography School

 
Comments Off on How to Capture Motion Blur in Photography (6 Tips)

Posted in Photography


How to Blur the Background in Lightroom: A Complete Guide

08 Apr

The post How to Blur the Background in Lightroom: A Complete Guide appeared first on Digital Photography School. It was authored by Rick Ohnsman.

how to blur the background in Lightroom

If you want to give more emphasis to your subject, you must minimize the background. The best way to achieve this is in-camera; you can focus on the subject but pick a wide aperture and a long focal length for limited depth of field. The result is a sharp subject but a blurred, simplified background:

how to blur the background in Lightroom
The best way to blur the background in a photo is with a combination of focal length and aperture.

That is the ideal method. I’m going to teach you how to blur the background in Lightroom, but with the caveat that it is not the best way.

What if your image is sharp from front to back but the background now competes for attention? You didn’t think about it and made your shot with a smaller aperture, wide focal length, or both. Or perhaps you’re dealing with a smartphone image, where a small sensor size and a very short focal length almost always creates images with everything in focus.

how to blur the background in Lightroom
Smartphone photos typically have a deep depth of field due to the small sensors and very short focal lengths. The image on the left is straight out of the phone. The version on the right had the background blurred with Lightroom to put more emphasis on the subject.

If you failed to get a blurred background in-camera, your next best option is Photoshop – or another sophisticated editing program that supports layers, selections, and functions like gradients and Gaussian blur.

As for Lightroom: It’s a fair option. It will work, but using it to blur your background probably ought to be thought of as a “rescue mission.” I don’t want to discourage you – Lightroom often can produce a very acceptable blur – but I’d strongly encourage you to shoot multiple images during your photo session and vary the aperture if you think you might want to soften the background.

But all the coulda, woulda, and shoulda regrets over how you might have made a better in-camera capture don’t count when the session is over, the images are already made, and Lightroom is the only editing tool you have.

So let me show you how to blur the background in Lightroom.

How to Blue the Background in Lightroom - The rock chuck
“Chuck” the rockchuck blended in a bit too much with the background. Using Lightroom, I blurred the areas around him to simulate a shot with a long lens and a wide aperture.

Two major steps

There are two major things to consider when blurring the background in Lightroom:

  • What area(s) you want blurred
  • The kind and amount of blurring you want

The what and how of masking

In Photoshop, defining the area you want to work with is typically done with selections. There are a variety of tools to create selections, and once you’ve made them, you’ll typically see the “marching ants” – the animated dotted-line border that defines your selected area.

But in Lightroom, there are no selections, and you’ll never see the ants. Instead, Lightroom uses what it calls “masks” to allow you to select areas where you want effects applied.

There are three local adjustment tools you can use in Lightroom to select areas and apply masks:

  • The Adjustment Brush
  • The Graduated Filter
  • The Radial Filter

Blurring the background with a Graduated Filter and the filter brush

statue in the park with and without a blurry background
This statue photo has a busy background. Background blurring techniques in Lightroom can help keep more attention on the subject.
statue in the park
Step 1: Drag a Graduated Filter from the right edge across the entire image. The Mask Overlay is turned on (in green).
statue in the park with masking
Step 2: With the Graduated Filter still selected, get the filter brush tool. (Find the word “Brush” at the top of the editing panels and click that, not the picture of the brush). Either hold down the Alt/Option key while you work so the symbol inside the brush is a “-” sign or click the Erase option. Erase portions of the mask you don’t want to be blurred. The Auto Mask option can be helpful to find edges.
statue in the park with masking
Step 3: Finish erasing the portions of the subject you want to be sharp. Then think about other areas that would be sharp if you had shot with a limited depth of field, such as the foreground. Erase those areas, too, making sure to use a very feathered brush with a low flow. After your image is masked, drag down the Sharpness slider to create the blur. (It’s good to toggle off the Mask Overlay here so you can see what you’re doing; just hit “O” on the keyboard to toggle it on and off.)

It’s probably best to think of your filter brush more as an airbrush than a paintbrush. There are four settings you can use to control its application:

  • Size: Changes the size of the brush. Roll the mouse wheel, use the left and right bracket keys, or use the slider.
  • Feather: Changes how hard the edge of the brush is and how rapidly the effect falls off. Use Shift while rolling the mouse wheel, Shift and the bracket keys together, or the Feather slider.
  • Flow: Controls how quickly the effect is applied with each stroke of the brush. Use the slider to adjust the flow, or with the brush tool selected, change the flow with the number keys on the keyboard. Using multiple strokes will build up the effect.
  • Density: Controls the maximum opacity of the brush effect. For example, if the Flow was at 100 but the Density was at 50, one stroke of the brush would apply the effect at 50% opacity.

It is possible to simply select the Adjustment Brush, drag the sharpness slider all the way down (“reverse sharpening”), and start painting away on your image, watching the painted sections become more blurred. (You are still creating a mask this way, but you will not see it unless you turn on the Mask Overlay).

The Adjustment Brush method might work fine if you don’t mind being imprecise about how finely the blur is applied, but it is not the best method for finer work.

Radial Filter

The Radial Filter has a shape that is restricted to circles and ovals. The effect radiates out from the center of the spot where it is applied. You can control its size, feathering, and orientation.

Using the Invert checkbox, you can also control whether the filter effect occurs outside the oval (the default), or inside the oval (if the Invert box is checked).

How to blue the background in Lightroom the Radial filter
Blurring the background with the Radial Filter is a three-step process:

1) Mask the entire image with the Radial Filter. (Turn on the Mask Overlay to see where the mask is applied.)

2) Use the filter brush to erase portions of the mask you want to remain sharp.

3) Slide the Sharpness slider to the left for reverse sharpening (softening) of the masked areas.

The image on the left is prior to masking; the image in the center shows the masked area after removing the mask on the barn; the image on the right shows a blurred background.

The Overlay option

Being able to see where you’ve applied a mask makes things easier, so turning on the Mask Overlay option is a good idea. This can be done by either checking the box at the bottom of the screen labeled Show Selected Mask Overlay or by tapping the “O” key on your keyboard.

You can cycle through various overlay colors (which can help to make your mask stand out over different photo colors) by using Shift + O.

landscape of rainforest with and without background blur
This background blur was created by simply loading the Adjustment Brush with the Sharpness slider turned down, then painting over the areas I wanted to soften. I added a Radial Mask with a slightly raised exposure to the fern to give added attention there.

Modifying masks

Though the Adjustment Brush, Radial Filter, and Graduated Filter are the only tools for applying masks, there are other tools for modifying them.

  • Auto Mask – Checking this box while working with a brush will help the brush find edges in your image and can make masking much easier.
  • Erase – You can use the Adjustment Brush to paint on a mask. When doing so, you will see a “+” symbol at the center of the brush. Clicking the Erase option will change the symbol at the center of the brush to a “-” symbol so that you can erase portions of the mask you already painted on. You can also easily switch from painting to erasing by holding down the Alt/Option key.
  • You can add or subtract from Graduated Filter or Radial Filter masks with the filter brush tool. If you are working with a Graduated or Radial Filter mask, you will see the word “Brush” appear to the right of the word “Mask.” Important: This is a different brush than the Adjustment Brush tool. It will allow you to add to or subtract from your existing Graduated Filter or Radial Filter mask.

Range masking

Lightroom has recently added what is called the Range Mask.

With Range Masking, you still apply an initial mask using the three tools mentioned above (the Adjustment Brush, the Radial Filter, and the Graduated Filter). But by turning on Range Masking, you can control more specifically where the mask is applied.

The Luminance Range Mask will allow you to selectively apply a mask to a range of luminance (brightness) in the photo, while Color Range Masking allows the mask to be applied to a range of color (hue). Being proficient with the Range Mask will serve you well as you become a more skilled Lightroom editor.

Range Masking and blurring with Lightroom
Clockwise from top left: 1) the Before image. 2) The background selected with the Color Range Mask. 3) The background blurred with one blur layer. 4) The background blurred with three duplicate blur layers.

Learning how to create a mask to work with the areas you want is the most important part of how to blur the background in Lightroom. Take time to carefully apply and fine-tune your masks. How convincing your final image will be is highly dependent on the careful application of your mask.

How to blur the background in Lightroom - Before
This is the original edited image. It had been foggy earlier in the day, and I wanted to emulate that look.
How to blur the background in Lightroom - graduated filter applied
I first brought in Graduated Filters from both the right and the left with the Sharpen slider down to about -28.
How to blur the background in Lightroom - graduated filter applied
I then brought another Graduated Filter down from the top with the Sharpen slider all the way down to -95.
How to blur the background in Lightroom - adjustment brush applied
I then added some additional masking with the Adjustment Brush tool, and I dropped the Sharpening down to about -33.
how to blur the background in Lightroom blurry background forest
Here is the final result with some additional negative Dehaze added to my masks.

Creating the blur

Creating your masks will determine where your blurring effect is applied. It’s the more time-consuming and critical step.

But these next steps will determine how the blur looks.

Let’s say you have a person in your foreground as the main subject. You want them to be sharp, but you’d like to blur the background. Using the masking tools and techniques I’ve outlined above, here’s how I’d approach the image:

  1. Drag a Graduated Filter across the image so the entire scene is masked.
  2. Use the filter brush tool (the one that’s part of the Graduated Filter) to fine-tune the mask, erasing portions over the subject, adding back as needed, and perhaps also using the Auto Mask feature to help you better mask near the edges.
  3. Now, with your Graduated Filter selected, drag the Sharpness slider down, perhaps all the way to the left.
  4. See if dragging down the Clarity slider a bit helps achieve the blur you want. Use this more sparingly than the Sharpness slider as it can create a strange look if applied too strongly.
  5. Play with the other sliders to see what effect they might have. Remember that each slider will only affect the masked area.

Double down on the blur

You might find that even if you drag your Sharpness or Clarity sliders all the way to the left, you still aren’t getting the amount of blur you’d like. Time to double down.

Once you’ve added the sharpening or clarity effect, right-click the pin and hit Duplicate. A copy of the adjustments will be applied on top of the existing adjustments, and the blur will be multiplied.

Still not enough? Repeat and duplicate again. You can make as many duplicates as you like, slowly building up the effect.

how to blur the background in Lightroom man with bike
Top left: The Before image. Top right: The mask applied. Bottom left: The background blurred with one pass of reverse sharpening. Bottom right: The background blurred with three duplicates of the reverse sharpening adjustment.

When you blur the background in Lightroom, less is more

Let’s come back around to what I said at the beginning of this article:

Using Lightroom to blur your background is not the best way to achieve the look you’re after. Softening details with editing is a bit of fakery and cannot begin to truly reproduce the kind of bokeh blur achieved with a lens.

So instead of creating something that is immediately obvious and calls attention to itself, be subtle. If an untrained observer would say, “This looks like an editing effect,” you’ve failed.

reverse sharpening bike on prairie
Less can be more. Just a little reverse sharpening to the background and foreground simulates a narrow depth of field.

Spend whatever time it takes to create and refine your masks so that it’s not obvious where the edge is. Consider the different parts of the scene that should – and shouldn’t! – be blurred.

Then be sparing in your application of reverse sharpness and clarity. It’s always a good practice to take a break after an editing session to give your eyes a rest, then look at your image again later. You might even ask someone else to view the image. (They should not be able to tell that anything was doctored.)

police motorbikes in a line
Front-to-back sharpness or a simulation of limited depth of field? For this shot, there wouldn’t have been time to shoot it both ways, so the ability to blur the background in editing was useful.

How to blur the background in Lightroom: final words

In teaching you how to blur the background in Lightroom, I want you to be successful with your editing and make beautiful images.

So test out the techniques I’ve shared. And if you get good results, post some of your before and after images in the comments below!

Why should you blur the background of a photo?

You should always decide on the most important subject in your photo and use techniques to put the most attention on that subject. Sometimes backgrounds can be distracting, so blurring them while keeping the main subject sharp can be a good idea.

Is Lightroom a good application for blurring the background?

It works, but you will be using tools not especially created for this purpose. Adobe Photoshop or a different editing application with selections, layers, and Gaussian blur would be better.

Is there a Blur tool in Lightroom?

Not really. To blur backgrounds in Lightroom, you add reverse sharpness and reverse clarity over selected portions of the image.

What is the best way to blur the background in a photo?

The best way is to shoot your photos with a limited depth of field. Wide apertures and longer focal lengths would be the in-camera approach to the blurred background look.

Will the “Portrait mode” of newer smartphone cameras allow you to blur the background?

Yes, this mode actually takes multiple shots and combines them in-camera to create a blurred background effect. It might be better than what you can do in Lightroom, but it provides limited user control and is not nearly as good as what can be done with a traditional camera.

The post How to Blur the Background in Lightroom: A Complete Guide appeared first on Digital Photography School. It was authored by Rick Ohnsman.


Digital Photography School

 
Comments Off on How to Blur the Background in Lightroom: A Complete Guide

Posted in Photography


3 Reasons to Introduce Motion Blur Into Your Photography

20 May

The post 3 Reasons to Introduce Motion Blur Into Your Photography appeared first on Digital Photography School. It was authored by Kav Dadfar.

dps-reasons-to-introduce-motion-blur-in-photography

Making a still image come to life can be a difficult task, especially if you don’t know the full functionality of your camera. When you’re first learning photography, it quickly becomes second nature to keep everything perfectly in focus, so you don’t instantly know how, why, and when to introduce motion blur to your images. But before you introduce motion blur, first, let’s learn what it is and how to do it.

3 Reasons to Introduce Motion Blur Into Your Photography
f/6.3 – ISO 160 – 1/100 sec

What is motion blur?

First and foremost, motion blur is a lot different than a blurry image. If you shake the camera around or your subject starts to move right as you open the shutter, that creates a blurred image, but not necessarily motion blur.

Motion blur is when you purposely create an aspect of movement for your subject, but the rest of the photo is in focus. This is a really important element that makes the difference between motion blur and just a blurred image. Without some part of your photo being sharp, then your foreground and background are going to blend together and the photo won’t work.

Motion blur should also happen to something that the viewer would naturally assume is moving, like a car or a person running. Adding motion blur to something that is typically stationary, like a book or a salt shaker that is on a table, will seem awkward. Even though seeing a salt shaker move at the speed of light is an interesting idea, it won’t really make any sense to the viewer.

Now that we have the basics down, here are 3 reasons why you should introduce motion blur to your photography.

Introduce-motion-blur
f/8 – ISO 400 – 1/40 sec

1. It tells a story

When done correctly, motion blur enhances the storytelling capability of a photo.

Imagine that you’re shooting at a horse racing track. You’re standing at an angle near the finish line, and when the two runners pass you, you compose your shot with them both in the frame and the finish line in the background.

If you introduce motion blur correctly in
your photo, then you’re going to have an awesome shot of the two runners in
motion, slightly blurred as if they are still running despite being frozen in
time. The finish line may even be in focus, along with the spectators.

This brings the viewer into the shot like they are standing right alongside you to see the race to completion. It tells the story of what you witnessed that day.

If done incorrectly, you’ll just get a blurred photo of two blobs running toward another blob. The elements in the photo will blend together and you’ll barely be able to understand what is happening in the first place.

3 Reasons to Introduce Motion Blur Into Your Photography
f/2.8 – ISO 4000 – 1/80 sec

2. It adds action to your photography

Another great reason for adding motion blur to your photos is to convey a sense of “action” or “movement.” This can make your photos seem much more dynamic.

For example, imagine a dirt bike that is roaring around the side of a mountain. Imagine seeing the blurred dirt bike racing along the path while the mountain itself is in perfect focus. It almost makes it look like the dirt bike is rocketing through the frozen image, or that you’re present to witness the moment yourself.

Or, for example, imagine a dancer. If you introduce motion blur, you can show the viewer the movement that is taking place. It could be that he or she is spinning, moving their arms, or even jumping. Having the right amount of motion blur can bring the dancer to life in your photo.

You’ll need to select a slower shutter speed than you would do normally to get this to work properly. The exact settings will depend on the speed that your subject is moving at. For the bike example above, you won’t need a shutter as slow as you would need for someone walking for example.

Introduce-motion-blur
f/4 – ISO 200 – 1/200 sec

3. It can create a wonderful effect

If you set up your camera when the lighting conditions are dark, and set a slow shutter speed so that you have a longer exposure, you can create streaking lights that not only tell a story but also look fantastic.

First, you need to make sure that you have a steady tripod. Without it, you won’t get anything other than a completely blurred picture unless you raise your ISO ridiculously high. The problem with doing that is the amount of unwanted noise that you will end up with being in your photo. So if you want the best photo possible, use a tripod.

The long exposure will mean that any vehicles that drive past will create a streaked-light effect, or the stars above will streak across the frame as the Earth rotates.

Attempting this during the day won’t work unless you use a neutral density filter like a Lee little or big stopper. Without a filter, you will just end up with a completely blown out (white) image. Even if you do get it to work, it would not have the same impact as when it is darker.

Introduce-motion-blur
f/8 – ISO 100 – 5 sec

Getting the hang of motion blur photography isn’t very difficult. But to do it well will require practice. So, experiment a little when you introduce motion blur to your photography and keep these reasons in mind to help push you along in your trials! With experience, you’ll get to learn how and when to best introduce motion blur to your photography.

The post 3 Reasons to Introduce Motion Blur Into Your Photography appeared first on Digital Photography School. It was authored by Kav Dadfar.


Digital Photography School

 
Comments Off on 3 Reasons to Introduce Motion Blur Into Your Photography

Posted in Photography


Google Pixel 4 ‘Feature Drop’ brings post-capture Portrait Blur and more

10 Dec

Google’s Pixel phones run the company’s Android operating system in its ‘purest’ form which also means they are the first devices to receive Android updates. Now Google has released its first ‘Feature Drop’ for the Pixel 4 and given us an overview in a blog post.

From an imaging point of view, the most interesting new feature is the ability to add a simulated bokeh effect post-capture, even if the image wasn’t originally shot in the Pixel’s Portrait mode. This means using Google Photos you can now add background blur to images that were shot a long time before bokeh simulation even was a thing.

On the downside, we would expect subject segmentation to be less precise than on images shot in Portrait Mode as the feature won’t have any depth data to work with and solely relies on subject recognition.

Other new features include an option for automatic Call Screen for robocalls and spam calls. Google Assistant can detect spam calls and silence them. Then it will screen the call to see if it might actually be worth your while. Google says it will also provide a ‘helpful context about who is calling and why.’

In addition, the video-calling app Google Duo can now auto-frame your face using the Pixel’s wide-angle selfie camera and expand the frame if a second person joins the caller. Google also says it has improved the Pixel 4’s memory management.

All new features will roll out ‘soon’ to Pixel users and at least some of them are likely to at some point appear on other Android devices as well. You can find the full list of new features on the Google Blog.

Articles: Digital Photography Review (dpreview.com)

 
Comments Off on Google Pixel 4 ‘Feature Drop’ brings post-capture Portrait Blur and more

Posted in Uncategorized


Photographic Inspiration or Copying? Where does the line blur?

25 Nov

The post Photographic Inspiration or Copying? Where does the line blur? appeared first on Digital Photography School. It was authored by Charlie Moss.

photographic-inspiration-or-copying

As photographers, we take inspiration from everywhere. Pictures we see on the internet, things our friends say to us over coffee, magazines, galleries and museums, even the advertising we see at the bus stop. All of it gets stored away inside our heads for later, even if we don’t realize it. All this visual information we have consumed throughout our lives becomes a part of the new photographs that we create in some way. It influences us to make certain choices about the way we style or shoot images or the way we post-process them. So if we’re all taking inspiration from the things we see around us, even without realizing, when is it photographic inspiration or copying?

Why is copying seen as such a bad thing in the photographic world? Moreover, is there a clear line between taking photographic inspiration, or is it fuzzy and open to interpretation?

photographic-inspiration-or-copying

Imitation or inspiration?

It’s often said that imitation is the most sincere form of flattery (a nineteenth-century English art collector originally said it). And in many ways, I agree with this.

If you’re imitating a picture by another photographer or you’re imitating their technique, then you must think it’s going to be worth putting in time and effort to learning more about what they do. And that’s where we get the idea that this process is flattery.

But it doesn’t always feel like flattery when you’re on the receiving end of being imitated. Instead, it feels like someone is just copying the hard work that you put in, without any creativity on their part.

Of course, in the commercial world, there can be real financial implications if another photographer copies your work. But perhaps it’s time, in the rest of the photographic world, to worry a little less about copying and to focus more on learning new skills and developing a voice.

photographic-inspiration-or-copying

Turning imitation into inspiration

We’ve all imitated others, I’m sure. Maybe a pose borrowed from one image, the lighting from another, or the setting from somewhere else. It’s so hard to be truly original when it comes to the creation of photographs. We can’t just close ourselves off from the world and stop looking at the imagery that surrounds us.

So how do you move from imitating another artist to using their work as inspiration?

I think that the difference happens when you start to bring your own experience to the images you create. If you allow the work to reflect your own view of the world and the things that have happened to you, then that’s when the originality starts to happen.

Photographic Inspiration or Copying? Where does the line blur?

Is originality of subject as important as originality of voice?

Let’s face it – you’re unlikely to hit upon a genuinely original subject or concept for your next photograph. Most things out there have been photographed thousands of times before.

I’m not sure that having a totally original subject is that important, as long as you’re bringing your own voice to the photograph. If you’re saying things in your way with your viewpoint, then that is something truly original.

Think about many of the celebrity portrait photographers, or the well-known landscape photographers. Those photographers don’t usually have original subjects that have never been photographed before. But what they do have is originality in voice, an ability to find something unique about their subject, and the skills to show that uniqueness to the world.

Finding your voice

It sounds so easy, doesn’t it? “Just find your voice and make your images unique!” I guess you’re sitting there wondering how you find your voice and stop copying? Here’s a few pointers with that in mind.

photographic-inspiration-or-copying

1. Bring your own experiences

Nobody else has led your life and had your experiences. If you bring these elements of you to your image-making, you will automatically be creating something different from everybody else. Nobody else is you, no matter how much they imitate your work.

Of course, your own experiences could also be showing up at the right time and place to create a unique shot.

2. Critique your photos

For every photo that you think is great, write down five ideas that would improve it if you took that photo again. Even the daftest ideas are worth writing down. Put a small print of the image in a notebook and record your thoughts there if you can. Then you can revisit it when you want ideas of new things to try.

3. Keep shooting

Don’t give up. It takes most people a long time to find their unique voice and viewpoint when they’re making images. You have to shoot quite a few photographs before you start discovering what makes your images unique. The longer you shoot, the more likely you are to hit on something that makes your work truly your own.

How bad is copying really?

So, photographic inspiration or copying? In the grand scheme of things, in my opinion, copying isn’t really that big of a deal.

Artists have always copied other artists. Going back hundreds of years, artists have sat in front of the work of another artist and made sketches from what they see. It’s a way of learning and improving your skills, and photographers can (and perhaps even should) consider doing the same – photographically speaking.

Photographic Inspiration or Copying? Where does the line blur?

If copying is being done for practice, learning, and curiosity, it should be encouraged. As long as nobody is claiming the ideas that they’ve copied as their own, then does it really matter?

The difficulty comes when people are using ideas and presenting them as their own, without taking the time to develop them fully and put an individual spin on the work.

So as long as you’re bringing something new to the work you present as being authentically yours, then I don’t think there’s any problem. And even if you are copying to learn technical or creative skills – so what? Does it even matter?

I’d like to know what you think about photographic inspiration or copying. What do you have to do to stop copying and start being inspired by other people’s work? How do you find your voice and make your own photographs unique? Share with us in the comments!

The post Photographic Inspiration or Copying? Where does the line blur? appeared first on Digital Photography School. It was authored by Charlie Moss.


Digital Photography School

 
Comments Off on Photographic Inspiration or Copying? Where does the line blur?

Posted in Photography


Go With The Flow – Using Slow Shutter Speed to Create Motion Blur

22 Jan

The post Go With The Flow – Using Slow Shutter Speed to Create Motion Blur appeared first on Digital Photography School. It was authored by Kevin Landwer-Johan.

Starting out as a photography assistant in a daily newspaper, I had one thing drummed into me. Make sure it’s sharp. This was the cardinal rule. It was appropriate for the situation.

Any kind of unintentional fuzziness, especially when it renders the subject indistinct, looks awful when printed on newsprint.

Adding motion blur, or any other form of blur, in a photograph can work extremely well when circumstances are right.

Merlion Park, Singapore Using a Slow Shutter Speed to a Create Sense of Motion

© Kevin Landwer-Johan. Shutter speed: 8 seconds

Two main techniques for creating motion blur in a photo are subject movement and camera movement.

Times when adding motion blur is the right choice

Deciding to add motion blur is best when:

  • Some parts of the composition remain sharp
  • The light is favorable
  • You find the shutter speed sweet spot
  • You have a means of stabilizing your camera
Poi Sang Long Festival Using a Slow Shutter Speed to a Create Sense of Motion

© Kevin Landwer-Johan. Shutter speed: 1/20th of a second.

Adding some flash can at times truly enhance a photo made with a slow shutter speed. I find this works best when you sync your flash with the rear shutter closing.

Keeping some of it sharp

Using a slow shutter speed to create motion blur, I find it’s best to ensure that some parts of your composition remain sharp. Whether you are moving your camera or your subject is in motion, your results will be stronger when not all the composition is blurred.

Using a slow shutter speed and moving your camera in relation to a moving subject, is known as panning. This will keep your subject sharp and the background will blur. Getting a perfectly sharp subject while panning is challenging because it requires the camera to be moving in sync with how fast the subject is.

Tuktuk Panning Using a Slow Shutter Speed to a Create Sense of Motion

© Kevin Landwer-Johan. Shutter speed: 1/25th of a second.

Having your camera locked down while your subject or the background move you will have a better chance to render your subject sharp.

Getting the exposure when the light is right

Bright sunny days make it challenging to capture motion blur in a photograph. You need to use a slow shutter speed for the effect to happen. Setting your aperture to the smallest opening and your ISO as low is it can go will not always allow you to use a slow enough shutter speed.

Using a neutral density filter in bright sunshine will make a slower shutter speed possible. At times I have coupled a neutral density filter with a polarizing filter to cut the light entering the lens even more.

Market Scene Using a Slow Shutter Speed to a Create Sense of Motion

© Kevin Landwer-Johan. Shutter speed: 1/4th of a second.

In this photo I had my friend stand very still to achieve motion blur in the people walking behind her. Being such a bright sunny day meant that even with my aperture set to the minimum opening of f/11. My ISO was set at one hundred and still did not allow me to use a slow enough shutter speed. I attached a four-stop neutral density filter and a polarizing filter so I could set my shutter speed to 1/4th of a second to capture the motion blur.

At night and in other low light situations achieving a slow enough shutter speed is simple.

Finding the sweet spot for optimal blur

Choosing a shutter speed setting appropriate to the pace of movement in your composition is important. Having too much or not enough motion blur will give you a poor result. This varies greatly depending on your subject and the style of photograph you are creating.

Photographing waterfalls, people walking or traffic at night, all require different shutter speeds for best results. Generally, slower moving elements in your composition need slower shutter speeds. Things moving more quickly need faster shutter speed or there will be too much motion blur. It also depends on how much definition you want to retain in whatever is moving.

Twently Second Waterfall Using a Slow Shutter Speed to a Create Sense of Motion

© Kevin Landwer-Johan. Shutter speed: 20 seconds.

Flowing water, like in this waterfall, can be completely blurred. In fact, waterfall photos usually look best when a shutter speed of more than two seconds is used. I used a twenty-second exposure for this photo and there’s absolutely no definition in the water. It is still obvious what it is though.

On The Sidewalk Using a Slow Shutter Speed to a Create Sense of Motion

© Kevin Landwer-Johan. Shutter speed: 1/10th of a second.

Keeping the motion blur balanced is more important with some subjects. For this photo of people on a sidewalk in Bangkok, I chose a shutter speed of 1/10th of a second. A slower shutter speed would mean more blur and less definition. A fast speed would show less blur and may just look like it was a mistake. I was happy to capture an image where the people walking are blurred yet their feet are reasonably sharp. The young woman modeling for me was very patient as it took quite a while to make a composition with the right number of pedestrians in my frame.

Experimentation is key to finding the sweet spot with your shutter speed. You need to decide how clear or how blurred you want your subject and other elements in your composition.

Camera stability is important

You can use a slow shutter speed even if you do not have a tripod. Learn to hold your camera well and be in control of it. I do not often carry a tripod so am forced to use alternative means of preventing unwanted camera movement. Unintentional camera movement creates ghosting which introduces extra fuzziness to photos.

Flames Using a Slow Shutter Speed to a Create Sense of Motion

© Kevin Landwer-Johan. Shutter speed: 1/20th of a second.

Hand holding a camera while panning can be preferable for some more than using a tripod. Keeping a steady movement along with your subject is what’s most important. If you are panning with a passing vehicle you do not want to be jiggling your camera up and down as you track your subject.

Finding a firm surface to place your camera can be a good substitute when you don’t have a tripod. You may need to place something under the lens so your angle of view is level. I find my mobile phone or wallet often come in handy for this.

Using a tripod does make things more straightforward when using a slow shutter speed. With a tripod, you have more stability and often more control of your angle of view.

Coffee Roasting Using a Slow Shutter Speed to a Create Sense of Motion

© Kevin Landwer-Johan. Shutter speed: 1/4th of a second.

Introducing rear curtain synchronized flash

Many cameras give you an option to synchronize the flash so it fires just before the shutter closes. Doing this combined with a slow shutter speed and movement produces interesting effects.

As the flash is triggered near the end of the exposure it looks like the movement is partially frozen. Using a very slow shutter speed when there’s fast movement your subject may appear semi-transparent.

Tricycle Taxi Using a Slow Shutter Speed to a Create Sense of Motion

© Kevin Landwer-Johan. Shutter speed: 4 seconds.

I used a four-second exposure for this photo of a tricycle taxi in Chiang Mai. You can see the ghosted image of two people just above the handlebars of the cycle. They were riding past on a motorbike just at the end of the exposure as my flash fired.

Conclusion

Photographing movement using long exposures it pays to give yourself plenty of time to experiment and take lots of photos. Varying your shutter speed. Choose a faster or slower speed with the same subject. This can create vastly different looking photos.

Iron Bridge Using a Slow Shutter Speed to a Create Sense of Motion

© Kevin Landwer-Johan. Shutter speed: 1.6 seconds.

If you’ve never often used a slow shutter speed, begin to explore the possibilities. If you’ve had some experience, try some new angle or subject. Please share your photos and comments below.

The post Go With The Flow – Using Slow Shutter Speed to Create Motion Blur appeared first on Digital Photography School. It was authored by Kevin Landwer-Johan.


Digital Photography School

 
Comments Off on Go With The Flow – Using Slow Shutter Speed to Create Motion Blur

Posted in Photography


Blur and Creative Photography – Why Your Images Don’t Need To Be 100% Sharp

06 Nov

Blur and creative photography – Why your images don’t need to be 100% sharp all of the time.

Blur and Creative Photography - Why Your Images Don't Need To Be 100% Sharp 1

I have an image of a blueberry shot on the end of a spoon with my macro lens. It has a very narrow depth of field (DOF).  Only the front of the blueberry is in focus. The rest has a lovely soft blur.

The first comment when I posted it on Facebook was ‘it would look better if it were all in focus.’

No.

There is a perception amongst some photographers who are very invested in the technicalities of shooting, that absolutely every image has to be 100% sharp. While it is an entirely valid choice – and I fully support the decision to shoot their images that way – it is not the ‘only’ choice.

For those of us who want to explore different creative styles, have fun with different lenses and push the boundaries of what photography can allow us to do in creating art, there are plenty of alternatives.

NOTE: To clarify, sometimes an image ‘just is’ out of focus for whatever reason. This article addresses the photographers deliberate creative choice to use softness or blur in a picture.  It may be a subtle difference for some, but it is a difference.

Blur and Creative Photography - Why Your Images Don't Need To Be 100% Sharp 2

Beyond Bokeh

It amuses me that many photographers believe all images ‘must be tack sharp.’ Still, they are out there taking photos of birds, portraits or wedding shots with very soft blurred bokeh backgrounds. However, the reasons they do so are perfectly valid.

Some photographers do so to:

  • soften a distracting background
  • bring the subject into prominence
  • make it aesthetically pleasing
  • give depth and 3D feel to the image

But for bokeh to work well, you need to have some specific elements present and happening. Such as decent quality lenses, a lot of distance behind the subject to the background, and good soft light. Not every shoot offers those situations, nor can everyone afford the best lens.

What if we want even more softness in our image, including the subject? Maybe we want the background sharp, and the subject blurred – a technique often used in some street photography styles.

What about ICM – Intentional Camera Movement? Or Wabi-Sabi, the Japanese/Zen aesthetic of the beauty of imperfection.

There are so many other ways to see the world and present our images with our unique creative viewpoint. If that means smearing stuff on a filter in front of your lens, then smear-away :).

Blur and Creative Photography - Why Your Images Don't Need To Be 100% Sharp 3

Learn To Love the Blur

Bring your hand as close to your face as you can, so you can still focus on it. What happens to the background?  If you shift focus to the background instead, your hand blurs.

Distant mountains are blurred as we physically cannot focus clearly that far away.

So its natural for blur to be present in our images. Therefore if we choose to use it more creatively to give our pictures a different feel or mood, we are enhancing a natural element in our world.

Painters can represent a tree in different ways depending on their technique and style. It may be rendered beautifully with every leaf painted as an individual element. It may have stark lines representing a trunk and branches, or colorful blobs in the background.

Photography can be playful, creative, stylistic and artistic as well. We can allow ourselves to love blur.

Blur and Creative Photography - Why Your Images Don't Need To Be 100% Sharp 4

Intentional camera movement is popular with stands of trees, soft beach scenes, and fields of flowers. To enhance it, even more, some people stretch plastic film in front of the lens. Or wrap it around the front leaving a small opening to shoot through.

I know flower/macro photographers who wrap gauze fabric around the front of their lens for an alternative soft effect and to add some color as well. Stretching pantyhose across the front of the lens is also cheap and effective.

Smearing petroleum jelly on a filter screwed to the front of the lens is reasonably common for an effective soft blur effect.

Blur and Creative Photography - Why Your Images Don't Need To Be 100% Sharp 5

Lens Choices

Lenses with an F stop of 2.8 to 1.4 give a very narrow depth of field, which highlights the subject and softens the background. Macro lenses are excellent for this effect.

Many portrait and wedding photographers will have an 85mm portrait lens with an F-stop in this range. Often specifically used to blur the background for a nice effect.

Lensbaby are well known for their special effect lenses. Their lenses offer lots of creative blur effects.  The ‘Composer’ range allows you to select a specific point in the image to be in focus while softening the remainder. The ‘Twist’ range gives a swirly bokeh effect in the background, and there are other options too.

‘Helios’ and ‘Vivitar’ vintage lenses are experiencing a renaissance in popularity. They have many creative bokeh effects (including the swirl style) and are quite cheap in comparison to Lensbaby. They are vintage manual-focus lenses and may need a specialist mount to attach to your modern camera, but can they can be purchased at very affordable prices.

Blur and Creative Photography - Why Your Images Don't Need To Be 100% Sharp 6

Vintage ‘Helios’ lens gives very swirly bokeh blur in this image

Have Fun

For some people, it can be scary to let go of the need for sharpness and embrace the softer side. Other people sit happily in that place and rarely shoot a classically sharp shot.

There is room within photography as a creative medium for us to be artistic. To let go of the perceived rules, relax and have some fun doing something different.

Yes, some effects are niche, and you may not want to use them all the time. But you wouldn’t use a Fish-Eye lens every day either.

Having a range of choices gives you much more scope to shoot differently, add your unique take on an image. Using different lenses can help us see the world in new exciting ways and open up opportunities to create memorable images.

Blur and Creative Photography - Why Your Images Don't Need To Be 100% Sharp 7

Ways to Play

1. Bokeh

Bokeh relates to the quality and smoothness of your blurred background when you shoot the subject with a shallow depth of field. Different lenses give a varied type of bokeh. Usually, the better quality fast primes or macro lenses have the smoothest, most pleasing bokeh.

Bokeh happens when the subject is closer to the camera than it is to the background. Shooting wide open, i.e., F2.8 to F1.2 will give maximum blur of the background.

So try to shoot your subjects wide open with a narrow depth of field. With the background further away from them, you will achieve the nice soft blur.

Blur and Creative Photography - Why Your Images Don't Need To Be 100% Sharp 8

2. Selective Focus

When you combine a narrow depth of field, such as F2.8, with selecting a specific part of the subject, it will soften everything else in the image.

Doing so creates a lovely effect with flowers and macro imagery.

Blur and Creative Photography - Why Your Images Don't Need To Be 100% Sharp 9

3. Shoot Through

Place something in front of the lens to add some level of softness.  It can either completely cover the lens or be wrapped around it to only soften the edges.

You can use:

  • nylons stretched across the lens
  • gauzy fabric wrapped around the lens
  • plastic film across or wrapped around the lens
  • filters smeared with petroleum jelly
  • hold fabric or flowers in front of part of the lens to add softness (common in flower photography)

4. ICM (Intentional Camera Movement)

Intentional Camera Movement is when the camera is deliberately moved during the shutter opening and closing to add blur to the image. A neutral density filter can assist with giving you a slightly longer shutter speed if shooting in daylight.

You may have seen this used in shots of forests with vertical stands of tree trunks.

5. Vintage Lenses

Try purchasing ‘Helios’ or ‘Vivitar’ Lenses (or other options) and related mounts for your camera. Many of these lenses have unexpected visual effects (sometimes seen as a fault) but can be used effectively for creative shots.

6. Specialty Lenses

Lensbaby offers a range of lens solutions to give you a variety of soft effects.

Blur and Creative Photography - Why Your Images Don't Need To Be 100% Sharp 10

Lensbaby Velvet 56 at F1.8 is very soft and adds a glamour effect

7. Filters

Soft Focus filters get screwed in front of your lens and are useful in portrait and glamour work. Otherwise, many people mimic this effect in post-processing via Photoshop.

Blur and Creative Photography - Why Your Images Don't Need To Be 100% Sharp 12

Conclusion

For those who strive to have every image as sharp as possible, continue with your efforts. If you who want more variation, flexibility, and creativity in your work, there is space to play and create that style of an image too.

It doesn’t have to be expensive. The vintage lenses can be bought online for under $ 100 (depending on freight and exchange rates).

Give yourself permission to relax, experiment and play, and create something unique!

Come over to the soft side. We like it here! ?

Share your images with us in the comments below.

Blur and Creative Photography - Why Your Images Don't Need To Be 100% Sharp 13


The post Blur and Creative Photography – Why Your Images Don’t Need To Be 100% Sharp appeared first on Digital Photography School.


Digital Photography School

 
Comments Off on Blur and Creative Photography – Why Your Images Don’t Need To Be 100% Sharp

Posted in Photography


Rylo update adds 180° mode, bluetooth capture and motion blur timelapse effect

19 Apr
Credit: Rylo

The popular Rylo 360° camera—a camera we called the “360 degree camera done right” in our review—is receiving a major update today. The update adds two new features for both iOS and Android users of the Rylo camera and app, with a third feature available only to iOS users for now.

Let’s take them one by one.

180° Mode

The new 180° video mode shrinks the field of view, allowing you to capture 180° video at higher resolution and better image quality than 360° mode allows. According to Rylo, 180° mode “is especially useful for chest-mounted shots or activities/scenarios in which one lens is blocked.”

Bluetooth Remote Capture

The name kind of gives this one away. Remote capture lets you sync your phone to the Rylo camera via bluetooth, which allows you to: switch between recording modes, start or stop a video, and snap a photo, all from the app on your phone.

Obviously, this feature will help if you’ve got the camera mounted somewhere hard to reach.

Motion Blur

A new feature for timelapse shooting, Motion Blur adds a ‘cinematic’ motion blur effect that is actually synced up to the speed of your timelapse shots (more speed = more blur). The effect doesn’t show up while shooting, but will be viewable upon export.

All three features ship today, although Bluetooth Remote Capture is currently only available for iOS, with Android support “coming soon.”

If you own a Rylo 360-degree camera and want to try these features out, all you need to do is update your Rylo app via the App Store or Google Play, then update your camera’s software through the app. And if you haven’t heard about the Rylo and want to know what this camera is all about, check out our full review at the link below.

Review: Rylo is a 360° camera done right

Articles: Digital Photography Review (dpreview.com)

 
Comments Off on Rylo update adds 180° mode, bluetooth capture and motion blur timelapse effect

Posted in Uncategorized


How to Create Realistic Bokeh and Blur Effects using Photoshop

07 Jan

Perhaps you want to creatively improve your image, already taken with a depth of field and bokeh or create this effect from scratch for a specific composition. In this article, you will learn how to work with new and old filters and their features, creatively apply textures, even create a bokeh texture from scratch.

Also, you’ll learn some small secrets and useful features of digital artists. Described techniques and features will be available depending on Photoshop versions, which I will mention in the process. You can use these techniques on any image and get surprising results, I just want to show you the principles and workflow.

Everything is about the creative approach, so do not hesitate and experiment!

How to Create Realistic Bokeh and Blur Effects using Photoshop

Shallow Depth of Field and Bokeh

A shallow depth of field (DOF) is when the desired object (focus point) appears sharp and everything else is blurred. Under certain shooting conditions on a blurry background, there may appear some beautiful circles or blurred highlights – that is called bokeh.

This effect can be done during the shooting process or synthetically added in post-processing. You can use this as an artistic style, to pay attention to a certain object or interesting composition. It’s very handy to use such effects if you want to hide some flaws or unsuccessful or empty parts of the composition.

Also, it is often used to create lighting and foreground effects, additional details that help to immerse the viewer in the atmosphere of the scene much more. Areas for using this technique and the creative possibilities are huge, so I suggest that you start with a practice.

How to Create Realistic Bokeh and Blur Effects using Photoshop

Blur Gallery – Field Blur

So, let’s start with the most interesting and powerful features of Photoshop CC – the Blur Gallery and Field Blur filter. Blur Gallery is available in the filter menu, starting with Photoshop CC 2014, and has five blur effects with additional features, such as Motion Effects, Noise, and Bokeh. Note that this does not work in older versions of Photoshop!

Open the image, to which you want to apply the effect in Photoshop via File > Open or use Cmd/Ctrl+O shortcut or just drag and drop the image from your file explorer into Photoshop.

Next, on the Layers panel, right-click on a layer and choose “Convert to Smart Object” (Layer > Smart Object > Convert to Smart Object). Go to Filter > Blur Gallery > Field Blur. Your workspace has been changed to the Blur Gallery dialog box and you are shown a control pin in the center of the image (if there are no pins visible, try Cmd/Ctrl+H or go to View > Extras, to hides/shows guides, controls, etc.).

How to Create Realistic Bokeh and Blur Effects using Photoshop

Setting Your Blur Effects

So, for a pin in the center, set the Blur value to 0px and move it to the place in your image that should stay in sharp focus. Begin to apply a blur from the edges of the image and in problem areas that you want to hide by clicking on the place where you want to add pins or drag and drop existing pins to the desired place.

Adjust the blur intensity or remove it on the Blur Tools panel or use the blur handle around the pin itself. For the edges of the image, start with larger Blur values, and then reduce it, if necessary. Also, I used several pins with a smaller Blur values near the area in focus in order to create a softer transition from blurred to sharp areas. If you want to remove any of the pins, select it and press Delete on the keyboard.

How to Create Realistic Bokeh and Blur Effects using Photoshop

Creating Bokeh

Now let’s set the settings for the bokeh. Start adding a bokeh by setting Light Bokeh to 100. Next work with the Light Range sliders and start moving white, then black, until finding the optimal ratio of values.

You can slightly reduce Light Bokeh values so you do not get large overexposed areas. At this stage, you need to be careful and change the blur settings along with others to get the best possible, most realistic result.

Adjust Color Bokeh values to vary the texture with a color and add unexpected shades. Just do not make this value too big, otherwise, it will increase saturation or a lot of additional shades will reveal themselves.

How to Create Realistic Bokeh and Blur Effects using Photoshop

Iris Blur and Tilt-Shift

The following filter, which we will consider is Iris Blur. The principle of this filter is the same, but now you are working with the focus field. You see the white circle frame, that you can deform and rotate, four small points around it to control blur distribution (shape), pulling by a square you can specify the focus area. You can still use several pins but blur values are the same for all of them.

This filter is very convenient if you want to highlight a specific area. In the previous example, you could specify exactly which areas of the image stayed in sharp focus and had more flexibility to work with the form, here you have less control over the details.

How to Create Realistic Bokeh and Blur Effects using Photoshop

Top image – Iris Blur. Bottom image – Tilt-Shift.

Tilt-Shift is very popular for the fact that it creates the impression of a miniature scene. It is especially good for photos of architecture and everything that is at a distance.

As an artist, I use it when I want to emphasize dynamism and distortion (especially, in abstract artworks) or to create a background when I work with portraits.

Path and Spin Blur

Path Blur is very useful if you decide to add motion to your composition or emphasize it. Unlike the Motion Blur filter, you can control the effect and set the most unusual directions for blur. Unfortunately, this filter does not have the ability to add a bokeh to the blur, but Motion Effects are available.

How to Create Realistic Bokeh and Blur Effects using Photoshop

Top image – Path Blur. Bottom image – Spin Blur.

Spin Blur, also a motion blur, but in a radial form. With it, you can turn your photos into a painterly image and if you add color effects, it will turn out very well. I use this filter for various artistic techniques, mostly when I work with very abstract creations. With this filter, you can create a very simple simulation of long exposure photography.

The Blur Gallery

You can apply several filters from the Blur Gallery at once. Just checkmark desired filters, adjust their settings and click Ok to apply. Depending on the image size and performance of your computer, it may take time to render a preview of the effect and after once you apply the desired settings, so be patient.

Also, you can edit the settings of the applied filter if you convert the layer into a Smart Object and add the filter on it. It’s automatically a Smart Filter, so just double-click on the name of the filter and edit the settings. This is a non-destructive way of editing photos and creating artworks.

The advantage of a Smart Object is that you can go back and make changes to the filter or adjustment, apply it several times, even delete it if something went wrong and keep the original image intact.

How to Create Realistic Bokeh and Blur Effects using Photoshop

Lens Blur Filter

Now let’s look at another powerful and fast solution for adding blur effects. The Lens Blur filter first appeared in Photoshop CS. So whatever version you use, CS or CC, this filter will be available for you. Take into account that this filter will not work on Smart Objects, so you can’t edit and apply this filter as a Smart Filter.

Again, open the desired image. Duplicate the original image layer (Layer > Duplicate layer or use the shortcut Cmd/Ctrl+J) to work non-destructively. In order to only apply an effect to a specific object or area, I made a selection with Quick Selection Tool (W) and added a layer mask to it (Layer > Layer Mask > Reveal Selection or use “Add layer mask” icon at the bottom of Layers panel).

How to Create Realistic Bokeh and Blur Effects using Photoshop

To achieve a more realistic effect, blur the layer mask or its edge a bit because the hard edges of the mask can spoil everything. You can use Gaussian Blur filter (Filter > Blur > Gaussian Blur) or Feather option on Properties panel (Window > Properties) with the settings to your taste.

Lens Blur Settings

Highlight the layer thumbnail and go to Filter > Blur > Lens Blur… In the window that appears, first set Preview to Faster because this filter sometimes takes a long time to process changes. Next, in the Depth Map section, you can set Source to a Layer Mask to not apply a blur to a masked area, or leave this parameter at None to blur an entire image.

Checkmark Invert if only the selection from a layer mask is blurred and adjust Blur Focal Distance for more accurate blur distribution. If Lens Blur effect does not appear on a layer, just delete a layer mask (right click on a layer mask > Delete Layer Mask).

How to Create Realistic Bokeh and Blur Effects using Photoshop

In the Shape drop-down menu, you can choose a form of bokeh. In this example, I will use a triangle because this is a rather unusual form, but shapes like Octagon produce more normal blurred results. Radius value controls the size of that shape and the amount of blur that is applied. Blade Curvature quite creatively changes the form and makes the shape more circular. Rotation sets the angle (direction) of the bokeh shape.

How to Create Realistic Bokeh and Blur Effects using Photoshop

To control where the bokeh will appear, change the settings in the Specular Highlights section. Brightness increases the strength of the highlights within the blurred area.

Threshold controls which tonal range (pixels) need to be affected to create bokeh. This means that pixels brighter than a Threshold value can be used for creating a bokeh effect. Do not overdo with these two values, otherwise, bokeh shapes can merge into a single mass or even fill a part with white.

Adding Texture or Bokeh Overlays

You can always use additional textures in your artwork, created digitally or by using a camera. Open your image in Photoshop and go to File > Place Embedded (File > Place in older versions), then choose the desired texture. In my case, I made some photos with bokeh on a black background (to separate the bokeh).

How to Create Realistic Bokeh and Blur Effects using Photoshop

Next start to experiment with the different layer Blending Modes, such as Screen, Linear Dodge (Add), Color Dodge, etc. You can always reduce the effect of the texture by reducing the layer Fill or adding a contrast to the texture with a Levels adjustment or adjustment layer to add more Blacks and greys, to make it more like “transparent”.

Or if you like texture but don’t like a color in it, then use a Hue/Saturation or Color Balance adjustment to change the hue or remove the color completely. Sometimes in different artworks, I use a bokeh layer with some blurred objects (mostly invisible).

How to Create Realistic Bokeh and Blur Effects using Photoshop

Create Your Own Bokeh

This makes artwork more interesting and adds texture and details. There are a lot of opportunities for creativity with layers, and it’s simply impossible to describe them all in this article. But now I will show you one more interesting trick for creating bokeh texture from scratch using only Photoshop filters. If you like to experiment with filters and settings, then this is a very interesting direction, with a lot of options and discoveries in the process.

Create a new layer at the top of all layers by using the shortcut Cmd/Ctrl+Shift+N or going to Layer > New > Layer. In the dialog box that appears set Mode to Screen and checkmark “Fill with Screen-neutral color (black)”. Next, go to Filter > Noise > Add Noise and set following settings – Amount: 15%, Distribution: Gaussian and click Ok. If you want black and white texture, checkmark the Monochromatic option.

How to Create Realistic Bokeh and Blur Effects using Photoshop

Next apply Mezzotint filter from Filter > Pixelate > Mezzotint with Type: Coarse Dots. This filter is needed to make noise texture sharper and add highlights to it. Now you need to soften the texture and blend colors. Apply Gaussian Blur filter (Filter > Blur > Gaussian Blur) with a radius 2.0 pixels.

How to Create Realistic Bokeh and Blur Effects using Photoshop

Go to Filter > Other > Maximum and set Radius: 20pixels, Preserve: Roundness. Depending on Radius value and size of your working document, the texture becomes larger or smaller. Apply a Levels adjustment (Image > Adjustments > Levels or use Cmd/Ctrl+L) and move the Blacks until you are satisfied with the result.

Play around and experiment with values of each of these filters and you can find a lot of interesting options.

How to Create Realistic Bokeh and Blur Effects using Photoshop

You can add more details to bokeh texture if you want, by using the Unsharp Mask or Find Edge filters. And if you repeat this technique again, but instead of using Mezzotint and Gaussian Blur, apply a Pointillize filter (Filter > Pixelate > Pointillize) with Cell Size: 35 you will get a completely different kind of bokeh texture. So do not hesitate to experiment!

On the internet, there are a lot of paid and free plugins available for Photoshop to create similar effects, for example, the Nik Collection. It’s a free and powerful addition to Photoshop CS4 through CC 2015 with a lot of interesting tools for photographers and artists. There also is the blur, depth of field and bokeh effects produced by Analog Efex Pro 2. In the image below you can see the work of this filter.

How to Create Realistic Bokeh and Blur Effects using Photoshop

Conclusion

And at the end some pieces of advice for you.

More is not always better! Sometimes too many effects (unfortunately any) can give the opposite effect and hide the beauty of the original image or idea. Therefore, try to achieve harmony in color, composition and use these techniques with an intention. If you decided to experiment, then embody the idea entirely, do not hesitate! Do so as you like it.

Bokeh is a lighting effect, use it carefully, so as not to overexpose the overall image. This effect can add excessive brightness to highlights (the right part of the histogram), unwanted light peaks, or increase the overall brightness of the image. It’s important, for example, if you decide to share the picture on the internet or print your image.

The more contrast that is applied with a clear, not overexposed bokeh, the better it looks. So keep your eye on the histogram (you can find it in Window > Histogram).

How to Create Realistic Bokeh and Blur Effects using Photoshop

Also, your bokeh should not be underexposed as well. This is important, by the fact that very often people try to remove unnecessary brightness incorrectly, so get a pale, not realistic bokeh. In exceptional artistic cases, this is permissible, but it is better not to do this.

Pay attention to where you have located or placed bokeh textures and where are the focus and blurred areas in your image, in order to express it more realistically and logically, through a visual image (in photo or artwork).

I will be glad to see your creative inventions, discoveries, and final results. If you have questions, please use the comments section below.

The post How to Create Realistic Bokeh and Blur Effects using Photoshop by Maria Semelevich appeared first on Digital Photography School.


Digital Photography School

 
Comments Off on How to Create Realistic Bokeh and Blur Effects using Photoshop

Posted in Photography