RSS
 

Posts Tagged ‘Adventure’

Top Tips to Capture Epic Adventure Photography

15 Dec

The post Top Tips to Capture Epic Adventure Photography appeared first on Digital Photography School. It was authored by Jeremy Flint.

tips-epic-adventure-photography

Adventure photography is one of the most exciting genres of photography and an opportunity to uncover unexpected places. Capturing epic adventure photography can be described as the art of photographing adventures, typically in the outdoors. It can involve exploring amazing places and experiencing new things, all whilst capturing the accomplishment with your camera.

Whatever the place or experience, adventure is about much more than scaling a famous mountain, such as Everest, and covers the world beyond outdoor pursuits. Whether it is cruising down the Nile, drinking beer or eating favorite dishes with the locals, or appreciating street art within an inner-city, it’s all a personal adventure. Here are some top tips for capturing these exploits of adventure.

1. Go on an epic photography adventure

epic adventure photography 01

Cappadocia, Turkey

One of the best things you can do to shoot epic adventure photography is to go on an adventure. Grab your camera and get outdoors. Go and explore a familiar or unfamiliar location. You may have a passion for mountains, epic wild scenery, or even rivers or seas, whichever you prefer, get out there and have fun.

Scout out a location and find a great view that you would like to photograph. Be sure to record the adventure and your surroundings.

2. Bring the right gear

It is hugely important to bring the right gear. But, don’t just think about your camera gear.

Depending on whether you are going for a day or several days, pack enough food, water, and warm clothing for your needs, such as a hat, gloves, and extra layers. Then pack more snacks in case you encounter any difficulties and to keep your energy levels up. Looking after your body is essential, so bring a first aid kit too in case of unforeseen emergencies. Be sure to check the weather forecast and plan ahead accordingly. You may need to bring wet weather gear too, such as a waterproof jacket and trousers.

Whatever you decide to take with you, plan ahead and pack lightly. And remember, safety is paramount.

3. Include a person in the frame

Image: Paddleboarding, Lake Bled, Slovenia

Paddleboarding, Lake Bled, Slovenia

One great way to document epic adventure photography is to include a person in the frame. This will help to show the spirit of adventure. Hiking, biking, backpacking, camping, boating, and general exploration are all great activities of adventure. You could illustrate your adventures by including yourself in the shot or someone else doing adventurous activities such as a hiker walking within a landscape, a jogger on a trail, a paddle boarder on a river, or a cyclist on a road or dirt track.

The options for outdoor subjects are endless.

4. Show scale

To help your images stand out, show scale. Include an extra element such as an object or a people (discussed above) to help show their real size compared with the height of mountains in a valley, such as these people on horseback.

epic adventure photography 03

Horse riding, Grand Tetons, Wyoming, USA

For example, the width of a river, or vastness of a plain, will be better understood by the viewer when including a raft or backpacker.

Other interesting subjects you can shoot to show scale include a boat in the sea, a tent on a hilltop, mountain walkers on an adventure, snowboarders or people skiing.

epic adventure photography 04

Trekking in the Himalayas, Nepal

5. Find a unique perspective

There are wonderful adventures to be experienced everywhere around the world. Find a striking and effective composition that shows a unique perspective and interesting side to your adventures.

Image: Kayaking in the Philippines

Kayaking in the Philippines

6. Protect your gear

When you are doing an epic adventure photography trip, make sure you look after your gear. You don’t want to damage your equipment in adverse conditions, so assess your potential environment prior to departure.

Camera protection is critical, so apply common sense when preparing your kit. Put your camera inside a waterproof cover if it is raining. Pack it in a well-cushioned bag if you are climbing over rocks or uneven terrain to prevent damaging your camera if you slip. Also, use a waterproof case or bag when shooting from the water. Freshwater and saltwater are corrosive and will damage your camera if you come into contact with these elements.

Conclusion

Enjoy your time outdoors with your camera and capture some epic adventure photography. Whether you are a solo adventure photographer, or enjoy having a person with you, apply these tips of including people, showing scale, finding a perspective, and taking the right gear and go and take your best ever adventure photos.

We look forward to seeing what you capture. Share your images with us below.

Get more from your travel photography with the e-book, Transcending Travel.


The post Top Tips to Capture Epic Adventure Photography appeared first on Digital Photography School. It was authored by Jeremy Flint.


Digital Photography School

 
Comments Off on Top Tips to Capture Epic Adventure Photography

Posted in Photography


The Olympus TOUGH TG-6 Camera Review – A Perfect Adventure Companion?

12 Nov

The post The Olympus TOUGH TG-6 Camera Review – A Perfect Adventure Companion? appeared first on Digital Photography School. It was authored by Mat Coker.

olympus-tough-tg-6-review

The Olympus Tough TG-6 is the perfect camera for the adventurous soul.

Like a wilderness travel guide, the TG-6 pulls you into the micro world, under the water, and down deeper trails than you would ever take your clunky DSLR down. You can trust the Olympus Tough TG-6 out in the wild because it’s built strong and made for adventure. It’s even tough enough to let your kids use it.

Moreover, it’s really small, so it doesn’t hinder your adventure for even a moment. And it’s so capable it will inspire adventures you hadn’t planned.

This review is about what the Olympus Tough TG-6 will let you do as a photographer and how the pictures look.

TG-6 small size

An evening adventure used to mean hauling a heavy bag filled with gear. I never knew which gear I would need for sure, so I always brought too much. Eventually, I just stopped going on spontaneous adventures because it became too much of a chore. The Olympus Tough TG-6 replaces all that stuff I used to haul around. Gear is no longer the hindrance it used to be.

The technical specs

The reason why so many people are excited about the Olympus Tough TG-6 is the impressive list of technical specs.

  • F2.0 wide-angle lens (the aperture narrows as you zoom)
  • 20 frames per second
  • Underwater modes
  • Microscope mode
  • In-camera focus stacking
  • Scene selection
  • Aperture mode
  • RAW capture
  • 4K video
  • Waterproof
  • Shockproof
  • Dustproof
  • Crushproof
  • Freezeproof

Of course, the reason this list of specs is so exciting is because of what they’ll let you do with this camera as a photographer.

“No photographer is as good as the simplest camera.” – Edward Steichen

When you read camera reviews, you want to know what a camera is capable of and how great the picture quality will be.

Don’t forget that a camera only has to be so good and then the rest is up to you. The world’s greatest camera isn’t much good in the hands of a person that knows nothing about light, moment, or composition. Look for a camera that meets your general needs, then up your game as a photographer.

The most famous photographs were made with cameras that we would consider inferior by today’s standards. A beautiful photograph transcends the technology it was made with.

In the end, it’s not about the technical specs of a camera, but what those technical specs let us do as creative people and photographers.

The TG-6 has an impressive resume. Let’s see what it can help us do.

Adventure photography olympus tg-6

Aperture: f/2.0, Shutter Speed: 1/250 sec, ISO: 3200

When my first child was born I was just becoming the photographer I had always wanted to be. I couldn’t wait to take him on adventures with me as he grew. Ironically, it was a bag filled with too much gear and too many options that held me back from adventures with my kids. The TG-6 is everything I always wanted and fits in my pocket. It practically pushes us out the door and into the world.

“My life is shaped by the urgent need to wander and observe, and my camera is my passport.” – Steve McCurry

What if you could shrink yourself?

It is captivating to suddenly see the world through a magnifying glass or microscope – to see tiny details blown up big. You may not be able to shrink yourself, but you can enter the micro world with the Olympus Tough TG-6.

Microscope mode

With the TG-6, you can get insanely close and discover the mystery and beauty in the fine details of everyday objects. You’ll be exploring the world in a way you haven’t done since science class.

The micro world offers you an infinite number of things to photograph. Look around you right now. There are so many things that you would never photograph on their own, but you can dive in microscopically to a new world and become enamored with the beauty of fine details.

insect macro photography

If you’ve got the courage, the TG-6 will bring you up close and personal with insects.


The Olympus TOUGH TG-6 Camera Review – A Perfect Adventure Companion?


The Olympus TOUGH TG-6 Camera Review – A Perfect Adventure Companion?


macro mode fine detail

The TG-6 can capture incredibly fine detail that the human eye overlooks.


The Olympus TOUGH TG-6 Camera Review – A Perfect Adventure Companion?


Berry macro photography

F/3.6, 1/100 sec, ISO 800

The problem with close-up photography

One of the biggest problems you’re going to run into with close-up photography is a shallow depth of field. You may take a photo of a flower, and nothing more than the edge of a petal is in focus. This is frustrating when you want more of that tiny object to be in focus.

How “focus bracketing” solves the problem

One way to deal with this is to take a series of photos at different focus points (focus bracketing), and later combine them in Photoshop in a process called focus stacking. The end result is an image with more depth of field than is possible in a single photo. If you’re a serious macro photographer, this is an amazing option. But it’s a labor-intensive process and you’re not likely going to do it on a whim while on a nature hike.

But the amazing thing about the Olympus Tough TG-6 is that it can actually do both the focus bracketing and focus stacking for you – all in-camera!

Let the Olympus Tough TG-6 do the Photoshop work for you

The photos below illustrate the frustration of such a shallow depth of field in close-up or macro photography. But they also illustrate the power of the TG-6’s in-camera focus stacking.

Olympus TG-6 focus stacking feature

The photo on the left is a single exposure with a shallow depth of field, while the photo on the right is the result of several photos with varying focus points stacked together into one image.


Focus Stacking with the Olympus TG-6

On the left, only a small portion of the leaf is in focus. But using the focus stacking option on the TG-6, the photo on the right is almost entirely in focus.

Normally, you need a dedicated macro lens if you want to take close-up, macro, or microscopic photos. That means a financial investment and another lens in your bag. But the TG-6 has this capability built-in. The close-up function is worth the cost of the camera.

Get in, the water’s nice!

You’re missing so much fun if you can’t take your camera into, or at least near, the water.

Generally, an underwater housing is expensive and might limit your access to camera settings. Best case scenario, you invest a lot of money to get your camera into the water. But this is a lot to invest and most people won’t do it on a whim. You’ve got to be sure you want to be in the water a lot to make it worth the investment.

With the Olympus Tough TG-6, you don’t need to think twice; just get in!

Having a camera that can get wet means you can get into the splash zone. Don’t photograph puddle-jumping-kids from a distance; get close and get wet!

Get underwater and explore fish from their world.

Don’t stand on the shore with dry feet to photograph the sunset; hit the waves.

The Olympus TOUGH TG-6 Camera Review – A Perfect Adventure Companion?


Olympus TG-6 underwater mode

My kids and I discovered a stream filled with salmon. I knew it was the perfect chance to try out the TG-6 underwater.

A couple of years ago, I stepped into a river with one camera in my hand and one around my neck. I was photographing people back on the shore and kept crouching a little to go for a lower angle. Every time that I crouched down for a great low angle, I was unknowingly dunking the camera around my neck into the water. Goodbye, Fuji x100s.

The irony is that I had an underwater case for my x100s. But it’s so clumsy to use in the case that it hinders my photography.

You no longer need to be nervous around the water with your camera – the TG-6 is completely waterproof and pulls you right in.

A good motivator

If it hasn’t happened yet, the day will come when you lose your drive and inspiration as a photographer.

At first, the thought of packing up all your gear and lugging it around will overwhelm you. Especially because you know you won’t even be happy with the pictures you take.

Then, even just the thought of picking up your camera will depress you.

You lose your drive, your inspiration, and eventually your will as a photographer.

You’ve already learned that new gear is not the answer to this depressing dry period you’re going through. But that’s because most gear is the wrong gear for you.

The TG-6 isn’t just a new camera, it’s a passport to new lands. It’s like slinging on a backpack and heading out to discover the world. It sits there looking at you, hoping you will take it out to play. Photography doesn’t have to feel like a burden anymore.

TG-6 photography inspiration

“It’s a dangerous business, going out your door. You step onto the road, and if you don’t keep your feet, there’s no knowing where you might be swept off to.” ~ Bilbo Baggins

Leave the Olympus TG-6 laying around

When my camera is in the bag, it never gets used. I prefer to leave it out with the lens cap off and the power button left on so that I’m ready to make a photograph at a moment’s notice.

But when I leave my cameras lying around, my wife doesn’t like the clutter (even though she loves the photos that result from the clutter).
Not to mention that leaving expensive cameras around is a hazard with a house full of kids and their rowdy friends.

The TG-6 has become our dedicated “leave it laying around the house” camera. It’s so small that it doesn’t bother my wife. It’s there when we need it. And, it’s so tough we don’t mind the kids using it.

I’m capturing many more moments now that I’ve got a dedicated “everyday life camera.”

Olympus TG-6 capturing candid moments


Window light candid moments with the Olympus TG-6


Black and white photography wit hthe Olympus TG-6

So tough I let the kids use it

One of the things that first attracted me to the Olympus Tough cameras is that I can let my kids use them. The TG-6 is waterproof, shockproof, dustproof, crushproof and freezeproof. Which means it’s also kid-proof.

TG-6 great for kids

I love to look at the photos my kids have taken. It’s inspiring to see what captures their attention enough to take a picture.


Olympus TG-6 dustproof

When my kids ask to use the camera while they explore sand dunes and lakes, I have no problem handing them the TG-6 to use.

Essential modes

After using the Olympus Tough TG-6 for about a month, I’ve figured out my favorite combination of settings for everyday use; P mode.

I want a certain amount of control over ISO, aperture and shutter speed because I understand how they affect my photo. But I don’t want to overthink these settings and miss the beauty of the moment.

In P mode, the camera will choose the shutter speed and aperture for you. All you have to think about is ISO (but you can select auto ISO if you wish).

With a few minor adjustments in P mode, I can make the TG-6 do exactly what I want it to.

In the menu, I set the minimum shutter speed to 1/125th. I want the camera to set the shutter speed for me, but I don’t want it to go any slower than this.

I select auto ISO, but I set the maximum ISO to 1600. I don’t want the ISO to go any higher than that because of the noise issues.

While it’s balancing the settings out, the TG-6 will always favor a lower ISO and only raise it if it needs to. Eventually, if it’s dark enough, it will go below your minimum shutter speed in order to achieve a good exposure.

Here’s the best part; in P mode, you have direct access to exposure compensation with the camera dial. Your camera will hardly ever get the exposure just as you want it. So use the exposure compensation feature to brighten or darken the photo before you take the picture.

There is no full-manual mode on this camera. But if you know what you’re doing, you can still take full control.

TG-6 exposure compensation feature

Processing RAW files

Using Lightroom 6, I am unable to edit the RAW files from the TG-6. However, Olympus provides free editing software called, Olympus Workspace.

Because of this camera’s smaller sensor size (and difficulty capturing extreme dynamic range), I am not putting much hope in the RAW files. RAW + JPG capture is a great option. Get the best exposure you can in order to have the highest quality JPG file, and keep the RAW file in case of an emergency.

Even heroes have a weakness

There are three main weaknesses that I have discovered with the Olympus Tough TG-6.

Lens Flare

I love playing with lens flare and I quickly discovered that is almost impossible to do with the TG-6. This is the strangest lens flare that I have ever seen. It’s discouraging, but I’ll have to learn to make compelling photographers without lens flare.

Oympus TG-6 lens flare

Noise

The Olympus Tough TG-6 produces a lot of noise in high ISO, low light photos.

The following photos are lit with a small-screen TV and/or a lamp.

High ISO

This photo was lit with a lamp. you can see the grainy discoloration in the white blanket. The ISO is 3200.

High ISO noise

This is a close-up of the white blanket in the previous photo.


High ISO noise

This photo is lit with the light from a TV and a small light in the next room over. The ISO was 3200.

High ISO noise

Close up of high ISO noise

You can see the grain and discoloration in his skin.

The following photos are backlit with dim light from a living room window.

Bright light high ISO noise

Again, the ISO was set at 3200. Because the light is brighter, there isn’t as much noise and discoloration. But there is a lack of crispness to the photo.


High ISO and window light

But I was shocked to capture this photo with lots of movement at ISO 3200 because it looks so crisp.

Sharp in bright light

You’ll have to get used to keeping your ISO at 1600 or lower (you’ll need a steady hand for the slow shutter speed that results).

But in bright light, with a low ISO, the TG-6 is nice and sharp.

A sharp photo with low ISO

So the Olympus Tough TG-6 is weak under extreme lighting conditions, but so are many other cameras. For many of us, high ISO with low noise is the last frontier on the technological side of photography.

We can strengthen the TG-6 by post-processing the photo with a program such as Lightroom. Keep your ISO to 1600 or lower when possible, and convert to black and white when suitable.

No control over shutter speed

At first, I thought it was a problem that there was no shutter speed mode on the TG-6. But then I realized that it wasn’t really necessary. You just have to know how to work around it.

If you want a quick shutter speed to freeze the action, use sports mode.

If you want a slow shutter speed to capture motion blur then you need to understand how to force the camera to produce a slow shutter speed.

Suppose you want to capture a silky waterfall photo. Normally, you need control over your shutter speed to make it go slow enough to capture the motion. But with the TG-6 you don’t have control over the shutter speed.

Or, do you?

When you understand ISO and aperture then you do have control over the shutter speed.

Olympus TG-6 slow shutte speed silky waterfall

In order to get silky waterfalls, you need a slow shutter speed. You can force your camera to choose a slow shutter speed by lowering your ISO and closing your aperture.

Choose an ISO of 100. Choose an aperture of f18. This will effectively choke out the light and force the TG-6 to slow down the shutter speed to let more light in. The slow shutter speed will produce a silky waterfall.

So the lack of control over shutter speed isn’t a big problem.

Olympus TOUGH TG-6

The greatest weakness

As photographers, we can find moments so powerful that lens flare isn’t necessary. And, we can look for moments so strong that the viewer will overlook high ISO noise in the photo. Whatever the shortcomings of our cameras, we as photographers always fall shorter. Whatever their weaknesses, our cameras are just fine. We need to increase our skills and know that, even if there was a perfect camera, it could only be used by an imperfect photographer.

The power of the Olympus Tough TG-6 is not merely in its technology. The power is in what that technology allows us to do. This is a camera that will nudge you every time you walk by. It’s like a kid who wants to be played with or a dog that wants to be taken out for a run. Come on, just a quick adventure?

A countless number of moments pass us every day. They become almost infinite in size when we consider their range from wide-angle to microscopic. When you’ve got a camera like the TG-6 in your pocket, it’s not so hard to make those moments hold still.

Have you used the Olympus Tough TG-6 camera? Would a camera like this make you take more photos? Share your thoughts with us in the comments!

The post The Olympus TOUGH TG-6 Camera Review – A Perfect Adventure Companion? appeared first on Digital Photography School. It was authored by Mat Coker.


Digital Photography School

 
Comments Off on The Olympus TOUGH TG-6 Camera Review – A Perfect Adventure Companion?

Posted in Photography


Review – Shimoda Explore 40 Camera Adventure Bag

10 Jan

I love to hike. I love to head out into the backcountry, and I regularly take my camera gear with me. Funnily enough, my first article here on dPS discussed just this fact. So it seems rather fitting that I got to review the Shimoda Explore 40 Camera Adventure Bag.

The opportunity to review the bag was also timely because I’m currently in the market for a new backpack and had been looking at several brands before the arrival of this Shimoda pack.

Review - Shimoda Explore 40 Camera Adventure Bag

The view from my hike. I love this area of Ontario, Canada.

The Shimoda Explore 40 pack is designed to be used as a daypack. It’s not meant to be used for weeklong treks into the wilderness with your camera gear.

If you’re looking for a pack to suit those needs, Shimoda makes the Explore 60 which more resembles a trekking bag. It’s similar to my 55 L Vaude Bag but it’s designed to hold camera gear whereas my Vaude bag was designed solely to carry backpacking gear. That doesn’t mean I haven’t adapted the bag to carry my camera gear, but it’s nice to have something designed specifically for photographers.

Review - Shimoda Explore 40 Camera Adventure Bag

Here’s the complete Shimoda Explore 40 kit.

The Material

Review - Shimoda Explore 40 Camera Adventure Bag

Here’s a close up of the material. It’s smooth, not rough like my other bags.

The first thing I noticed about the pack was the material. It is distinctly different from the material of my other bags. I took the Shimoda Explore 40 out of the packaging and was surprised by the feel and texture. It’s a smoother surface that is deceptive at first.

I am used to a bag that has a sort of canvas type material that feels rough like an old tent. At first touch, I was a bit sceptical about the durability of this material. I needed time to get used to the differences. The material is, in fact, double-resin coated nylon. It does not feel like the material of my Vaude hiking pack or my Lowepro Backpack.

I tested it in my kitchen sink. The water easily beaded on the material and rolled off without soaking through. The zippers are also water-resistant. The Explore 40 does not come with a rain cover, though. Most of the time you won’t need one but to be on the safe side, there’s plenty of room to pack a generic rain cover, just in case.

Review - Shimoda Explore 40 Camera Adventure Bag

Here’s a close-up of the zippers with leather pulls. You’ll notice they are heavy-duty, not likely to break.

The Structure

The Shimoda Explore 40 is very well constructed of a heavy-duty material and also comes with a reinforced frame. Shimoda has inserted aluminum rods into the frame of the pack to help it maintain its shape and durability. I like the structure of the bag and how truly sturdy it feels.

The Core Units

Review - Shimoda Explore 40 Camera Adventure Bag

I packed the core unit just to see how everything fit. Later, I changed the configuration for my hike as I didn’t take my extension tubes or the flash components.

The Shimoda Explore 40 is designed for lighter travel. It comes with two small core units as well as a medium sized one. The units are strong and durable. The dividers are easy to use and configure to the needs of your camera gear. I was able to remove pieces and reposition them quickly and easily without the Velcro becoming stuck to the sides and annoying me.

The camera gear is quite safe within the core units. They are designed to protect the gear and cushion items from the bumps and bangs that often occur when out on the trail. On my hike, I slipped down a rocky section of the trail and landed at the bottom of a steep hill. My gear was safe and secure within the core unit.

Review - Shimoda Explore 40 Camera Adventure Bag

This is the interior of the small core unit.

The two smaller core units come with a very basic strap that allows you to turn the unit into a shoulder bag for carrying around one or two lenses and a camera body. But the strap isn’t designed for all day walking through a city.

I could see the bag possibly digging into my shoulder if I were to use it to peruse a city with my camera for 8 hours. The unit is designed more for quick jaunts around the campsite or for short walks.

Review - Shimoda Explore 40 Camera Adventure Bag

The inserts are very sturdy and I found the tapered edges made it easier to configure the unit for my camera gear.

Storage within the Bag

Review - Shimoda Explore 40 Camera Adventure Bag

Here’s a shot of the front compartment. I stuffed a trail guide in here.

The Shimoda Explore 40 is designed to hold more than just camera gear. I was able to pack food items as well as a water bottle. If need be the Explore 40 is equipped to carry a water bladder and hose. For this trip, I chose to take a small mug and water purifying drops, so I didn’t test out the water bladder compartment.

The bag comes equipped with tons of pockets. I was able to store my lunch, extra socks, my phone, a map, a rain cover, mug, and extra mittens within the pack. There was certainly room for more gear inside the pack.

The outer straps allow you to attach items to the exterior of the pack. You could choose to carry a small tent at the bottom of the bag.

Review - Shimoda Explore 40 Camera Adventure Bag

The bag is pretty spacious when opened.

The bag also comes equipped with a sleeve in which you can fit a 13” laptop. The padding of the back panel would protect the laptop from any bumps or bangs that might cause possible damage to the gear.

The Shoulder Straps

The pack comes with several different adjustable should heights. I put the bag on the smallest setting. To give you an idea I am 165cm (5’5″) tall.

The pack fit nicely on my torso at the smallest setting. The hip belt rested just above my hip bones, and the adjustable straps allowed me to set the shoulders comfortably so that I felt no strain and carried the majority of the weight on my waist.

The last thing you want is a bag that places most of the stress on your shoulders, and by the end of the day, you’re regretting your decision to take your gear.

Review - Shimoda Explore 40 Camera Adventure Bag

There are four different settings for the height of the torso.

My one complaint about the strap configuration has to do with the chest strap. It comes across the front and helps to keep the shoulder straps in place. This takes some strain off the top of the shoulders.

The issue is pretty much based on anatomy. The bag is designed as a unisex item. It does not take into consideration the female chest. Many women’s bags are designed so that this strap sits above the bust. I was able to slide the strap up somewhat but not enough to keep it from resting on the bust.

It’s a minor complaint that only female photographers will struggle to overcome. Believe me, we are used to this. It would be nice one day for someone to take the risk and design a camera bag specifically for the shape of a woman (hint, hint, Shimoda).

Review - Shimoda Explore 40 Camera Adventure Bag

The bag sits comfortably on the body, even when you’re wearing a thick sweater.

Accessing Camera Gear

The Explore 40 comes equipped with both side and rear access to your camera gear. For my test hike, I used the medium core unit and tested out the rear access. It was easy to get to my camera and to switch lenses when needed.

The core unit easily held my 5D Mark III, a 70-200mm, a 16- 35mm and a 50mm prime lens. The side access works quite well also. At home, I inserted the small core unit and stuffed the bag with towels to hold it in place. It was easy to sling the bag sideways and remove my 70-200mm while it was attached to my camera body.

In Conclusion

Overall the bag is beautifully designed. I tested it on the Bruce Trail. It was a cold and rainy day. I completed a 15km hike over rough terrain. The design of the bag ensured it fit snuggly to my body. I didn’t ever feel burdened by the gear I was carrying.

The hard frame of the core unit did slightly dig into my lower back, but I was able to make a few adjustments to the straps and solved the issue. Over time I can see myself breaking some of the plastic clips, but this is pretty common in most bags. I have replaced the clips on my Vaude trekking bag on several occasions.

Review - Shimoda Explore 40 Camera Adventure Bag

At the start of the trail with the Shimoda Explore 40 pack.

I wouldn’t use the Shimoda Explore 40 for long overnight hikes. The shoulder straps are not designed to carry the weight of camera gear plus all of the items necessary for a backcountry trip. Shimoda recommends their Explore 60 for those types of activities.

After looking on their website I discovered that they also offer a carry-on unit for planes as well as several accessory packs that can help make packing your gear easier to manage. I’ll be honest, I’m considering the carry-on the unit. The core units fit into this bag, so it’s easy to transfer items from carry-on to your pack once you arrive at your destination. I like this feature an awful lot. It would have helped me out a great deal last year during my trips.

Review - Shimoda Explore 40 Camera Adventure Bag

The straps are comfortable and durable but definitely designed as a daypack. I’m told the Explore 60 has much heftier straps for longer hikes.

See the bag overview in this video:
?

Shimoda recently completely a Kickstarter campaign. Check them out and see what you think of their products.

The post Review – Shimoda Explore 40 Camera Adventure Bag by Erin Fitzgibbon appeared first on Digital Photography School.


Digital Photography School

 
Comments Off on Review – Shimoda Explore 40 Camera Adventure Bag

Posted in Photography


A mother shares her love of adventure with her son

14 May
Sarah-Jane “SJ” Staszak is suspended from a cliff with her son Hamish. (Photo courtesy of Benjamin Von Wong)

Benjamin Von Wong is at it again, this time partnering with digital artist Karen Alsop on a Heart Project to give a paralyzed mother another opportunity to share her love of adventure with her 8-year old son Hamish.

Von Wong and Alsop teamed up to give former outdoor education instructor SJ Staszak a chance to create some magical images with Hamish. Staying true to their individual artistic approaches, Von Wong set up a shoot where SJ and Hamish were suspended off a cliff (as were Von Wong and the lighting equipment) and Alsop used digital manipulation to edit studio photos of the mother-son duo.

‘Tunnel of Life’ (photo courtesy of Karen Alsop)

Read Von Wong’s post for more photos and behind-the-scenes footage

Articles: Digital Photography Review (dpreview.com)

 
Comments Off on A mother shares her love of adventure with her son

Posted in Uncategorized


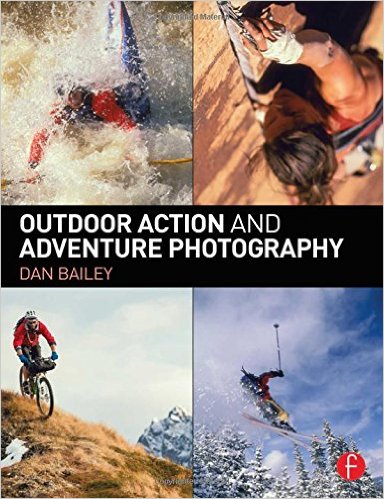
Review – Outdoor Action and Adventure Photography Paperback Book

18 Apr

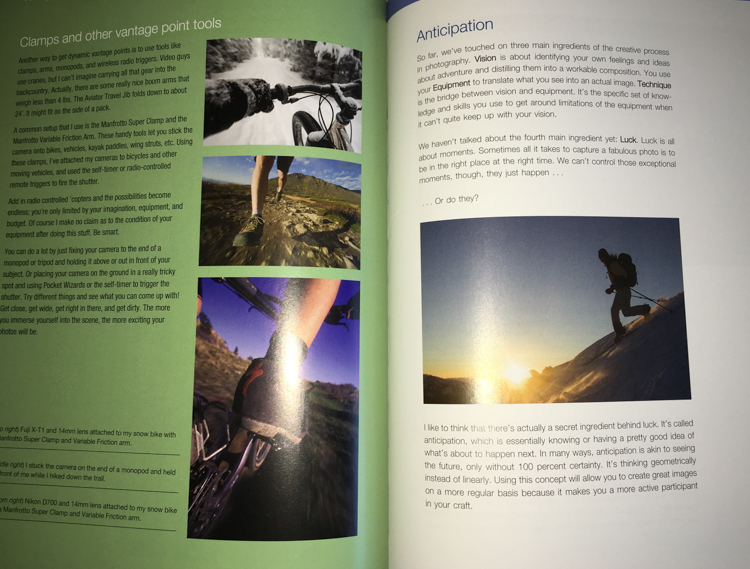
outdoor action and aventure photographyOutdoor Action and Adventure Photography by Dan Bailey is a refreshing change of course in this digital age we live in – it’s actually a paperback book. It is a good thing that Dan had decided to go hardcopy with this book, because it is filled with information, and as a result I feel like many people will want to jot things down, highlight paragraphs, and refer back to it time and again.

Overview

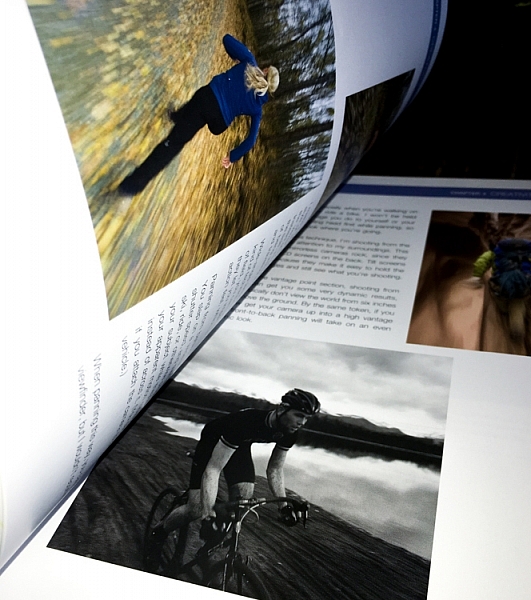
The book starts out with a heartfelt acknowledgement section that truly shows you how much time, effort, and passion, Dan has put into this work. It’s not just something that he’s slapped together – and it shows! Not only is the book well written and informative, but it is beautifully illustrated with a number of photographs from Dan’s portfolio.

After the acknowledgements, you’re given a general introduction to frame your mind for what you’re about to learn. Outdoor Action and Adventure Photography is geared to outdoor photographers, but I’d argue it’s geared even more so towards the outdoor enthusiast, who wants to take great photographs of their adventures.

outdooraction

What I mean is that this book is designed to show you how to take photographs, while you’re hitting a triple black diamond ski slope, or hiking up the side of a mountain. It’s geared more towards the extreme side of outdoor adventure, and the challenges that you would face if you were trying to photograph in those conditions.

What You’ll Learn

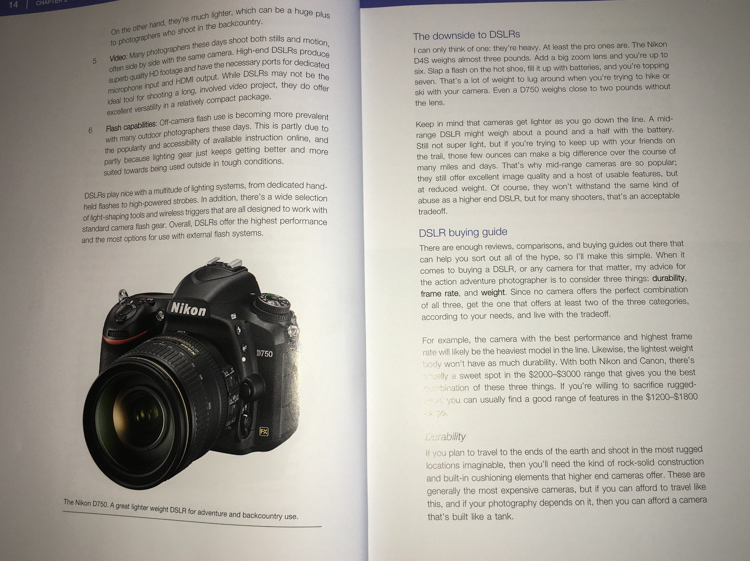
After the general framework is set, the book is broken down into a fairly logical path. First you’re introduced to the types of gear that you’ll need. Dan makes a great point about how, for this type of work, expensive gear does make a difference. Not necessarily just for the image quality, but because higher quality professional gear is designed to take a beating, and in the conditions you’ll be facing, the gear you use will need to withstand a few bumps.

outdooraction-3

One of the largest problems faced by adventure photographers is the desire to pack light, but maintain a versatile and high quality kit. In the book, Dan addresses how he handles this challenge, and from what I can gather he is focused more on lightweight and ease of use, versus trying to carry every possible lens and body up the side of a mountain. He has a few different configurations of bodies and lenses that he brings, depending on how far and strenuous the adventure is expected to be.

outdooraction-2

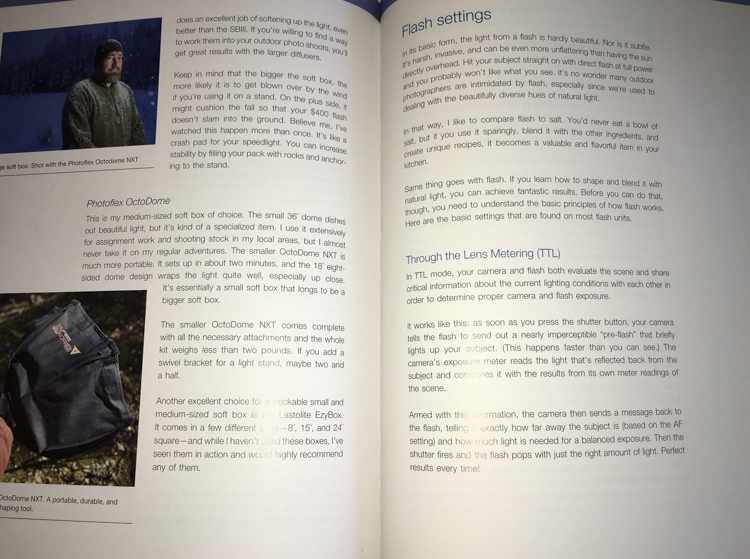
Another big issue that is addressed in this book is regarding lighting. Light on the side of a mountain is not always going to be what you want it, and in this section Dan spends a great deal of time discussing different types of flashes, he provides a great step by step workflow, and talks about different use cases.

outdooraction-4

Finally, there’s a great section on weighing the decision to go pro. What does it mean, do you have what it takes, will you go full-time or part-time? A lot of what is discussed in this section can be applied to other fields of photography, but there are a few considerations specific to Dan’s field, that are worth considering if you’re thinking about making this a career choice.

Final Thoughts

Outdoor Action and Adventure Photography is a book that is designed for the outdoor enthusiast who wants to take great photographs in extreme conditions. While Dan keeps a fairly conversational tone throughout, the book is so packed with information, I’d equate it to more of a textbook than a simple informational guide.

If you’re looking to take great photographs while hitting the slopes with your friends – this is the book for you!

googletag.cmd.push(function() {
tablet_slots.push( googletag.defineSlot( “/1005424/_dPSv4_tab-all-article-bottom_(300×250)”, [300, 250], “pb-ad-78623” ).addService( googletag.pubads() ) ); } );

googletag.cmd.push(function() {
mobile_slots.push( googletag.defineSlot( “/1005424/_dPSv4_mob-all-article-bottom_(300×250)”, [300, 250], “pb-ad-78158” ).addService( googletag.pubads() ) ); } );

The post Review – Outdoor Action and Adventure Photography Paperback Book by John Davenport appeared first on Digital Photography School.


Digital Photography School

 
Comments Off on Review – Outdoor Action and Adventure Photography Paperback Book

Posted in Photography


7 Tips for Better Adventure Photography

28 Feb

Adventure photography has continuously become more and more popular for outdoor photographers, thanks to new technology in cameras, and the outlets of social media platforms like Instagram, that are very photography-friendly. You may have seen some posts that are routinely labeled as “epic” and want to know how to create the same awe-inspiring feeling in your own photographs.

The good news is you can! But, just like in other fields of photography, composition is extremely important when you want to start dabbling in epic scenes. Let’s look at some tips to help you start shooting better adventure photography.

1- Always have your camera on

PHOTO 1

Like a lot of photographers, you may suffer from battery anxiety, the fear that your battery is going to die and you’ll miss that one shot you’ve been waiting for your entire life. Well, when you constantly have your camera turned off, you’re probably going to miss more amazing split second shots, than if your battery died. That’s why you should always leave your camera on when you’re out shooting adventure photography.

Are you out hiking with your friends? Leave the camera on. What about spelunking in some caves? Leave the camera on. What if you’re zip-lining through a jungle canopy? First, leave your camera on, and then hold on to your camera tightly.

You won’t have to worry about battery anxiety if you properly pack, including extra batteries to take with you. Simply leave your camera on, never put your lens cap on, use a lens hood to protect the lens, and take a micro-fibre cloth to clean the lens. Your fear of the battery going dead should never stand between you, and freezing an adventurous moment in time.

2 – Put yourself in the frame

Adventure photography features people living their lives to the fullest, by placing them in amazing landscape scenes. But, what if you aren’t in nature with anyone else? I’m sure you’ve faced that dilemma before. Well, instead of feeling like all is lost, think outside the box and put yourself into the frame.

PHOTO 2

It may feel a bit strange at first to feature yourself in a photograph, but sometimes you have to do what you have to do,in order to get the shot! If you’ve never done this before, all you have to do is mount your camera on a tripod, and set it to the 10-second delayed timer. Once you press the shutter and the timer starts, get into position, and wait for the camera to do its thing.

You might want to also set your camera to take a series of shots once the ten second timer is complete, to be sure you get a suitable photograph. Many cameras have the option to use the timer, or one with continuous shots. Sometimes you might not get in place fast enough, but using a multiple shot sequence will allow you to have a couple more frames to get into position.

3 – Subject placement in adventure photography

Subject placement is extremely important in adventure photography. You want to feature your subject (the person out adventuring) in the landscape, without any distractions or limitations. Anyone viewing your adventure photograph should never be confused about where the subject is, or what they are doing.

It doesn’t matter whether your subject is close to the camera, or way off in the distance. What matters is their placement in space. So, when you’re inspecting a landscape, and trying to decide where to place your subject, always look for a solid color or a negative space to place them.

PHOTO 3

The people in the landscape will stand out against a solid color and negative space, to allow your audience to locate the subject immediately. The last thing you want when you show a photo, is someone trying to find your subject because they are right on the horizon line, or lost in a pattern of shadows.

Not only will placing your subject in negative space clearly reveal where and what your subject is, but it will also eliminate any boring spaces in the photograph’s composition.

4 – Choose a better perspective

Perspective, or point of view, in photography ia always important when you’re trying to show a scene more creatively. Think about it; everyone walks around all day seeing everything at eye level. So, if you want to show something differently, shoot a perspective that isn’t at eye level.

Getting lower to the ground gives your subject in adventure photography a larger than life feel. This is usually shot with a wide angle lens, to fit a low perspective foreground, and the landscape into one photograph. Low perspectives show the importance of a person or activity, more than the landscape surrounding them.

PHOTO 4

Higher perspectives feature the landscape more than the subject, making the natural elements of the frame seem larger than they actually are in reality. These points of view are usually used to look down on your subject, while allowing you to show more of a landscape as well.

5 – Show scale

Do you remember doing science projects in school where you’d have to collect photo evidence of your specimen, by placing a pencil or coin next to it to show its size? Well, that’s called scale. You use an object of a well-known size next to your find, to give your audience an idea of the actual size of the specimen shown.

You can actually do the exact same thing in adventure photography. Everyone knows the average size of a human. However, when you show a photograph of just a cliff, it’s difficult for someone to get a really good idea of how large the cliff actually is.

The solution is to incorporate a well-known average size (in adventure photography that would be a person) into the frame, so your audience is able to get a much better idea of how large and grand the landscape actually is. This is a tremendous composition technique to use whenever you feel absolutely dwarfed in nature.

PHOTO 5

6 – Think about using silhouettes

Silhouettes are another great technique that you can use in adventure photography. Whenever you’re stuck in a bad lighting situation, one that has too much dynamic range to be able to capture both your subject and the landscape in good light, go directly for the silhouette shot.

To use silhouettes effectively in adventure photography, place your subject on a solid line within the scene. This could be either a horizontal or a vertical line. For example, you could place your subject on a hiking trail, or on a vertical wall, while rock climbing. Next, compliment your subject by placing an interesting background behind them, such as a forest or sunset.

The key to an effective complementary background is to create a composition that features your subject first. This goes back to what you learned on subject placement in adventure photography. Never overpower the subject of the photograph by hiding them in a complementary background.

PHOTO 6

7 – Make your audience jealous

Lastly, make your audience jealous with your adventure photography. Compose an adventure photograph in a way that makes people want to go where you went, and do what you did. The overall goal of adventure photography is to get people outside, exploring new places.

Let your audience live vicariously through your photography. When you’re able to do that, you’ve definitely stepped up your adventure photography game.

PHOTO 7

So, by all means, get out and document your adventures!

Do you have any other adventure photography tips to share? Or perhaps some of your favorite adventure photography images? Please do so in the comments below.

googletag.cmd.push(function() {
tablet_slots.push( googletag.defineSlot( “/1005424/_dPSv4_tab-all-article-bottom_(300×250)”, [300, 250], “pb-ad-78623” ).addService( googletag.pubads() ) ); } );

googletag.cmd.push(function() {
mobile_slots.push( googletag.defineSlot( “/1005424/_dPSv4_mob-all-article-bottom_(300×250)”, [300, 250], “pb-ad-78158” ).addService( googletag.pubads() ) ); } );

The post 7 Tips for Better Adventure Photography by David Johnston appeared first on Digital Photography School.


Digital Photography School

 
Comments Off on 7 Tips for Better Adventure Photography

Posted in Photography


The Ultimate NYC Photo Adventure

14 Sep

Packing photo gear for a trip can be a daunting endeavor. You’ll want to return with perfect photos, but just how do you make that happen?

Our pal, Brandon, braved the crowds and dodged NYC traffic to photograph some of New York City’s most iconic spots. He returned with amazing photos! So we asked him – Just how did he do it?

Find out what gear he brought along on his jam packed day to make his photo-heavy trip effortless, unique and to make the memories last a lifetime.

(…)
Read the rest of The Ultimate NYC Photo Adventure (405 words)


© Erin for Photojojo, 2015. |
Permalink |
No comment |
Add to
del.icio.us

Post tags:


Photojojo

 
Comments Off on The Ultimate NYC Photo Adventure

Posted in Equipment


Lowepro Whistler and Photo Sport II backpacks ready for adventure

06 Aug

Lowepro has introduced the Whistler and Photo Sport II backpacks, designed to keep gear safe in the great outdoors. The Whistler is a new series built for alpine adventures, while the Photo Sport II updates a popular rugged design. Read more

Articles: Digital Photography Review (dpreview.com)

 
Comments Off on Lowepro Whistler and Photo Sport II backpacks ready for adventure

Posted in Uncategorized


15 November, 2014 – My Astrophotography Adventure

16 Nov


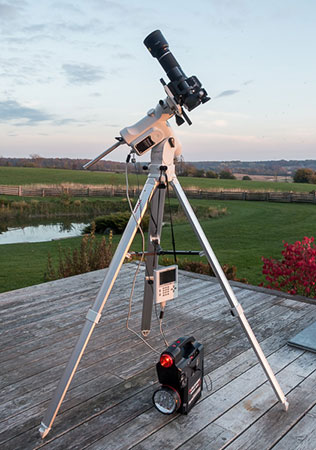
Lately, as many readers know, Michael Reichmann has ventured into a new area and interest for himself and that is astronomy and mixing it up with photography.  Astrophotography is the term we’ll use and as usual when Michael dives into something he dives into the deep end head first.  Today’s article is a look into his journey in Astro Photography – My Astrophotography Adventure.

Don’t forget we still have a small number of berths available for the Antarctica Trips due to a few cancellations.  It’s still not too late to join us on Antarctica 2015.  Also we have only a few spots left on our Iceland workshop in June.  If you want to explore Iceland differently than other workshops then check out this Iceland 2015 Workshop .


The Luminous Landscape – What’s New

 
Comments Off on 15 November, 2014 – My Astrophotography Adventure

Posted in News


Adventure Awaits!

03 Nov

Cozy sweaters, twinkling lights and slipping on ice, tofurkey’s and burnt pumpkin pies…

Don’t miss out on capturing the merriment (or mishaps) of your adventurous autumn on video, with this collection of gear!


© Britta for Photojojo, 2014. |
Permalink |
No comment |
Add to
del.icio.us

Post tags:


Photojojo

 
Comments Off on Adventure Awaits!

Posted in Equipment