If you’re serious about landscape photography, it won’t take you very long to realize the fundamental problem of the craft: not every landscape that catches your eye will easily translate into a compelling photograph.
When we experience a place, the smells, sounds, the warmth or chill in the air, and our own emotions combine to give us an overall impression. Our job as photographers is translate that overall impression into a photograph.
Every landscape photo needs to be carefully crafted with the final image in mind.

There are many problems we run into along the way that can prevent our overall impression of a scene from shining through in the final image. The following are the most common traps to expect, and how you can avoid them.
1. Crooked Horizons
Most landscape photos will feature the horizon – a dead giveaway to the picture’s overall perspective. That means that if the line dividing land and sky is not perfectly straight across, the whole picture looks totally out of whack. There are a few ways to make sure your horizon squares up right:
- Grid Overlay
On most DSLRs (and some compact cameras), you can overlay a grid on either your viewfinder, your live view screen, or both. Align your horizon with one of these lines. - Electronic Horizon
Newer, higher-end cameras often have a built-in electronic level. When turned on, it will gauge the camera’s position in space and tell you when it is evenly aligned. - Bubble Levels
Some cameras have a bubble level attached and some tripods will have one as well. If you don’t have one built into your gear, you can purchase one that affixes onto the camera’s hot shoe. Just like a spirit level in construction, this will help you straighten your camera out. - Post-Processing
If all else fails, every major photo editing software will feature a “straighten” tool which allows you to draw a line tracing the horizon. Using this, the program will automatically crop the image on an angle to make sure that the line is perfectly horizontal.
2. Eye-level Perspective
Most people photograph from an eye-level standing position producing photos that look as you would expect to see things if you were there. For a more interesting composition, try climbing on top of something, or getting close to the ground to achieve a different point of view.
3. Empty Skies
Without clouds, birds, or some other interesting feature, empty skies can turn out pretty flat and boring in a photo. Try to compose your picture with something interesting in the sky. If there is nothing interesting to show, raise your horizon line to the top third of the image to minimize how much space the sky occupies in the frame.

4. Hand Shake Blur
A blurry photograph loses almost all of its impact. Either use a tripod or use a fast shutter speed combined with image stabilization.
When it comes to landscapes, securing your camera onto a sturdy tripod will always yield better results. Even if you’re using short exposures, a tripod will allow you to compose your shot more precisely and lock its position into place while you shoot.
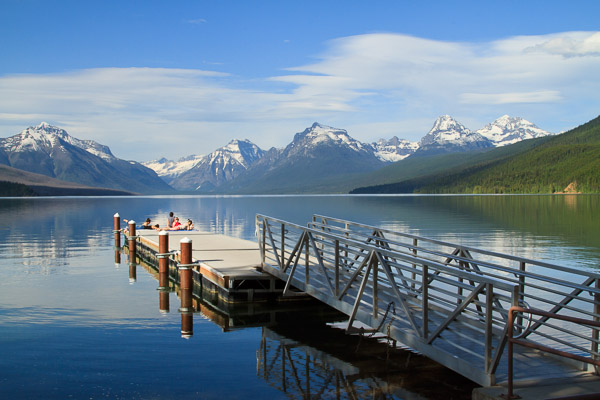
5. No Focal Point
Skies and mountains are lovely, but a picture can’t be all background. Your photo needs a focal point to hold the viewer’s interest. This can be anything – an interesting tree, a boat, a pier, a log – but no landscape photo is complete without a main subject.

6. Cluttered Backgrounds
The opposite also applies – be careful not to focus too much on the subject and forget about how the background comes together. Pay attention to what is behind your main subject. If the background elements don’t add to the composition remove them if possible. Be careful that you have separation between each element, and don’t let them visually blend together (ie. two or more trees merging into a greenish blob). This is especially problematic when the objects are backlit or silhouetted.
7. Poor Lighting
When you rely on the sun to light your shots, you’ll find that some days the weather just doesn’t cooperate. Grey, cloudy days will give you muted, washed-out colours and not much in the way of shadows or contrast. Extremely sunny days might do just the opposite. Carefully consider the lighting conditions on your scene before you decide how to approach it.
- If the sun is out, position it to one side of the camera to take advantage of the shadows and textures created by sidelight.
- If the sun is in front of the lens, your scene will be backlit and you can make some dramatic silhouettes.
- If the sun is behind you photographing the scene will be more difficult because the direct light will make the scene appear flat. Consider changing direction.
- If there is no sun and the sky is white, use the soft lighting conditions to make close-ups.

8. Underexposing
If the sky is overly bright (say, in the middle of the day), it can confuse the camera’s light meter, which will try to compensate by underexposing the rest of the image, resulting in a dark foreground. If this happens, use the exposure compensation to turn up the brightness, but not so much that the sky becomes blown out (turns white).
If you’re having this problem, try re-composing your image to include a darker area of the sky. This type of scene is a good time to use a graduated neutral density filter. These filters are dark on the top and clear on the bottom. You place it in front of your lens to darken the top half of the image and even out the exposure.
9. Hot Spots and Blown Out Highlights
It’s not just the sky that can blow out, though – a hot sun can cause glare on many surfaces. Watch your scene for bright spots caused by reflections or excess sunlight. Most cameras have a “highlight warning” viewing mode on the image preview which will show any pixels that have turned pure white. If you have blown out highlights, use the exposure compensation to reduce the exposure slightly until they are gone.
10. Lack of Dimension
Even though a photo is a two-dimensional image, a strong landscape composition gives the illusion of depth. When you’re setting up your shot, make sure to populate the frame in the foreground, mid-ground, and background.
When you are learning photography it can be hard to critique your own work and understand how to improve. After your next photo shoot, examine your images for these problems so you can avoid them next time. Looking at each of your images with a critical eye and considering how they could be improved will quickly improve your artistic eye and make you a better photographer.
The post 10 Most Common Mistakes in Landscape Photography – and How to Overcome Them by Anne McKinnell appeared first on Digital Photography School.
You must be logged in to post a comment.